

Introduction: Why DIY BFF Crafts Are Special
Crafting with your best friend isn’t just an enjoyable way to spend time; it’s an opportunity to create lasting memories and meaningful symbols of your friendship. DIY projects shine in their ability to personalize experiences, allowing you to express your unique bond while having tons of fun. Let’s explore the benefits of DIY projects and the importance of crafting together, making these activities even more special for you and your BFF!
Benefits of DIY Projects
DIY projects encompass a wide range of creative activities that can enhance your friendship in numerous ways. Here are some standout benefits of engaging in DIY crafts:
- Creativity Boost: When you embark on DIY projects, you unleash your creativity! Whether it’s making colorful friendship bracelets or designing a custom tote bag, you tap into your artistic side. This not only nurtures your imagination but also encourages your friend to bring their ideas to life.
- Skill Development: Trying out new crafts helps you acquire various skills. From hand sewing to painting, you both get to learn and improve techniques that may surprise you! For instance, while working on polymer clay designs, I found that both of us became better not just at crafting but also at planning our projects.
- Stress Relief: Engaging in hands-on activities is a fantastic way to relieve stress. As you immerse yourselves in crafting, not only does it serve as a creative outlet, but it also stimulates the production of dopamine, leaving you both feeling happier and more relaxed.
- Meaningful Keepsakes: The products of your creativity become treasured keepsakes. When you make something special with your BFF, each piece carries a memory. Years later, looking back at those friendship bracelets will spark laughter and joy.
- Strengthened Connection: DIY projects foster communication and patience. You might not always agree on colors or designs, but working through creative differences strengthens your bond as you collaborate on something special together.
Importance of Crafting Together
The beauty of doing DIY projects with your best friend lies in the experience of crafting together. Here’s why working side by side is invaluable:
- Shared Memories: Each crafting session becomes a cherished memory. For instance, I can recall a particularly hilarious day spent tie-dyeing t-shirts when we accidentally spilled dye everywhere! Each time I wear that shirt, I smile at the fun we had together.
- Encouragement and Support: It’s essential to have a cheerleader! When tackling new projects, having your BFF there to encourage you makes it all the more enjoyable. Whenever I struggled with wire wrapping for a necklace, my friend would remind me, “You’ve got this!” Just the motivation I needed to keep going!
- Experimentation and Exploration: Crafting together allows you to inspire each other to try new things. You might discover your newfound love for embroidery when your friend introduces you to it, or perhaps they’ll find joy in screen printing after seeing your designs. Exploring different crafts broadens your creative horizons.
- Quality Time: In today’s fast-paced world, finding quality time can be challenging. Opting for fun DIY projects allows you both to bond while creating something meaningful. Consider setting up a regular “art night”—a weekly or monthly gathering dedicated to crafting. It creates a beautiful routine that strengthens your friendship.
- Personal Growth: Through collaboration, both of you learn about teamwork and compromise. These skills not only apply to crafting but also to life. Navigating through creative endeavors brings you closer and enhances your relationship, opening the door to even deeper discussions and connections.
Incorporating all these elements makes DIY projects with your best friend truly special. The shared experiences, the memories created, and the skills developed form a solid foundation for a lasting friendship. Whether you’re beading, painting, or winding wires, every moment spent creating together is an investment in your bond. Ready to get those crafting tools out? Let’s dive into some specific DIY projects you can take on together!
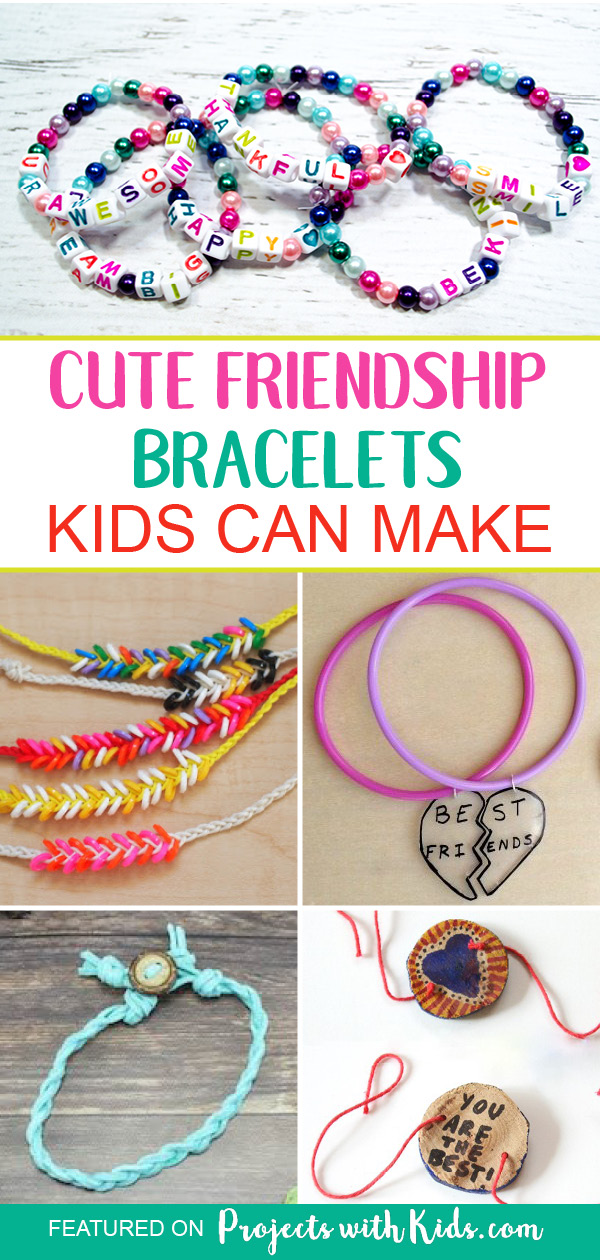
Personalized Friendship Bracelets
Now that you know how special DIY crafting can be, let’s dive into one of the most popular and heartfelt projects you can take on with your best friend: personalized friendship bracelets! These pieces not only serve as decorative accessories but also embody your bond and shared memories. There are many creative ways to design these bracelets. Two standout options are beaded bracelets and embroidered friendship bands.
Beaded Bracelets
Beaded bracelets are one of the simplest yet most versatile DIY projects. They allow you to express your creativity while crafting something that truly represents your friendship. Here’s why beaded bracelets are fantastic:
- Customizability: One of the best parts of making beaded bracelets is the sheer variety of beads available. From glass to wooden, plastic to gemstones, the options are endless! You can choose colors that reflect each other’s personalities or even incorporate symbols significant to your friendship (like a charm for travel if you both love adventuring together).
- Simple Techniques: Even if you’re a beginner, creating beaded bracelets is relatively straightforward. You just need a few materials:
- Beads of your choice
- Elastic string or beading wire
- Scissors
- Optional: A clasp for added security
Here’s a simple step-by-step guide on how to make your beaded bracelet:
- Choose Your Beads: Select a color palette or theme.
- Cut the String: Measure out enough elastic string or wire to fit your wrist comfortably.
- String the Beads: Start threading the beads onto the string, alternating colors, sizes, or patterns as desired.
- Tie Off or Attach Clasp: Once you’ve reached your desired length, tie a secure knot if using elastic, or attach a clasp for a more polished finish.
- Show Off Your Creation: Wear your bracelet and admire your handiwork together!
One memorable experience I had with beaded bracelet-making was a rainy day inside during a sleepover. We surrounded ourselves with all sorts of beads and just let our creativity flow. Each bracelet we made told a story, and it was delightful to share those stories with each other.
Embroidered Friendship Bands
Another incredible way to create a meaningful friendship bracelet is by making embroidered friendship bands. This crafty option adds a personal touch that can transform a simple bracelet into a work of art. Here’s what to know about embroidering friendship bands:
- Materials Needed: To create your own embroidered bands, gather:
- Fabric strips (canvas or cotton work well)
- Embroidery thread in various colors
- A needle
- Scissors
- Optional: Embroidery hoop for better tension
- Design Your Pattern: Before diving in, brainstorm what you would like your bands to say or represent. This might include initials, favorite quotes, or simple motifs like hearts or stars.
Here’s how to create your embroidered friendship bands:
- Cut the Fabric Strips: Depending on your wrist size, cut long strips of fabric—typically about one inch wide and long enough to wrap around your wrist.
- Choose Your Thread Colors: Pick two or three colors for your embroidery thread to create contrast.
- Start Embroidering: Use simple stitches like backstitch or satin stitch to write letters or create designs on the fabric strip. If you’re new to embroidery, there are countless online tutorials you can follow!
- Finish Off: Once you’ve embroidered your design, tie off the thread securely and make sure the ends are finished for a polished look.
- Wear and Share: Wrap the band around your wrist and secure it with a knot or a simple slipknot for easy removal.
One of my fondest memories comes from a summer camping trip when my best friend and I sat by the campfire, making embroidered friendship bands. While we stitched, we shared stories and laughter, and the quiet nights made the experience even more special. Both beaded bracelets and embroidered friendship bands serve as beautiful reminders of your connection and the time you spent creating together. The next time you find yourself wanting to craft something memorable, consider these options. Not only will you end up with lovely accessories, but you’ll also weave even more cherished memories into your friendship!

Memory Book Creation
Continuing our creative journey, let’s explore another fantastic way to celebrate your friendship: memory book creation! Capturing moments and milestones in a tangible format allows you to reflect on your journey together while adding a personal touch that makes each memory even more special. Two popular formats for memory books are scrapbooks and mini photo albums, and each offers unique opportunities for creativity and storytelling.
Scrapbook Ideas
Scrapbooking isn’t just about sticking pictures onto a page; it’s an art form that brings your shared experiences to life. Here are some exciting ideas to get started on your scrapbook project:
- Theme Your Scrapbook: Pick a theme that resonates with your friendship. Whether it’s a specific year spent together, a favorite vacation, or your adventures in a particular hobby, a thematic approach can help guide your layout and decorations.
- Capture the Moments: Gather memorabilia that reflects your friendship. This might include:
- Ticket stubs from concerts or movies
- Postcards from travels
- Handwritten notes or letters
- Doodles or sketches, if you both enjoy drawing
- Creative Layouts: Play with layouts! Here are some layout ideas to inspire you:
- Chronological Order: Arrange your memories in a timeline format, highlighting significant moments over the years.
- Collages: Create visually engaging pages featuring clustered photos and decorations that tell stories in each section.
- Quote Pages: Include your favorite quotes or inside jokes, sprinkling them throughout the scrapbook for an extra touch of nostalgia.
- Decorative Elements: Use stickers, washi tape, and colored markers to embellish your pages. Personalize them to reflect your styles, such as pastel colors for one or vibrant patterns for the other.
I recall one summer when my friend and I dedicated an afternoon to scrapbooking our recent road trip. Digging through the piles of pictures, we laughed at silly poses and relived unforgettable moments, turning those memories into a beautiful keepsake that remains on my coffee table as a reminder of our adventure.
Mini Photo Album Designs
If you prefer a simpler yet equally personal approach, consider creating a mini photo album! These compact creations still pack a punch when it comes to nostalgia. Here’s how to craft your own mini photo album:
- Choose the Right Size: Decide on the size of your album. It could range from a wallet-sized book to a larger design that fits more photos. Mini albums that fit in your hand are great for quick sharing.
- Organize Your Photos: Before assembling your album, sort your favorite photos into categories. You might want to group them by events, themes, or periods of your friendship.
- Design the Cover: The cover is the first thing people see, so make it special! Use a sturdy cardstock or get creative with materials like fabric or wood. Personalize your cover with:
- Titles like “Our Friendship” or “Memories in the Making”
- A favorite photo of you both
- Decorative elements like stickers or hand-drawn designs
- Limitless Layouts: Mini albums give you the flexibility to play around with layouts—no rules apply! Try:
- Flip Pages: Create interactive pages that open to reveal hidden notes or extra photos.
- Pocket Pages: Use small envelopes or pockets to store memorabilia alongside photos.
- Thematic Sections: Dedicate sections to specific events, like vacations or birthdays, so that your album becomes a glimpse into the chapters of your friendship.
- Add Personal Touches: Write little messages or memories near relevant photos. It’s a chance to express your thoughts or recount inside jokes, making each page more meaningful.
One of my favorite mini album experiences was putting together a book for my friend’s birthday. I included photos from our best moments and wrote little annotations for each one, capturing the essence of our adventures together. The surprise on her face when she opened it was priceless! Creating a memory book with your BFF is not only a fun activity but also a beautiful way to solidify your friendship. Scrapbooks and mini photo albums both carry unique charm and allow you to relive your shared moments. Dive into this project and discover how you can turn everyday experiences into memory treasures!
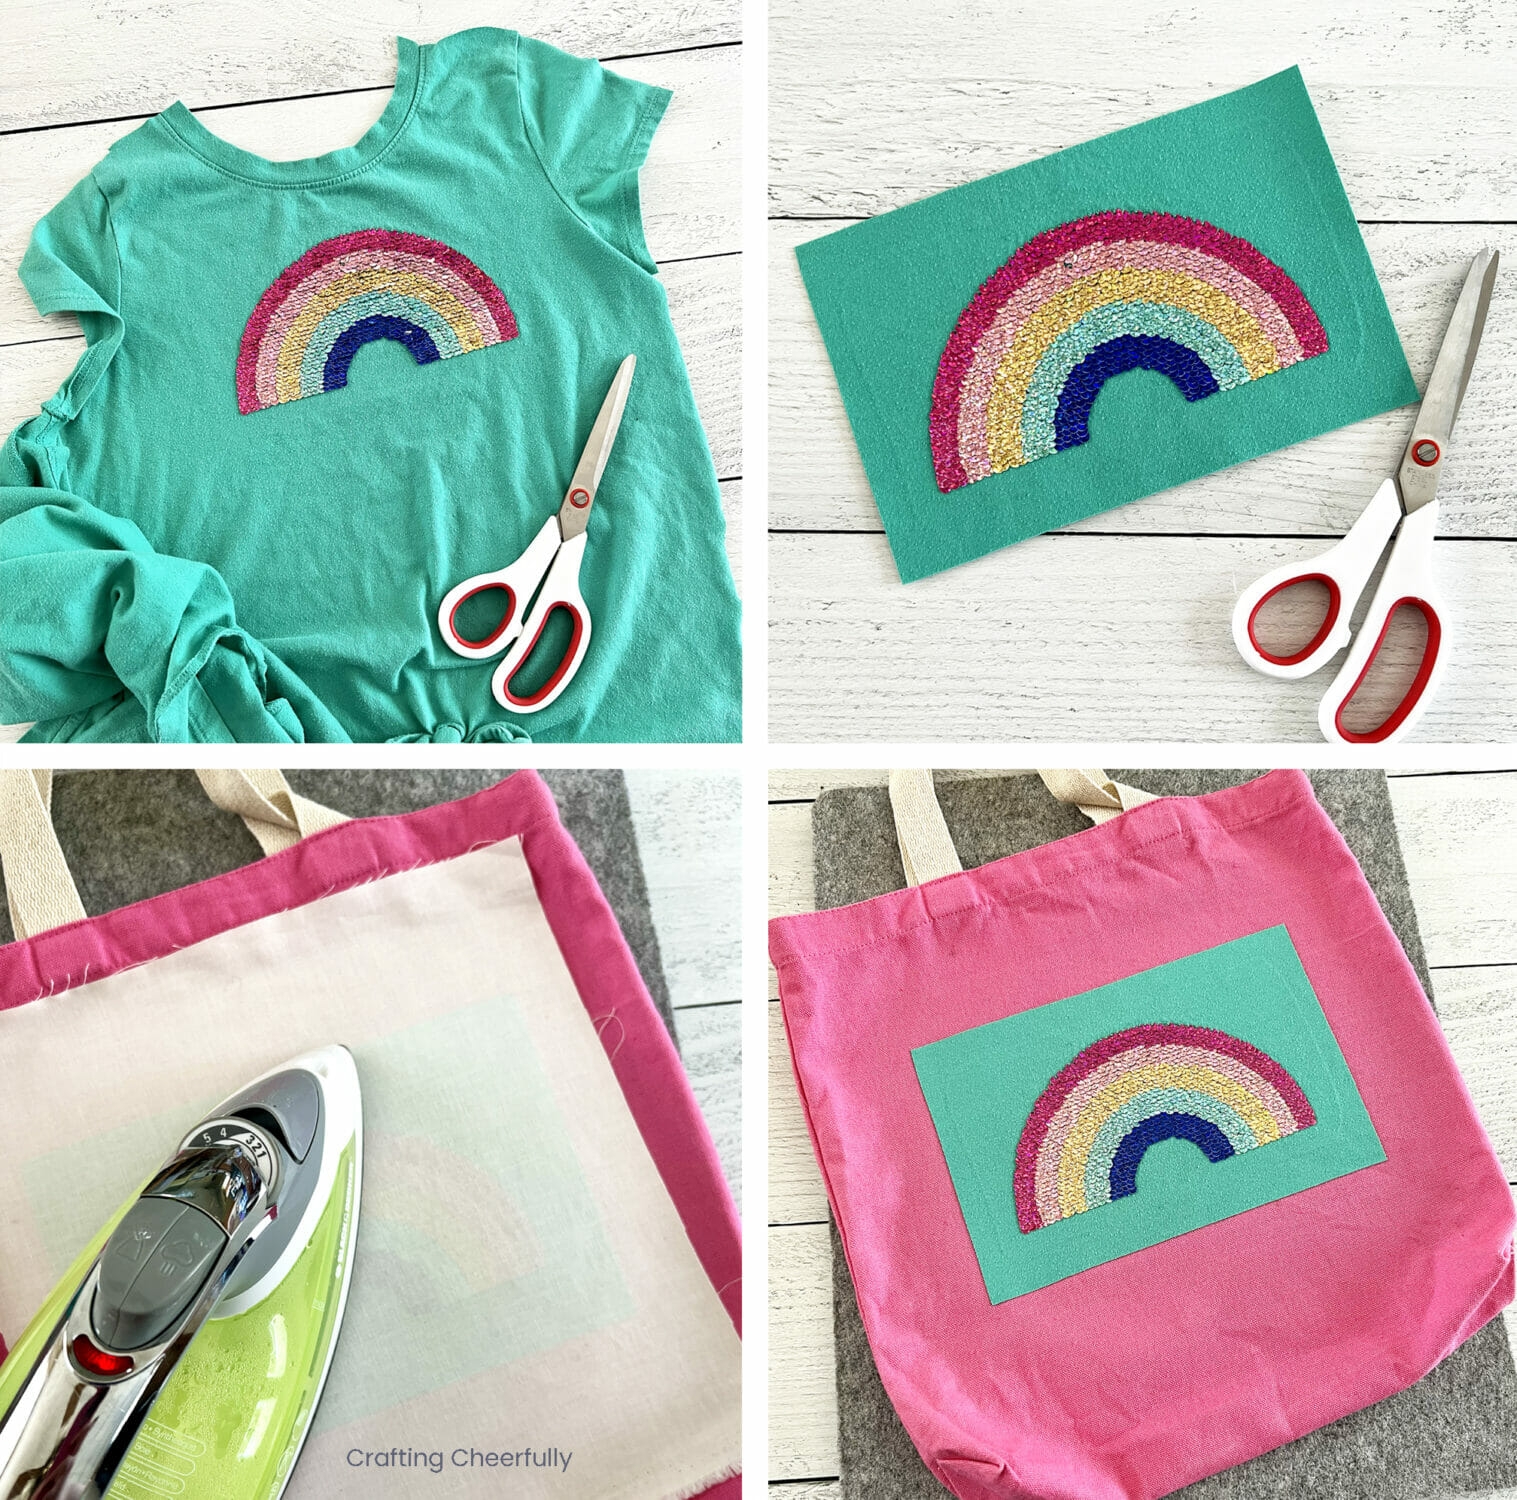
Customized T-Shirt & Tote Bag Designs
As you continue to celebrate and capture your friendship, customizing your own t-shirts and tote bags can be an incredibly fun way to showcase your unique bond! Designing these items together allows you to wear your memories and creativity with pride. Let’s dive into two exciting techniques: screen printing and tie-dye. Both methods bring out your artistic flair while ensuring you end up with something special that represents your friendship.
Screen Printing Techniques
Screen printing is a popular method for creating custom designs on fabric. It’s a little more meticulous but offers fantastic results, especially if you want to replicate the same design multiple times. Here’s how you can get started:
- Gather Your Materials: For this project, you’ll need:
- T-shirts or tote bags in your desired colors
- Screen printing ink (fabric-friendly)
- A screen printing frame with mesh (or a DIY approach if you’re feeling crafty)
- A squeegee (for applying ink)
- Stencils (you can create your own or print them out)
- Choosing Your Design: This is where the fun begins! Brainstorm designs that resonate with your friendship. It could be:
- A shared quote that reminds you of each other
- A simple image or symbol that represents an inside joke
- Artwork or doodles you’ve both created
- Prepare the Stencil: If you’re creating your own stencil, make sure it’s sturdy enough to hold the ink. You can use materials like cardstock or transparency sheets. Don’t forget to secure it properly on the screen to avoid any smudging!
- Print Away!: Here’s how to bring your design to life:
- Place your t-shirt or tote bag flat on a clean surface.
- Position the screen frame over the fabric.
- Pour a line of ink at the top of the stencil.
- Use the squeegee to pull the ink down the screen, evenly distributing it over the stencil.
- Carefully lift the screen and let the ink dry!
One of my favorite memories involves a screen printing session I had with my best friend. We decided to create matching shirts for a music festival we were attending. As we pulled each shirt from the table, the anticipation of seeing the final product boosted our excitement, and we squealed with delight at how they turned out!
Tie-Dye Creations
If you’re looking for something a bit messier yet delightfully colorful, tie-dye is the way to go! This technique harnesses vibrant colors and unique patterns to turn your ordinary fabrics into stunning wearable art. Here’s how to dive into the wonderful world of tie-dye:
- Prepare Your Materials: You will need:
- White or light-colored t-shirts and tote bags
- Tie-dye kits or fabric dyes (in various colors)
- Rubber bands or string for binding
- Plastic gloves
- Plastic squeeze bottles or spray bottles for dye application
- Plastic table cover (to protect your workspace)
- Choosing Your Tie-Dye Patterns: There are countless tie-dye techniques to explore. Here are a few popular patterns:
- Spiral Pattern: Pinch the center of your fabric and twist it in a circular motion, securing with rubber bands to separate sections.
- Classic Fold and Bind: Fold your fabric in half and then zigzag it. Secure sections with rubber bands for a stripe effect.
- Bullseye Pattern: Pinch the fabric and pull it upward, securing rubber bands evenly spaced along the length of the fabric.
- Diving into the Dye: Now for the fun part! Follow these steps:
- Put on your gloves and prepare your dye according to the instructions.
- Apply the dye using squeeze bottles or spray bottles, ensuring you cover the sections you want colored.
- After dyeing, leave your items wrapped in plastic for several hours to allow the colors to set.
- Rinse and Reveal: After the dyeing time has passed, rinse your items under cold water until the water runs clear. Then, hang them to dry and reveal your artistic masterpieces.
I’ll never forget the excitement of creating tie-dye shirts with my friend during a summer afternoon. We threw on our old clothes, went wild with colors, and ended up with the craziest, most outlandish designs! Each shirt captured our carefree spirit and bond, and wearing them always reminds me of that brilliantly chaotic day. Customizing t-shirts and tote bags through screen printing and tie-dye not only showcases your style but also strengthens your friendship as you create something unique together. These projects embody your shared creativity and can become cherished items in your wardrobe. So grab those supplies, let your imaginations run wild, and make something that represents the beauty of your friendship!

Friendship Necklaces & Keychains
As you continue your crafting journey, let’s dive into the delightful world of friendship necklaces and keychains! These accessories are perfect for keeping your friendship close, allowing you to carry a piece of each other wherever you go. Today, we’ll explore two fun crafting methods: wire wrapping techniques and polymer clay designs. Get ready to create pieces that are not just beautiful, but also filled with meaning!
Wire Wrapping Techniques
Wire wrapping is an incredible technique that involves bending and shaping metal wire to create stunning jewelry pieces. It’s perfect for crafting necklaces or keychains that reflect your friendship. Here’s how you can get started:
- Gather Your Materials: You’ll need:
- Craft wire (copper or aluminum is great for beginners)
- Wire cutters
- Round-nose pliers
- Flat-nose pliers
- Beads or stones for embellishment
- Jump rings and clasps (for necklaces)
- Choosing Your Design: Think about what you want your necklace or keychain to represent. Are there specific colors or symbols that resonate with your friendship? Here are some ideas:
- Wire-wrapped initials
- Heart shapes to signify your bond
- Simple designs incorporating cherished gemstones
- Getting Started: Begin by cutting a piece of wire to your desired length. Here’s a basic step-by-step to start wire wrapping:
- Create a Loop: Use your round-nose pliers to make a small loop at one end of the wire.
- Add Beads: Thread your beads onto the wire to create the focal point of your design.
- Wrap the Wire: Use the pliers to wrap the wire around the beaded section multiple times for a secure hold. This also adds a decorative touch!
- Finish the Piece: Complete your wire wrapping by creating another loop at the opposite end or directly attaching a jump ring for the necklace.
I remember when my friend and I discovered wire wrapping while browsing a craft store. We spent an entire afternoon experimenting with different designs, creating one-of-a-kind necklaces that not only showcased our styles but also became symbols of our friendship. Those necklaces have since become cherished keepsakes!
Polymer Clay Designs
Another fabulous method for creating friendship necklaces and keychains is using polymer clay. This versatile medium allows you to mold and shape unique designs that truly tell your friendship story. Here’s how to get started:
- Gather Your Materials: You’ll need:
- Polymer clay in various colors
- Clay tools (like rollers and cutting shapes)
- An oven (for hardening the clay)
- Jump rings (for necklaces or keychain attachments)
- Optional: Acrylic paint or sealants for finishing touches
- Choosing Your Design: The wonderful thing about polymer clay is that you can create almost anything! Here are some design ideas to inspire you:
- Matching charms (like mini cupcakes or animals)
- Personalized beads featuring initials or symbols
- Colorful abstract shapes that can be made into pendants
- Creating Your Designs: Here’s a simple process to guide you:
- Knead the Clay: Start by kneading your polymer clay until it’s soft and pliable.
- Shape Your Pieces: Roll, mold, and design your charms or beads. Use cookie cutters or your hands to shape them into desired forms.
- Add Holes: Don’t forget to poke holes at the top for jump rings or keychain attachments before baking!
- Bake: Follow the instructions on your clay package to cure your pieces in the oven.
- Finish Your Pieces: Once cooled, you can paint or add decorative touches. Attach jump rings to complete your necklaces or keychains.
One unforgettable day, my friend and I held a polymer clay crafting night, transforming our kitchen into a mini art studio. The laughter, creativity, and endless colors around us made for an incredibly bonding experience. Each piece we made symbolized something unique about our friendship. Creating friendship necklaces and keychains through wire wrapping and polymer clay is a great way to celebrate your bond while having fun! These projects require a pinch of creativity, a splash of joy, and a whole lot of love. So gather your materials, dive into these crafting techniques, and create pieces that tell your friendship story in the most beautiful way possible!
Friendship Planters & Terrariums
Continuing your creative adventures, let’s explore the enchanting world of friendship planters and terrariums! These living decorations not only enhance your spaces but also symbolize growth and nurturing—much like your friendship. By designing planters and miniature gardens together, you create a lasting representation of your bond. Let’s delve into some delightful ideas to bring nature indoors with succulent potting and miniature garden DIYs.
Succulent Potting Ideas
Succulents are not only trendy and visually appealing, but they’re also incredibly easy to care for, making them the perfect choice for friendship planters. Here’s how you can get started with potting succulents:
- Choose Your Containers: The first step is selecting the right pots for your succulents. Consider unique container options such as:
- Ceramic pots with fun designs
- Mason jars or glass containers for an aesthetic touch
- Wooden crates for a rustic vibe
- Pick Your Succulents: Explore local nurseries or garden centers to find a variety of succulents. Here are some popular options:
- Echeveria: These rosette-shaped succulents come in various colors and are ideal for beginners.
- Aloe Vera: Not only are they pretty, but they also have medicinal properties!
- Jade Plant: A symbol of friendship and good luck, making it perfect for this project.
- Assemble Your Succulent Planters: Once you have your containers and plants, it’s time to pot your succulents! Follow these simple steps:
- Add Drainage Material: Place pebbles or stones at the bottom of the container to ensure proper drainage and prevent overwatering.
- Soil Layer: Fill the pot with cactus soil or a well-draining potting mix, leaving space for the succulent.
- Planting: Carefully remove your succulent from its nursery pot and plant it into the soil, patting it down gently.
- Decorate: You can add decorative pebbles, sand, or small figurines around your succulents for a personal touch.
I fondly recall a sunny afternoon spent potting succulents with my best friend. We took our time arranging the plants, giggling as we made adjustments to find the perfect look for each planter. Those succulents now sit proudly on our windowsills, reminding us of the fun we had together!
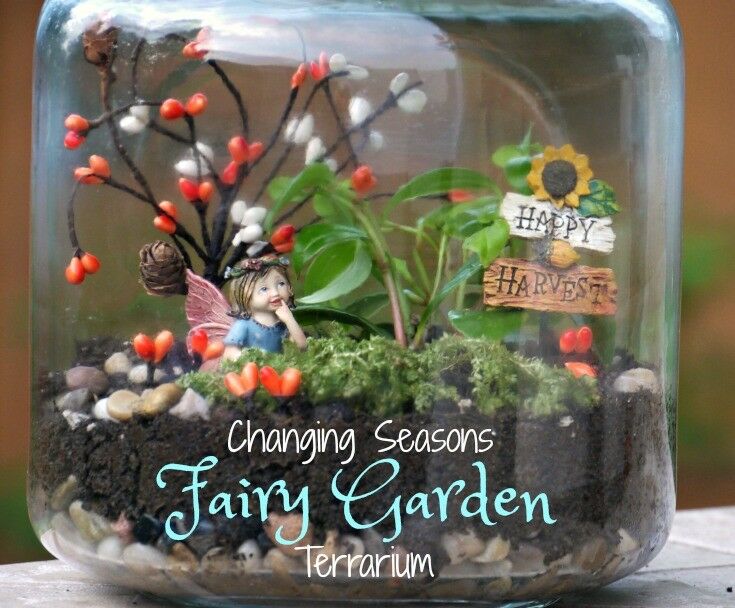
Miniature Garden DIYs
If you’re feeling a bit more adventurous, creating miniature gardens can be a wonderful way to express your creativity! Miniature gardens allow you to craft an entire world in a small space, reflecting your friendship through imaginative designs. Here’s how to get started:
- Choose Your Base: Decide on the size and style of your miniature garden. Some popular options include:
- Shallow containers or bowls for a zen garden look
- Old birdcages or wooden crates for a whimsical touch
- Terrariums for an enclosed, self-sustaining design
- Select Your Plants: Just like with succulents, choose plants that are compatible with miniature gardens:
- Different varieties of moss for a lush, green base
- Miniature ferns or peace lilies for added texture
- Small flowering plants, such as pansies or daisies, to bring color
- Gather Your Accessories: Creating a miniature garden is all about the details! Consider adding:
- Tiny figurines (like fairies or animals)
- Decorative stones or crystals
- Small pathways made from pebbles or wood slices
- Design Your Garden: This is where your creativity shines! Follow these steps:
- Layer the Base: Start by adding a layer of moss or potting soil to your container.
- Arrange the Plants: Position your chosen plants, considering their height and color contrast. Space them out evenly for a balanced look.
- Add Accessories: Place your miniature accessories around the garden, arranging them in a way that tells a story or reflects your friendship’s uniqueness.
I remember a delightful evening spent with my friend creating miniature gardens. We found tiny frog figurines and little bridge decorations, filling our gardens with whimsical charm. As we worked together, it turned into a relaxing yet meaningful experience, reflecting the laughter and joy we share. Designing friendship planters and terrariums provides not just a creative outlet but also a nurturing project that symbolizes growth and care. Each planter or miniature garden captures memories and stories that you’ll cherish for years to come. So gather your materials, let your creativity flow, and craft these beautiful living expressions of your friendship! 🌱✨

Friendship Magic Potion Bottles
Continuing our exploration of fun and meaningful DIY projects, let’s dive into the whimsical world of friendship magic potion bottles! These enchanting creations are perfect for capturing the essence of your unique bond and sprinkling a little magic into your lives. With colorful decorative bottles and secret message scrolls, you and your best friend can create unforgettable keepsakes that ignite your imaginations. Let’s delve into some creative ideas to get started!
Decorative Bottle Ideas
The first step in your potion bottle journey is selecting the perfect bottles and transforming them into magical treasures. Here are some decorative ideas to inspire your creativity:
- Choose Your Bottles: Start by gathering different types of containers. Consider:
- Glass jars with cork stoppers for a classic look
- Small vials or ampoules for an authentic potion feel
- Decorative bottles from thrift stores or craft outlets
- Color Your Potions: Use colorful liquids to fill your bottles. You can create magical effects by mixing various elements:
- Glitter Water: Combine water with food coloring and fine glitter for a sparkling potion effect.
- Layered Drinks: Use liquids of different densities, such as oil and water, to create beautiful layered potions.
- Essence of Friendship: Consider using essential oils or herbal infused waters to capture a refreshing scent, representing your friendship’s essence.
- Add Magical Touches: Elevate your potion bottles with decorative elements. Here are some fabulous ideas:
- Labels: Create whimsical labels with names like “Friendship Elixir,” “Joyful Potion,” or “Courage Brew.” Use craft paper for an aged look.
- Embellishments: Tie twine or ribbons around the neck of the bottle, and add charms or small trinkets that have special meaning for you both.
- Light Up: Consider adding fairy lights inside the bottle to create a magical glow whenever you display them.
I’ll never forget a fun weekend I spent crafting potion bottles with my best friend. We collected a bunch of little glass jars and spent hours experimenting with colors and labels. Our spirits soared as we infused each bottle with memories and laughter—each jar became a tiny treasure brimming with magic!
Secret Message Scrolls
Now comes the exciting part—creating secret message scrolls to accompany your magical potion bottles! These scrolls allow you to express heartfelt words and share meaningful memories. Here’s how to create them:
- Gather Your Materials: You’ll need:
- Parchment paper or rolled paper to create the scrolls
- String, twine, or ribbon to tie the scrolls together
- Optional: Wax seal for an authentic touch or decorative stickers
- Writing Your Messages: Think about the essence of your friendship, and let your creativity flow onto the parchment. Here are some message ideas:
- Inspirational Quotes: Write down favorite quotes that uplift both of you.
- Inside Jokes: A funny memory or quote that only the two of you would understand.
- Heartfelt Notes: Share what you appreciate about your friendship or dream together for the future.
- Rolling and Sealing: Before you place your scrolls in the potion bottles, make them look extra magical:
- Roll the Paper: Tightly roll the parchment, keeping your message securely tucked inside.
- Tie It Off: Use string or ribbons to tie your scroll, adding a little flair.
- Seal with Wax: If you’re feeling fancy, melt some wax and let it drip onto the knot, creating a beautiful seal.
One of my favorite memories involved writing secret scrolls alongside my friend. We spent a cozy evening, reminiscing about our adventures while crafting clever messages. After sealing our scrolls, we placed them in our potion bottles. Each time we opened them, it was a delightful surprise to rediscover those heartfelt notes! Creating friendship magic potion bottles and secret message scrolls is not only a whimsical project but also a fantastic way to express your unique bond. These enchanting creations chronicle your adventures and feelings while adding a dash of magic to your friendship. So, gather your materials, let your imaginations soar, and craft these enchanting keepsakes that will always remind you of your special connection! 🌟🍃✨

Friendship Collage Wall Art
As you wrap up your remarkable crafting odyssey, let’s explore the beautiful world of friendship collage wall art! This creative project encapsulates your cherished memories and showcases the uniqueness of your bond. Collages can be personalized in numerous ways, and they’re a great conversation starter in any space. Let’s dive into two engaging methods: experimenting with mixed media techniques and designing inspirational quote art. Both options are perfect for celebrating your friendship while adding a splash of color and personality to your walls!
Mixed Media Techniques
Mixed media art is a fantastic way to blend various materials and textures, giving your collage a captivating depth. Here’s how you can get started with mixed media techniques:
- Gather Your Materials: This is where the fun begins! Here are some items you might want to collect:
- Magazines or printed photos for cutouts
- Decorative paper, fabric, or wallpaper remnants
- Paints, markers, or watercolor for additional elements
- Embellishments like buttons, ribbons, or beads
- Adhesives such as glue sticks, mod podge, or double-sided tape
- A base for your collage (canvas, poster board, or wood panel)
- Decide on a Theme: Think about what represents your friendship. You might want to focus on:
- Special memories you’ve shared
- Your favorite places or activities together
- Themes like “Adventure,” “Laughter,” or “Support”
- Create Your Layout: Before gluing anything down, lay out your materials to see how they flow together. Consider these tips:
- Use some larger pieces as a background and layer smaller images or textures on top.
- Mix different shapes and sizes to create visual interest.
- Don’t be afraid to overlap pieces—this can add an organic feel.
- Assemble Your Collage: Once you have a plan, start sticking things down! Here’s how to make it pop:
- Begin by applying your background pieces using glue or mod podge.
- Layer cutouts and embellishments as you go, adding paint or markers to enhance the visual story.
- Don’t forget to seal it with a layer of mod podge, giving it a glossy finish!
Thinking back to a creative afternoon spent with my friend making a mixed media collage, we worked in a whirlwind of laughter and colorful papers. We cut out pictures that represented our dreams and pasted them together on canvas. That chaotic yet beautiful mess became a cherished piece that speaks to the heart of our friendship.
Inspirational Quote Designs
Another beautiful option for your friendship collage is to incorporate inspirational quotes that resonate with you both. Here’s how to design quote art that reflects your bond:
- Select Your Quotes: Choose phrases that inspire you or remind you of the joy in your friendship. Consider:
- Quotes from favorite books or movies you both love
- Personal mantras that signify your relationship
- Funny anecdotes or sayings that bring a smile
- Design Your Layout: Think about how to integrate your quotes into your collage:
- Use different fonts or handwriting styles for an added artistic touch.
- Create focal points for each quote and build surrounding elements that enhance it.
- Experiment with typography by using large letters for powerful statements, allowing them to stand out.
- Incorporate Visuals: To make your quote art more engaging, consider adding visuals:
- Surround quotes with related imagery—like photos of you both at memorable moments.
- Use colors that evoke certain emotions, matching them to the tone of your quotes.
- Create decorative borders or shapes that frame each quote beautifully.
- Finalize the Artwork: Once you’ve laid everything out, secure each piece on your collage base. Here’s how to make it cohesive:
- Use your adhesive to stick down quotes and images carefully.
- Add final touches using paints or markers for extra designs around the edges.
- Seal with a protective varnish if desired, ensuring your artwork lasts!
One of the most memorable projects I did involved creating a quote collage with my friend. We selected the quotes that empowered us and gave each other the responsibility to design portions independently. The final result was a breathtaking tribute to our friendship, literally hanging on my wall as a daily source of inspiration. Creating friendship collage wall art allows you both to express yourselves uniquely while celebrating your bond. Through mixed media techniques and inspiring quotes, your creations can become stunning representations of your journey together. So gather your materials, unleash your creativity, and craft beautiful artworks that illustrate the magic of your friendship for years to come! 🎨💕
