
Introduction to Crafting for Seniors
Crafting is more than just a hobby; it can be a gateway to maintaining mental and physical health for senior citizens. Engaging in various forms of crafting can significantly enhance quality of life by providing avenues for creativity, social interaction, and cognitive stimulation. Let’s explore the benefits and importance of crafting for seniors, inspiring you to embrace this fulfilling activity.
Benefits of Crafting for Senior Citizens
Crafting offers a multitude of benefits that can positively impact the wellbeing of seniors. Here are some key advantages:
- Cognitive Engagement: Crafts require focus, problem-solving, and following instructions. This mental challenge helps keep the brain active and may reduce the risk of cognitive decline.
- Fine Motor Skills Improvement: Activities like knitting, painting, and cutting paper can enhance dexterity and hand-eye coordination. This is especially beneficial as physical skills may diminish with age.
- Emotional Wellbeing: Crafting can be soothing, almost meditative. Engaging in a project allows seniors to express their emotions creatively, which can improve mood and decrease feelings of loneliness.
- Sense of Accomplishment: Completing a craft project gives a sense of achievement. A beautiful piece of art or functional craft can provide pride and boost self-esteem.
- Social Connections: Group crafting sessions provide an opportunity for socialization. Whether at a community center or a friend’s house, sharing craft ideas can enhance friendships and combat isolation.
For example, consider Mrs. Thompson, an 82-year-old who had been feeling lonely after losing her husband. When she started to attend weekly pottery classes, not only did her skills flourish, but she also formed friendships with fellow attendees that brought joy into her life.
Importance of Staying Engaged in Activities
Staying engaged in meaningful activities is crucial for seniors. It helps prevent feelings of boredom and stagnation, which can lead to depression. Here’s why participation matters:
- Healthy Routine: Crafts can fill the day with structure, offering something to look forward to, which can lead to a sense of purpose.
- Learning Opportunities: Through crafting, seniors can learn new skills or hobbies. Whether it’s mastering a new technique in painting or learning to sew, there’s always something new to explore.
- Lifelong Learning: Engaging in new activities fosters a mindset of lifelong learning, which is essential for mental vitality. This enthusiasm for learning can keep spirits high.
- Connection to the Past: Crafts can evoke memories—maybe a knitting project reminds someone of their grandmother, stirring feelings of nostalgia and joy.
Incorporating crafts into daily activities can lead to improved physical and mental health in seniors. By embracing these creative projects, you’re not just making something tangible; you’re also cultivating connections, both to others and to yourself. The beauty of crafting lies in its power to uplift and energize the spirit, inviting all seniors to tap into their creativity and explore the possibilities that await.

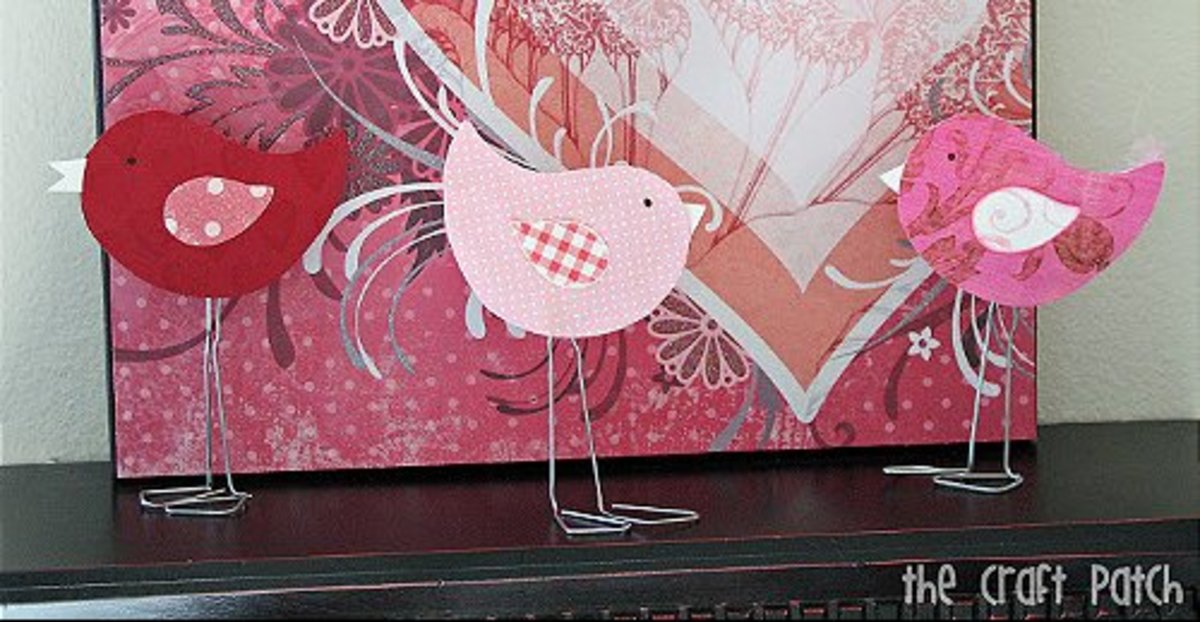
Paper Crafts for Seniors
Moving forward into the realm of paper crafts, seniors can discover an array of delightful activities that not only challenge their creativity but also sharpen their skills. Among these, origami creations and greeting card making stand out as two engaging and fulfilling options. Let’s delve into both of these wonderful crafts and how they can enrich your crafting experience.
Origami Creations
Origami, the Japanese art of paper folding, is a fantastic way to engage your mind and hands simultaneously. This craft involves transforming flat sheets of paper into intricate designs. Here’s why origami can be an excellent choice for seniors:
- Mental Stimulation: Following origami instructions can enhance cognitive abilities as it requires concentration and the ability to visualize the final product.
- Fine Motor Skills: The delicate folding motions involved in origami help improve dexterity and hand-eye coordination.
- Calming Activity: Many people find the repetitive motions of folding paper to be calming, almost like meditation.
To get started, consider these simple origami projects:
- Paper Cranes: A classic design that symbolizes peace and hope. They can be a beautiful decoration for your home or a meaningful gift for someone special.
- Origami Flowers: Creating paper flowers is a fun way to bring a touch of nature indoors. You can use colorful paper to match the decor of your home.
As you fold and create, don’t hesitate to share your creations with family and friends. I recall a delightful afternoon spent with my grandmother, who taught me to fold origami cranes. Not only did we share laughs, but we also reminisced about her past as we crafted together.
Greeting Card Making
Creating greeting cards is another fulfilling paper craft that allows you to express your creativity while crafting personalized messages for loved ones. This activity is especially rewarding when celebrating birthdays, holidays, or special occasions. Consider these benefits of greeting card making:
- Personal Touch: Handmade cards carry a heartfelt sentiment that store-bought cards sometimes lack. You can personalize each card to suit the recipient.
- Social Engagement: You might invite friends over for a card-making session, turning it into a fun and social craft day.
To get started with greeting card making, gather some basic supplies:
- Cardstock: Pick some vibrant colors or even patterned paper for a unique backdrop.
- Craft Supplies: Scissors, glue, markers, and decorative items like stickers or ribbons. These can add a personal touch and flair to your cards.
Here are some simple ideas for your greeting cards:
- Birthday Cards: Use cheerful colors and designs that reflect the personality of the birthday person.
- Thank You Cards: A simple card with a heartfelt message can brighten someone’s day and show appreciation.
Crafting greeting cards not only allows for creative expression but also strengthens connections with loved ones. Every card you create can serve as a small reminder of your thoughtfulness and affection. Embrace these paper crafts as a way to engage your mind, express love, and have fun in the process!
Fabric Crafts for Seniors
Transitioning from the world of paper to fabric opens up an exciting variety of creative possibilities! Fabric crafts not only allow seniors to explore their artistic side but also result in cozy, functional items they can use every day. Two enjoyable fabric crafts that stand out are no-sew fleece blankets and button art projects. Let’s dive into these crafty ventures, which are perfect for keeping both hands and minds active!
No-Sew Fleece Blankets
No-sew fleece blankets are an easy and rewarding project that anyone can tackle, regardless of their sewing experience. It involves utilizing soft fleece fabric to create warm and cozy blankets without needing a needle and thread. Here’s why this project is particularly appealing:
- Simple Techniques: This craft requires only basic cutting and knotting techniques, making it accessible for seniors.
- Personalized Gifts: Handmade fleece blankets make perfect gifts for family and friends. You can choose colors and patterns that reflect their style!
- Warm and Cozy: Once finished, you’ll have a wonderfully warm blanket to snuggle under while reading or watching TV.
To make a no-sew fleece blanket, follow these simple steps:
- Select Your Fabric: Choose two pieces of fleece fabric in complementary colors or patterns. Each piece should ideally measure 1.5 yards.
- Cut the Fringe: Lay the fabrics on top of each other, aligning them. Cut a rectangle out of each corner (about 5 inches), then cut 1-inch wide fringes along the edges, leaving a 5-inch uncut border.
- Knotting: Take one fringe piece from the top fabric and one from the bottom fabric. Tie them together in a knot. Repeat this until you’ve tied all fringes around the blanket.
Creating this cozy blanket can be a wonderful afternoon adventure. I remember my aunt hosting a crafting party where we all made these blankets, chatting and sipping tea as we knotted away. The laughter and warmth made the whole experience unforgettable!
Button Art Projects
Button art projects offer another fun and creative way to repurpose materials while expressing artistic flair. You don’t need to be an artist; this craft can bring out the creativity in everyone. Consider these benefits:
- Upcycling Materials: Button art is a great way to repurpose those spare buttons lying around the house, giving them new life.
- Room Decor: The completed pieces can serve as beautiful decorations for your home, or they can be thoughtful gifts for loved ones.
To get started with button art, gather these materials:
- Buttons: A variety of sizes, shapes, and colors make for more interesting designs.
- Canvas or Stretched Frame: This is your working surface where you will assemble the buttons.
- Glue: A strong craft glue will secure the buttons in place.
A simple project idea is to create a button tree. Here’s how:
- Outline the Shape: On the canvas, draw the outline of a tree with a marker or light pencil.
- Arrange Buttons: Before gluing, arrange the buttons within the tree shape, mixing colors and sizes for a textured look.
- Glue the Buttons: Once satisfied with the layout, start gluing the buttons onto the canvas.
Creating button art not only promotes creativity but also results in vibrant pieces that showcase your personality. I once worked on a button flower bouquet project with my neighbor. We shared stories while perfecting our designs; it became a cherished memory and a lovely centerpiece to boot. Experimenting with fabric crafts not only keeps your hands busy but also opens up opportunities for connection and creativity. These projects invite you to engage with your surroundings, celebrate your individuality, and express your artistic side, all while creating something beautiful and useful.
Nature-Inspired Crafts for Seniors
Exploring the beauty of nature can inspire a wealth of creative projects, especially for seniors looking to engage with the world around them. Nature-inspired crafts allow for a deep connection with the environment while producing lovely handmade items to enjoy or gift. Two delightful options are pressed flower creations and pine cone bird feeders. Let’s uncover these engaging activities that celebrate the beauty of nature!
Pressed Flower Creations
Pressed flower creations are a wonderful way to preserve the beauty of flowers and bring a taste of nature indoors. This craft is not only aesthetically pleasing but also allows for creativity and personalization. Here’s why you’ll love it:
- Simplicity: You don’t need advanced crafting skills to create beautiful pressed flower art. With just a few materials, anyone can join in!
- Therapeutic Process: Collecting flowers and arranging them can be a calming, meditative experience, perfect for unwinding.
- Unique Art: Each piece will be unique, reflecting the flowers you collect and the designs you create.
To start making pressed flower creations, you’ll need:
- Fresh Flowers: Choose flowers with vibrant colors and interesting shapes, remembering to pick them when they’re dry (a sunny day is perfect!).
- Heavy Books or a Flower Press: Use these to flatten your flowers. A flower press is great for serious crafters, but heavy books work just as well.
- Paper and Frame: For displaying your art, cardstock or watercolor paper are excellent choices, along with a frame to complete the look.
Here’s how to create your own pressed flower art:
- Collect Flowers: Gather flowers from your garden or a nearby park, ensuring they’re free of insects.
- Press the Flowers: Place the flowers between sheets of paper in a heavy book or flower press and let them sit for about two weeks.
- Create Your Artwork: Once pressed and dried, arrange your flowers on the cardstock as desired and glue them down.
- Frame It: Place your artwork in a frame to showcase your natural creation.
One sunny afternoon, I gathered blooms from my garden with my grandmother, who taught me the art of pressing flowers. We reminisced about her own garden as we arranged our pressed masterpieces, which now adorn my living room wall.
Pine Cone Bird Feeders
Pine cone bird feeders offer a delightful way to engage with wildlife while crafting something useful. This project connects seniors with nature, encourages outdoor activity, and supports local bird populations. Here’s why they’re worth trying:
- Fun for Everyone: Crafting bird feeders is simple and perfect for all ages, making it easy to include grandchildren or friends.
- Eco-Friendly: This project uses natural materials, promoting sustainability and environmental awareness.
- Encourages Observation: After creating your feeders, you’ll be delighted to observe the various birds that visit your yard.
To create your pine cone bird feeders, gather these materials:
- Pine Cones: Collect a few pine cones outside; they can often be found resting on the ground in your backyard or local park.
- Peanut Butter or Lard: These serve as a base to hold the birdseed.
- Birdseed: Choose a mix of seeds that attracts local birds.
- Twine or String: This will help hang the feeders from branches.
Here’s the step-by-step process:
- Prepare the Pine Cone: Start by tying a piece of twine around the top of the pine cone, creating a loop for hanging.
- Spread the Base: Use a butter knife to spread peanut butter or lard over the pine cone’s surface.
- Roll in Birdseed: Roll the coated pine cone in birdseed until it’s fully covered.
- Hang and Watch: Find a suitable branch or hook outside to hang your feeder and enjoy watching the birds come to visit!
The first time I made these feeders with my neighbor, we were delighted as birds flocked to our yard within hours! It sparked joy and laughter as we fumbled with the peanut butter but ultimately crafted something that contributed to nature. Nature-inspired crafts, like pressed flowers and pine cone bird feeders, offer opportunities to connect with the beauty around us while fostering creativity. These projects not only brighten your home but also encourage joy and relaxation. So, gather your materials and let the wonders of nature guide your crafting journey!
Recycled Material Crafts for Seniors
As we embrace our creative sides, let’s look at how we can transform everyday recycled materials into beautiful crafts! Recycled material crafts not only help reduce waste but also allow seniors to express their creativity in a fun and meaningful way. Two engaging projects you can try are upcycled bottle cap magnets and newspaper basket weaving. Let’s explore these eco-friendly crafts that are as enjoyable as they are sustainable!
Upcycled Bottle Cap Magnets
Upcycled bottle cap magnets are delightful little projects that can brighten up your refrigerator while promoting recycling. They require minimal supplies, making them perfect for busy crafting days! Here’s why you’ll love making these unique decorations:
- Creative Freedom: You can personalize each magnet with artworks, photos, or even collages, making them one-of-a-kind!
- Easy and Fun: This project doesn’t require advanced crafting skills, so anyone can join in on the fun.
- Great for Gifting: These magnets make excellent gifts for family and friends, showcasing your creativity without a significant investment of time or money.
To create your upcycled bottle cap magnets, gather these materials:
- Bottle Caps: Collect various caps from soda, beer, and juice bottles.
- Magnets: You can find adhesive magnet strips or small round magnets at craft stores.
- Decorative Supplies: Consider using washi tape, stickers, printed pictures, or even paints.
Here’s how to make your fun bottle cap magnets:
- Prepare the Caps: Make sure the bottle caps are clean and dry.
- Add Your Decoration: Inside each cap, apply your chosen design. This could be a small photo, a piece of decorative paper, or simply paint.
- Attach the Magnet: Once the decoration is secure, glue the adhesive magnet or small magnet piece to the back of each cap.
- Display Them: Stick your new creations on the fridge, a magnetic board, or any metallic surface.
I fondly remember spending an afternoon with my friends crafting these magnets, exchanging our designs and laughing as we shared stories. The finished magnets transformed my fridge into a vibrant collage, a perfect reminder of those fun times!
Newspaper Basket Weaving
Newspaper basket weaving is a wonderful way to transform something as simple as old newspapers into functional and beautiful art. This craft is both eco-friendly and practical, allowing seniors to create attractive storage solutions. Here are some great reasons to give it a try:
- Practical Use: The baskets you create can be used for organizing small items, making them functional as well as decorative.
- Promotes Fine Motor Skills: Weaving helps to improve dexterity, making it an excellent activity for seniors looking to keep their hands agile.
- Social Crafting: This project can easily become a group activity, fostering connection and teamwork.
You’ll need a few materials to start weaving your newspaper baskets:
- Old Newspapers: Gather a good stack of old newspapers to use as your primary material.
- Glue: Craft glue or a glue stick will help keep your materials intact.
- Scissors: For cutting strips of newspaper.
- A Base Frame: A cardboard base can give structure to your basket.
Here’s how to weave your beautiful newspaper basket:
- Prepare Your Strips: Cut the newspapers into long strips about 1-2 inches wide. You’ll need plenty, so don’t hesitate to stack a few papers!
- Create the Base: Start by placing several strips horizontally and weaving additional strips vertically through them to form a grid. This will serve as your basket’s base.
- Weave Up the Sides: Continue adding and weaving more strips upward until you reach your desired basket height.
- Secure the Edges: Once you’ve finished weaving, fold down the newspaper strips at the top and glue them in place for a neat finish.
Crafting these beautiful newspaper baskets provided a special bonding experience with my neighbor, who introduced me to this enchanting art form. As we chatted and weaved, we enjoyed the satisfaction of repurposing materials into beautiful home decor. Engaging in recycled material crafts not only fosters creativity but also cultivates a sense of mindfulness about the world we live in. Upcycled bottle cap magnets and newspaper baskets are just two ways you can explore the wonders of crafting while promoting sustainability. So gather your materials, unleash your creativity, and let the joy of crafting inspire you!
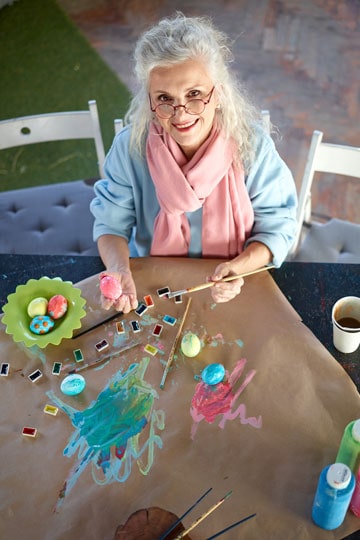
Painting and Drawing Crafts for Seniors
Once you’ve explored the world of recycled materials, it’s time to dive into the vibrant realm of painting and drawing! These crafts are not only enjoyable; they also allow for self-expression and creativity. For seniors, engaging in activities like watercolor painting and adult coloring books can be particularly fulfilling. Let’s explore these artistic avenues that can brighten your artistic journey!
Watercolor Paintings
Watercolor painting is a wonderful way to express your creativity in a fluid and forgiving medium. The beauty of watercolors lies in their versatility and the unique effects you can achieve. Here are several benefits that watercolor painting offers:
- Relaxation: Painting with watercolors can be a soothing process, allowing you to escape into a world of color and creativity.
- No Pressure: Watercolors are forgiving! You can easily blend, layer, or even lift paint off the page, making it perfect for beginners or experienced artists alike.
- Sensory Delight: Working with colors and water provides a sensory experience, connecting you to emotions and memories.
To get started on your watercolor painting journey, gather the following supplies:
- Watercolor Paper: Choose a pad of paper specifically designed for watercolors, as it has better absorbency.
- Watercolor Paints: You can opt for tube paints or pan sets, whichever feels more comfortable for you.
- Brushes: A selection of brushes in various sizes will open up your options for different techniques.
Here’s a simple exercise to create your own watercolor masterpiece:
- Choose a Subject: It could be a flower, landscape, or abstract shapes; pick something that inspires you.
- Wet the Paper: Lightly wet your paper with a clean brush to allow the colors to spread and blend smoothly.
- Apply Color: Start adding colors to the wet paper, watching how they blend together. Don’t be afraid to experiment!
- Layer and Detail: Once dry, you can go back and add more details or layers of color to enhance your painting.
I vividly remember attending a watercolor class with my friend, where we both giggled about our “creative” attempts. Yet, by the end of the session, we were surprised by the beauty of our finished pieces. Now, those paintings adorn our walls as lovely reminders of our artistic day together.
Adult Coloring Books
Adult coloring books have gained popularity for a good reason—they’re fun, therapeutic, and perfect for seniors looking for a relaxing yet creative outlet. They come in various themes, from intricate floral designs to stunning landscapes, catering to all preferences. Here’s why you might enjoy this activity:
- Stress Relief: Coloring can be a meditative practice that helps reduce stress and promotes mindfulness.
- Enhances Focus: The simple act of choosing colors and filling in intricate designs can improve concentration and fine motor skills.
- Social Activity: Grab some coloring books and colored pencils and get together with friends for a cozy, shared experience.
To dive into the world of adult coloring, you’ll need a few essential items:
- Adult Coloring Books: Find ones that appeal to you—there are many styles available, featuring everything from animals to mandalas.
- Coloring Pencils or Markers: A good selection will allow for fine details and vibrant colors.
Here’s how to make the most out of your coloring experience:
- Select a Page: Pick a beautiful design that resonates with you and sparks your creativity.
- Choose Your Colors: Think about the mood you want to convey. Do you want bright, cheerful colors or soothing pastels?
- Start Coloring: Take your time and enjoy the process. There’s no rush! Fill in patterns, experiment with shading, and let your imagination guide you.
I fondly recall hosting a coloring night with my sister. We laughed, shared tips, and marvelously compared our colorful creations. Our pages turned into amusing works of art, and we cherished those moments spent together. Painting and drawing crafts, such as watercolor painting and adult coloring, provide endless opportunities for creativity, relaxation, and the chance to connect with others. So gather your art supplies, embrace your imagination, and allow the strokes of your brush or pencil to tell your story!

Jewelry Making for Seniors
As we transition from the vibrant world of painting and drawing, let’s delve into the charming art of jewelry making! Creating your own jewelry can be incredibly satisfying, giving you the chance to express your style while honing your crafting skills. Two delightful projects that are easy and rewarding for seniors are beaded bracelets and clay earrings. Let’s explore these creative avenues and discover the joy of making your own adornments!
Beaded Bracelets
Beaded bracelets are a classic jewelry-making project that yields beautiful and personalized accessories. This craft is not only enjoyable but also allows you to showcase your creativity through various colors, patterns, and designs. Here’s what makes beaded bracelets an excellent choice:
- Simple Techniques: Stringing beads is an easy skill to acquire, making it accessible for beginners.
- Customizable: You can mix and match colors, shapes, and sizes, allowing for unique creations that reflect your personality.
- Perfect for Gifting: Handmade bracelets make thoughtful gifts for friends and family, showing them you care.
To get started on making your own beaded bracelets, gather these supplies:
- Beads: Opt for a mix of glass, wooden, or acrylic beads in colors and designs that resonate with you.
- Elastic or Stretch Cord: This is great for making bracelets that are comfortable to wear.
- Scissors: You’ll need these for cutting the cord.
Here’s a step-by-step guide to creating your beaded bracelet:
- Measure Your Wrist: Cut a length of elastic cord about 3-4 inches longer than your wrist measurement. This extra length will help with tying the knot later.
- Select Your Beads: Lay out the beads in the order you’d like to string them. Play around with the arrangement until it feels just right.
- String the Beads: Carefully thread the beads onto the elastic cord, ensuring they all fit snugly and look visually pleasing.
- Secure the Bracelet: Once you’ve strung all your beads, tie a firm knot to secure the ends together. For added security, you can add a drop of clear glue to the knot.
I remember crafting beaded bracelets with my granddaughter during a rainy afternoon. We laughed as we mixed bright colors and created matching pieces to wear, a cherished memory that still brings a smile to my face!
Clay Earrings
Making clay earrings can be an engaging and fun project that results in stunning, lightweight jewelry. Polymer clay is particularly suited for this craft as it’s easy to work with and comes in a multitude of colors. Here’s why you’ll love creating your own clay earrings:
- Creative Expression: You can mold and shape the clay in any way you like, allowing for endless design possibilities.
- Satisfying Results: The transformation from raw clay to beautiful finished jewelry is incredibly rewarding.
- Lightweight and Comfortable: Clay earrings are easy to wear and can be made in various styles, from studs to dangles.
To embark on your clay earring-making journey, gather the following materials:
- Polymer Clay: Choose several colors to mix and match for your designs.
- Earring Findings: You’ll need earring hooks or posts, which can easily be found online or at craft stores.
- Baking Tray: For hardening the clay in the oven.
Here’s a simple method for creating your clay earrings:
- Prepare the Clay: Start by conditioning the polymer clay by kneading it until it’s soft and pliable.
- Shape Your Design: Roll, flatten, and mold the clay to create your desired earring shapes. You can create simple geometric designs, whimsical shapes, or even flowers!
- Add Attachments: Before baking, make sure to add holes for the earring hooks. You can use a tiny piece of a straw or a toothpick for this.
- Bake and Assemble: Follow the instructions on the clay packaging for baking times. Once cooled, attach the earring findings to your clay pieces.
I fondly recall making clay earrings together with a friend during a crafting meet-up. We each created a pair to match our favorite outfits, which became our little signature pieces. Jewelry making, whether through beaded bracelets or clay earrings, opens a world of creativity and self-expression. These projects not only offer a chance to create beautiful pieces but also allow for connection, laughter, and treasured memories. So gather your materials, unleash your creativity, and enjoy the art of crafting unique jewelry that reflects who you are!

Knitting and Crocheting Projects for Seniors
As we journey further into the world of crafts, knitting and crocheting present some of the most fulfilling and practical projects for seniors. These timeless arts not only help keep your hands busy but also yield lovely, useful items that can be gifted or used around the home. Two charming projects to consider are knitted dishcloths and crocheted hats. Let’s dive into these crafts and discover how they can bring joy and creativity into your life!
Knitted Dishcloths
Knitted dishcloths are a fantastic project for both novice and experienced knitters. These everyday essentials are not only functional but also offer a great way to practice and showcase your knitting skills. Here’s why you’ll love making knitted dishcloths:
- Quick and Easy: They can be completed relatively quickly, making them perfect for instant gratification after a crafting session.
- Practical Gifts: Hand-knit dishcloths make thoughtful gifts, especially when paired with other kitchen items like handmade soaps or tea towels.
- Experiment with Colors and Textures: You can play with various yarn colors and patterns to create something unique for your home.
To get started on your knitted dishcloths, gather the following supplies:
- Cotton yarn: For durability and absorbency, choose cotton yarn. It is soft and perfect for kitchen use.
- Knitting needles: Use size 7 or 8 needles for a standard dishcloth pattern.
- Pattern: Look for a simple garter stitch or checkered pattern online to kick things off!
Here’s a step-by-step guide:
- Cast On: Start by casting on about 30 stitches, depending on the desired size.
- Knit: Simply knit every row (garter stitch) until your dishcloth reaches about 8-10 inches in length.
- Bind Off: Once you reach the desired size, bind off your stitches and weave in the ends.
I fondly remember knitting dishcloths with my sister during a cozy evening. We shared hot cocoa and chatted as we knitted, filling our kitchen with laughter and creativity. Now, those dishcloths remind me of those delightful moments spent together!
Crocheted Hats
Crocheted hats are not only fun to make but also provide warmth and style during colder months. This project allows you to express your creativity while creating a practical item that can be cherished or gifted. Here’s why crocheting hats is an excellent choice:
- Warmth and Comfort: A handmade hat is perfect for keeping your head warm, making it a seasonally appropriate craft.
- Variety of Styles: You can choose from various designs and colors, from slouchy beanies to cozy cloches.
- Great for Personalization: Add embellishments like flowers, buttons, or pom-poms for a personal touch.
To embark on your crocheted hat journey, gather these supplies:
- Yarn: Choose soft worsted weight yarn—wool is preferable for warmth, but cotton works for lighter hats.
- Crochet Hook: A size H (5.0 mm) hook works well for most worsted yarn patterns.
- Pattern: Look online for beginner-friendly hat patterns to follow.
Here’s how to crochet your own stylish hat:
- Start with a Slip Knot: Begin your hat with a magic circle, or chain 4 and join to the first chain to create a circle.
- Create Your Rounds: Follow the chosen pattern, increasing stitches as necessary to achieve the desired width.
- Crochet Until Desired Length: Continue crocheting rounds until the hat reaches the desired height, then finish off by weaving in the ends.
I fondly recall crocheting hats with a group of friends as we gathered on a chilly afternoon. We even had a “fashion show” to model our creations, igniting the room with laughter and applause! Both knitting dishcloths and crocheting hats offer practical, satisfying projects for seniors. These crafts promote creativity, provide a sense of accomplishment, and can foster connection with friends and family. So grab your yarn, pick up your needles or hook, and let the warmth of craftsmanship fill your heart!
DIY Home Decor Crafts for Seniors
As we continue exploring the world of crafts, let’s turn our attention to DIY home decor projects that allow seniors to enliven their living spaces with creativity and personal touches. Creating unique decorative pieces not only enhances your home but can also bring immense joy during the crafting process. Two delightful projects to try are mason jar lanterns and hand-painted flower pots. Let’s dive into these charming crafts that can brighten up any room or garden!
Mason Jar Lanterns
Mason jar lanterns are a fun and versatile project that adds a warm glow to any space. Whether you’re looking to create ambiance in your home or add a festive touch for a gathering, these lanterns can be tailored to fit any occasion. Here’s why they’re an excellent choice:
- Easy to Personalize: You can easily customize mason jar lanterns with different colors, embellishments, and themes.
- Simple to Make: Crafting these lanterns requires minimal materials and can be completed in just a short time.
- Indoor and Outdoor Use: They can light up your indoor spaces or serve as charming outdoor decorations for gatherings on the patio.
To get started, gather the following supplies:
- Mason Jars: Any size will work, from pint to quart jars.
- String Lights or Candles: Choose battery-operated tea lights for safety or decorative string lights for a whimsical look.
- Decorative Elements: You can use paints, ribbons, twine, or even natural materials like pinecones and leaves for added flair.
Here’s how to create your mason jar lanterns:
- Prep the Jar: Clean and dry your mason jar thoroughly.
- Decorate: If you’re painting or layering decorative elements, do this first. You can create a frosted effect by spray painting the outside with a matte finish.
- Add Lights or Candles: For battery-operated lights, coil them inside the jar and arrange them randomly for a sparkling effect. For candles, place the candle at the bottom of the jar.
- Finish Off: Add ribbons or twine around the neck of the jar for a charming touch.
I fondly remember hosting a small gathering where we made these lanterns together. Each guest personalized their jar, and the results were beautiful! We lit them up at night, filling the backyard with a magical glow that turned our gathering into an event to remember.
Hand-painted Flower Pots
Hand-painted flower pots are another fantastic DIY craft that brings bursts of color and personality to your home or garden. It’s a wonderful way to showcase your favorite plants while adding a personal artistic flair. Here are some reasons to make hand-painted flower pots:
- Creative Expression: You can express your individuality through your designs and colors.
- Great Gifts: These pots make delightful gifts, especially when filled with a beautiful plant or flowers.
- Indoor and Outdoor Decor: They can brighten up your windowsill, patio, or garden.
To get started, gather these materials:
- Terracotta or Ceramic Pots: Choose pots in various sizes for a diverse look.
- Acrylic Paints: Use vibrant colors that complement your style.
- Paintbrushes: Various sizes will help you achieve different patterns and effects.
Here’s how to create stunning hand-painted pots:
- Prep Your Pot: Clean the pot to remove dirt and debris. Let it dry completely.
- Plan Your Design: Sketch out your design lightly with a pencil on the pot’s surface.
- Paint Away: Using your brushes, start painting your design. You can create flowers, abstract patterns, or even personalized messages!
- Seal Your Work: Once the paint is dry, apply a clear sealant spray to protect your artwork, especially if your pots will be outdoors.
I cherish the memory of painting flower pots with my grandchildren. We each designed our pots and planted colorful flowers in them, which now grace our porch and remind me of those joyful afternoons together. Creating DIY home decor crafts, like mason jar lanterns and hand-painted flower pots, allows seniors not only to enhance their living spaces but also to enjoy the therapeutic benefits of crafting. These projects offer opportunities for creativity, connection, and self-expression. So gather your supplies, unleash your artistic spirit, and transform your home into a reflection of your unique style!
Memory Crafts for Seniors
As we journey through our creative endeavors, it’s important to cherish our memories and the meaningful experiences that have shaped our lives. Memory crafts are a beautiful way to do just that, allowing seniors to reflect on cherished moments while engaging in a delightful crafting process. Two wonderful projects to explore are scrapbooking and memory jars. Let’s dive into these nostalgic crafts that capture precious memories and create lasting keepsakes!
Scrapbooking
Scrapbooking is a beloved craft that combines creativity with memory preservation, making it a fantastic choice for seniors. This activity allows individuals to showcase their favorite photos, stories, and mementos, all within beautifully designed pages. Here are some of the benefits of scrapbooking:
- Creative Outlet: Scrapbooking provides a platform for artistic expression through combining photos with decorative elements like stickers, washi tape, and journaling.
- Memory Preservation: This craft allows you to preserve memories in a tangible way, creating a valuable heirloom that can be shared with family in the future.
- Therapeutic Process: The act of reminiscing while crafting can be a cathartic experience, encouraging reflection on joyful moments.
To get started with scrapbooking, gather the following supplies:
- Scrapbook Album: Choose one that suits your style, with various page sizes to accommodate different layouts.
- Photos and Mementos: Collect your favorite photographs, ticket stubs, postcards, and any other keepsakes that tell your story.
- Decorative Supplies: Gather stickers, colored papers, scissors, adhesives, and pens for journaling.
Here’s how to create an engaging scrapbook:
- Plan Your Layout: Decide on the theme for each page (holidays, family events, vacations) and plan where your photos and mementos will go.
- Attach Your Photos: Use adhesive or photo corners to securely attach photos and memorabilia to the pages.
- Add Decorations: Enhance your pages with stickers, washi tape, or drawings. Use colored pens to write captions or little stories beside your photos.
- Reflect and Enjoy: Flip through your scrapbook when you need a little pick-me-up, or share it with friends and family during visits.
I remember creating a scrapbook with my mother, where we compiled family photos dating back generations. The laughter and stories that emerged made the crafting session unforgettable, and those scrapbooks became treasures we proudly displayed in our homes.
Memory Jars
Memory jars provide another wonderful way to cherish moments and create a visual representation of your life’s highlights. This simple yet meaningful craft involves collecting notes, mementos, or memories to fill a decorative jar, making it a delightful project for seniors. Here’s why memory jars are a must-try:
- Reflective Craft: The process of writing down memories encourages conscious reflection on the positive aspects of life.
- Personalized Decoration: You can customize your memory jar and use it as a decorative piece in your home.
- Easily Accessible Joy: Whenever you need a boost, you can pick a memory from the jar for a moment of joy.
To create your own memory jar, gather these materials:
- Jar: Use any glass or decorative jar you have on hand—mason jars work wonderfully!
- Paper and Pens: Cut out small pieces of paper or use sticky notes for writing your memories.
- Decorative Supplies: Get creative! Use ribbons, paint, or labels to decorate your jar.
Here’s how to make a heartfelt memory jar:
- Write Your Memories: Whenever a happy memory comes to mind, write it down on a piece of paper and fold it up.
- Fill the Jar: Place your memory notes inside the jar, gradually filling it with little moments of joy.
- Decorate Your Jar: Add your personal touch to the jar with decorative elements that represent your style.
- Share the Joy: Encourage family and friends to create their own memory jars, and share joyful notes with each other!
I cherish the memory of creating a memory jar with my grandchildren. They filled their jars with notes about their favorite days, and it became a shared treasure we revisited regularly, sparking laughter and conversations. Engaging in memory crafts like scrapbooking and memory jars not only allows seniors to reflect on precious moments but also fosters connection and creativity. These projects serve as keepsakes that capture the essence of life’s beauty, celebrating love, joy, and cherished experiences. So gather your supplies and start making these lovely crafts that will brighten your heart and home!