

Crafting is more than just a fun activity; it’s a way to express creativity, explore new materials, and even reduce waste through upcycling. Whether you’re looking to spend a rainy afternoon indoors or seeking to create meaningful gifts, there are countless crafting avenues to explore.
The Joy of Crafting
As someone who has dabbled in a variety of crafting projects over the years, I can tell you that there’s an undeniable joy in creating something with your own hands. I remember the first time I shaped a piece of paper into a beautiful origami crane. It felt magical to watch a flat sheet transform into a piece of art. That sense of accomplishment keeps many of us coming back for more. Crafting serves multiple purposes:
- Creative expression: It provides an outlet for your imagination.
- Therapeutic effects: Many find crafting to be a great way to relax and unwind.
- Skill-building: You can learn new techniques and enhance fine motor skills.
- Community bonding: Group crafting can forge closer connections with friends and family.
With that said, let’s delve into some exciting crafting categories that everyone can enjoy, each offering its unique flair and challenges.
Exploring Paper Crafts
In the realm of paper crafts, options abound. For instance, origami is not just a method of folding paper; it’s an art form that originated in Japan.
- Origami Creations: From simple designs like cranes and frogs to complex shapes like flowers or complete scenes, origami can range from beginner to expert levels. You can find countless tutorials online, and it’s incredibly satisfying to watch your creation come to life.
- Paper Mache Projects: This technique involves layering paper strips soaked in adhesive to create three-dimensional objects. You could make anything from bowls to masks or even sculptures. It’s perfect for using up scrap paper and involves lots of creativity and imagination.
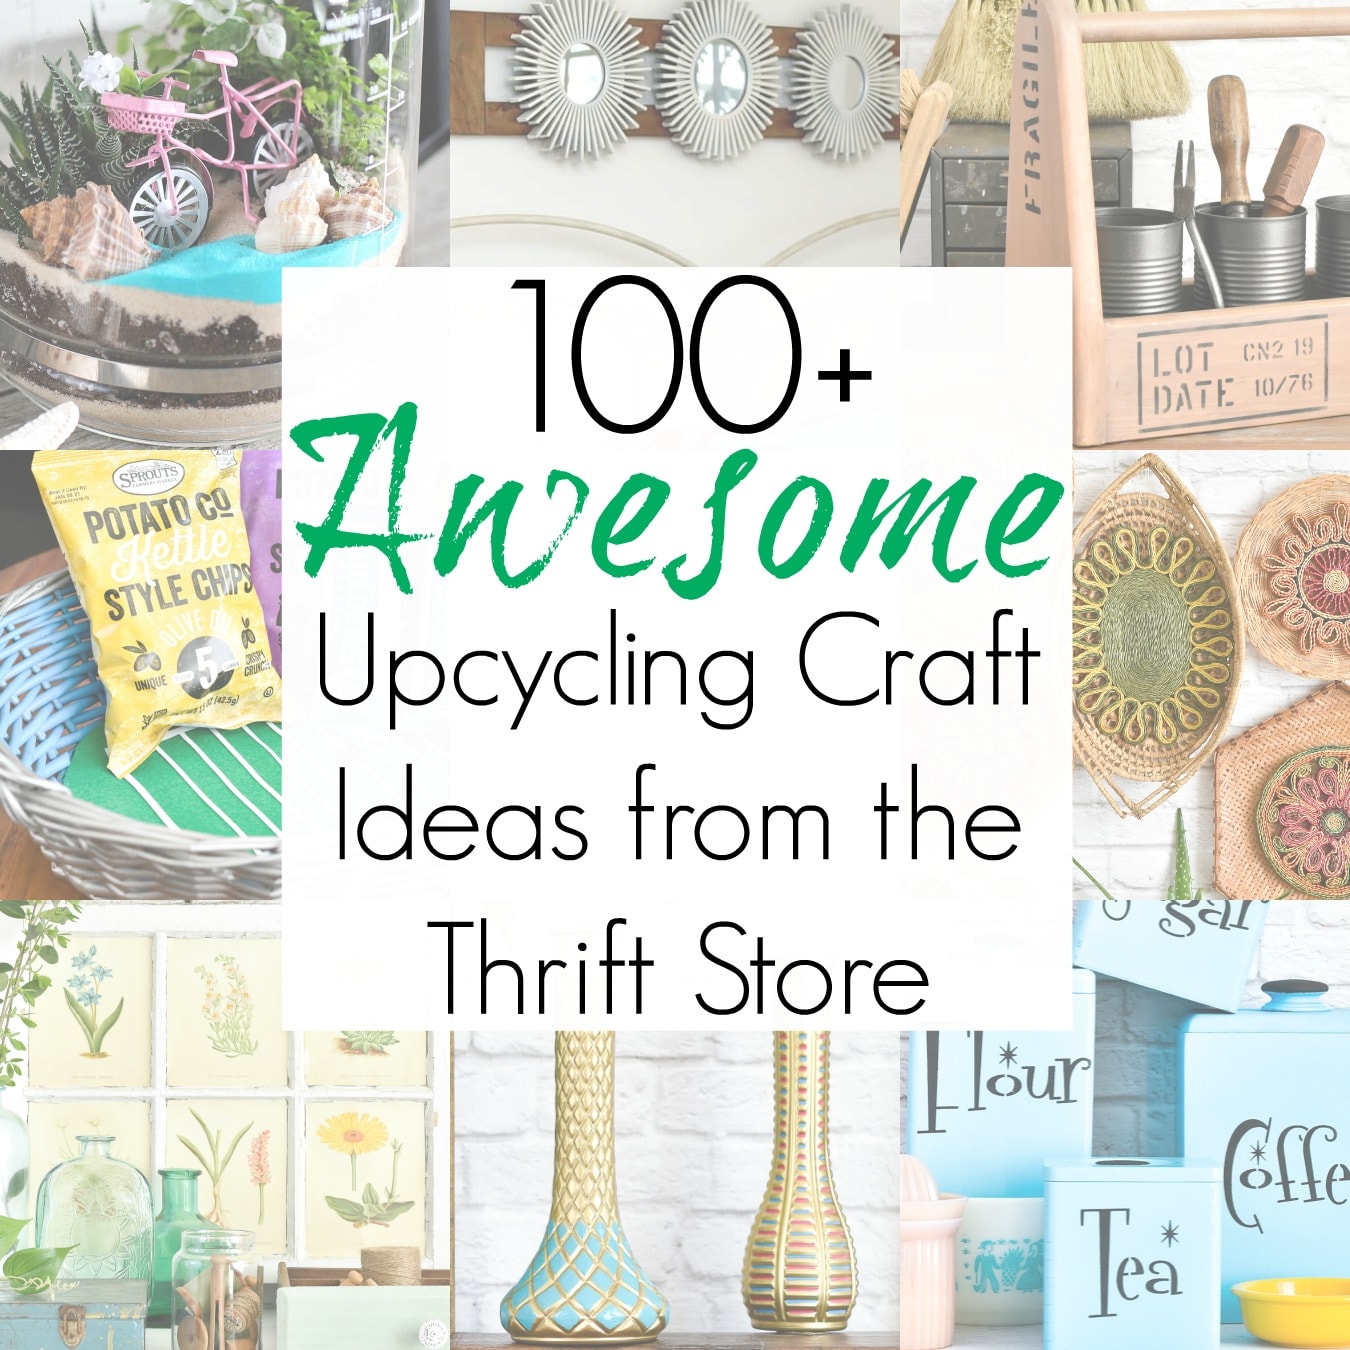
Diving into Upcycling
Upcycling is another fantastic way to make crafts financially and environmentally friendly. You can turn everyday objects into works of art or functional items.
- Tin Can Crafts: Take those old food cans, clean them up, and get creative! They can become lovely plant pots, candle holders, or even decorative lanterns. Just a bit of paint or twine can elevate a simple can into stunning décor.
- Bottle Cap Art: If you’re a soda drinker, you likely have a collection of bottle caps. Why not turn them into art? Creating mosaics using bottle caps is a fun way to display your favorite color schemes or to make quirky art pieces.
Embracing Fabric Crafts
Fabric crafts open a gateway to countless projects with various skill levels.
- No-Sew Projects: You don’t need to be a sewing expert to craft with fabric. No-sew projects like fabric banners, pillow covers, or even hair accessories allow anyone to join in. Just grab fabric glue and some scissors!
- DIY Tote Bags: Everyone can benefit from a sturdy, reusable tote bag. You can make one from old clothing, fabric scraps, or even natural fibers. Personalizing it with fabric paint can add that extra touch.
Connecting with Nature Crafts
Nature crafts are a beautiful way to bring the outdoors inside.
- Pressed Flower Art: Collect flowers from your garden or local park and create unique artworks by pressing and framing them. They make beautiful gifts or can be hung in your home.
- Pinecone Decorations: Who knew pinecones could be so versatile? Transform them into festive wreaths, ornaments, or even creative creatures that can be used to embellish your space.
This broad overview only scratches the surface of crafting possibilities. Each section we’ve explored adds excitement and creativity to the crafting world. As you dig deeper into these projects, you’ll uncover even more pathways for expression, sustainability, and enjoyment. Happy crafting!

Section of Paper Crafts
Crafting with paper is one of the most accessible yet versatile forms of DIY. It allows us to explore creativity without needing extensive materials or special tools. Whether you’re a novice or a seasoned crafter, paper crafts like origami and paper mache can provide endless joy and satisfaction.
Origami Creations
Origami, the art of folding paper into intricate designs, has its roots in Japan and has captivated hearts around the world. The beauty of origami lies not just in its aesthetics, but also in its simplicity. With just a single sheet of paper, you can create something truly beautiful. My first experience with origami was during a school art class where we all made paper cranes. I still remember the delight when my crane finally took shape—it felt magical! If you’re looking to dive into origami, here are a few tips and project ideas:
- Start Simple: Begin with basic shapes like cranes, boats, or frogs. As you become comfortable with the folds, you can gradually tackle more complex designs like the intricate lotus flower or a dragon.
- Use Quality Paper: While you can practice with any paper, using origami paper designed for folding can make a significant difference. It usually has a beautiful design on one side and a solid color on the other, elevating your finished product.
- Follow Tutorials: The internet is replete with video tutorials and diagrams. Websites like YouTube or specialized origami sites can guide you step-by-step through different folding techniques.
- Practice Makes Perfect: Don’t be discouraged if your first few attempts don’t look perfect. Just like any skill, origami improves with practice. Eventually, you’ll be able to create more detailed and stunning pieces.
Origami isn’t just a pastime; it can serve other purposes too. For instance, you could fold several cranes and string them together for a beautiful decoration at a party or utilize smaller creations as unique gift-tags.
Paper Mache Projects
Next up is paper mache, another exhilarating paper craft that lets your imagination run wild! This technique, which involves layering strips of paper soaked in a paste to create sturdy objects, has endless possibilities. I once created a paper mache bowl for a school project, and watching it evolve from a flimsy structure to a hard, decorative bowl was incredibly rewarding. Here’s how you can get started with your own paper mache adventures:
- Gather Your Materials: You’ll need strips of paper (newspaper works great), a adhesive mix (flour and water or a craft glue), and a mold to shape your project. Balloons make excellent molds for bowls or sculptures!
- Prepare Your Paste: A simple recipe is mixing one part flour with two parts water. Stir this until it forms a smooth, pourable consistency. Alternatively, you can use PVA glue diluted with a bit of water for a faster-drying solution.
- Start Layering: Dip a strip of paper into the paste, remove the excess, and layer it onto your mold. Apply several layers for strength; a minimum of three layers is recommended. Make sure to allow each layer to dry fully before adding the next.
- Get Creative with Paint: Once fully dried and hardened, it’s time to unleash your artistic side! You can paint your creation, add embellishments like beads, or even decoupage it with additional paper for a unique look.
Paper mache encourages experimentation, allowing you to create everything from decorative bowls and masks to more elaborate sculptures. You can transform simple materials into eye-catching art. In summary, both origami and paper mache offer fantastic ways to engage with paper creatively. Not only do these crafts hone your skills, they also provide an opportunity to make gorgeous decorations that can brighten up any space. So grab some paper, roll up your sleeves, and let your creativity unfold! Enjoy the process—crafting is all about having fun.
Section of Upcycling
Upcycling is a brilliant way to breathe new life into materials that might otherwise end up in the trash. It’s not only environmentally friendly, but it also sparks creativity and saves money! Two popular upcycling crafts are making use of tin cans and bottle caps. Let’s delve into how you can turn these everyday items into beautiful, functional art.
Tin Can Crafts
Do you have a stash of empty tin cans lying around? Rather than tossing them out, consider the countless crafty possibilities they offer! Tin can crafts can be a fantastic family activity or a personal project, turning ordinary cans into whimsical art pieces or functional items. Here are some creative project ideas to get started:
- Planters: Tin cans make for excellent small planters! Simply remove the label and give the can a good rinse. Puncture some holes in the bottom for drainage, fill it with soil, and plant your favorite herbs or succulents. You can even decorate the outside with paint, fabric, or washi tape for a personal touch.
- Candle Holders: Create beautiful candle holders by carefully punching designs into the sides of a cleaned tin can. Once punctured, fill the can with water and freeze it to hold the shape while you work. After the ice melts, you’ll be left with a stunning light effect when a candle is placed inside.
- Organizers: Transform a cluster of tin cans into an organizational station for your desk. Paint them in coordinating colors or use contact paper with fun patterns. Attach them to a board or simply group them together on your desk to hold pens, scissors, or craft supplies.
- Wind Chimes: Turn your tin cans into a mesmerizing wind chime. Remove the tops, paint or decorate the exterior, and hang them with twine or fishing line. Add beads or other decorations for added flair. The soft clinking as they move in the breeze can be quite soothing!
The beauty of tin can crafts is that they can be adapted to all skill levels and age groups. I had so much fun creating a colorful herb garden with my kids last summer, and we even labeled each can with colorful markers. It became a lovely addition to our kitchen!
Bottle Cap Art
Now, let’s shift our focus to another overlooked upcycling treasure: bottle caps! These little circular gems can be transformed into treasures with a bit of creativity. Here are some fun and creative ways to incorporate bottle caps into your crafts:
- Mosaic Art: Gather a variety of colorful bottle caps and create stunning mosaic artwork. Use a canvas or a piece of wood as your base, and arrange the caps to form a design or picture. You can glue them down and even paint the background for added contrast. It’s a great way to create personalized wall art that’s full of character.
- Magnets: Bottle caps make for fantastic fridge magnets! Simply fill the inside of the cap with a small picture or design, like your favorite band or a family photo. Then, seal it with a layer of Mod Podge or clear resin, and glue a magnet on the back. Voila! You now have a unique and personal magnet to display your memories.
- Keychains: Another simple yet effective project is turning bottle caps into charming keychains. Puncture a small hole in the cap and attach it to a keychain loop with your favorite decorative strings or beads. You can personalize them as gifts or create fun party favors for events.
- Coasters: Create a unique set of coasters by gluing bottle caps onto a cork base or piece of wood. Once they’re arranged how you like, seal them with a clear coating to protect against spills. It’s a practical way to jazz up your home decor!
Upcycling not only allows you to create one-of-a-kind pieces but also promotes a sustainable lifestyle. Using materials you already have reduces waste and can lead to wonderful crafting experiences. So, gather those tin cans and bottle caps, unleash your creativity, and let the crafting begin! Happy crafting!
Section of Fabric Crafts
Fabric crafts can be incredibly fulfilling, offering a unique way to express creativity and make practical items. And the best part? You don’t always need a sewing machine to dive into fabric crafting! With no-sew projects and DIY tote bags, you can easily create beautiful and functional pieces. Let’s explore these two exciting categories together.
No-Sew Projects
No-sew projects are a fantastic way to get started with fabric crafts, especially if you’re new to crafting or don’t have sewing skills. They’re quick, approachable, and often require minimal materials. Plus, you can create stunning items without ever picking up a needle! Here are some exciting no-sew project ideas to inspire you:
- Fabric Banners: Create a festive fabric banner for your next celebration! Cut triangles from colorful fabric scraps and tie them to a long piece of twine. Hang it in your home, at a birthday party, or for any special occasion. Personalizing the shapes or colors can make it even more unique.
- T-shirt Bags: Repurpose an old t-shirt into a stylish tote bag! Simply cut off the sleeves, remove the neckline to create an opening, and tie the bottom of the shirt in a knot or cut fringe strips and tie them together. It becomes a functional carrying bag perfect for grocery shopping or casual outings.
- No-Sew Pillows: Transform fabric scraps into cozy no-sew pillows. Cut two pieces of fabric in a square shape, place them together, and tie around the edges with strips of fabric. Fill the middle with stuffing or a pillow form before tying it off. Voilà! You have a charming pillow that adds a pop of color to your space.
- Fabric Bookmarks: For the readers out there, fabric bookmarks make wonderful gifts. Cut fabric into your preferred shape and size, then simply fray the edges for a rustic look. You can also add embellishments, like beads or tassels, to personalize them further.
I remember making fabric bookmarks as party favors for a book club gathering. We had so much fun picking out different fabric patterns and adding personal touches. They turned out to be such a hit!
DIY Tote Bags
Tote bags are not only fashionable but also incredibly practical. With a few simple supplies and some creativity, you can create a unique tote bag that reflects your style. They’re perfect for grocery shopping, beach days, or just carrying your essentials while running errands. Here’s how you can create your own DIY tote bag:
- Materials Needed:
- A sturdy piece of fabric (canvas works great, but any fabric will do!)
- Scissors
- Ruler or measuring tape
- Fabric markers or paint (optional, for decoration)
- Steps to Create a Simple Tote Bag:
- Cut the Fabric: Cut two rectangles of equal size from your fabric piece. A standard size is around 15”x18”, but you can adjust this based on your preferences.
- Make the Handles: Cut two strips of fabric about 3” wide and 20” long for the handles. You can also use a thicker fabric or webbing for added durability.
- Assemble the Bag: Place the two large rectangles together with the right sides facing each other. Pin the side edges (the 18” sides) and the bottom edge together, leaving the top open.
- Attach the Handles: Before sewing, mark how far down you want the handles to sit on each side of the bag. You’ll want to make sure the handles are securely attached to prevent ripping.
- Secure Stitches: If you prefer not to sew, you can use fabric glue along the edges and where the handles will attach. Be sure to let it dry completely before using the bag.
- Decorate: Use fabric markers or paint to personalize your bag with designs, quotes, or patterns.
Creating your own DIY tote bags is not just rewarding; it also allows you to be eco-friendly by reducing the need for disposable bags. I recently made tote bags for my family for a picnic outing, and everyone loved carrying their personalized bags filled with snacks and games. In closing, fabric crafts like no-sew projects and DIY tote bags are not only fun but also practical. They invite creativity into your home while offering useful items that can be used in everyday life. Whether you’re crafting alone or with friends, these projects bring a shared sense of joy and accomplishment. So, grab your fabric, unleash your creativity, and start your next crafting adventure!

Section of Nature Crafts
Working with elements from nature can foster a deeper connection to the environment while allowing your creativity to flourish. Nature crafts, such as pressed flower art and pinecone decorations, bring the beauty of the outdoors into your home. These projects are not only fun but also a wonderful way to preserve nature’s beauty.
Pressed Flower Art
Pressed flower art is a timeless craft that turns blooms and foliage into stunning decorations. Not only does this technique allow you to preserve beautiful flowers, but it also lets you create unique artworks that can adorn your walls, bookmarks, or even greeting cards. To get started with pressed flower art, consider following these simple steps:
- Gather Your Flowers: Choose your favorite blooms, such as daisies, violets, or even leaves. The best time to collect them is in the morning when they are fresh and full of moisture.
- Prepare for Pressing: To press your flowers, you can use a few different methods, but the most accessible one is to place them between two sheets of parchment paper. Make sure they’re flat and not overlapping.
- Apply Weight: Place the flowers between heavy books or a flower press. Allow them to sit for 1-2 weeks to completely dry and flatten out. Check periodically to ensure they’re drying properly.
- Create Your Artwork: Once your flowers are ready, it’s time to get creative! You can arrange them on cardstock or canvas in various patterns. Use craft glue to secure the flowers in place.
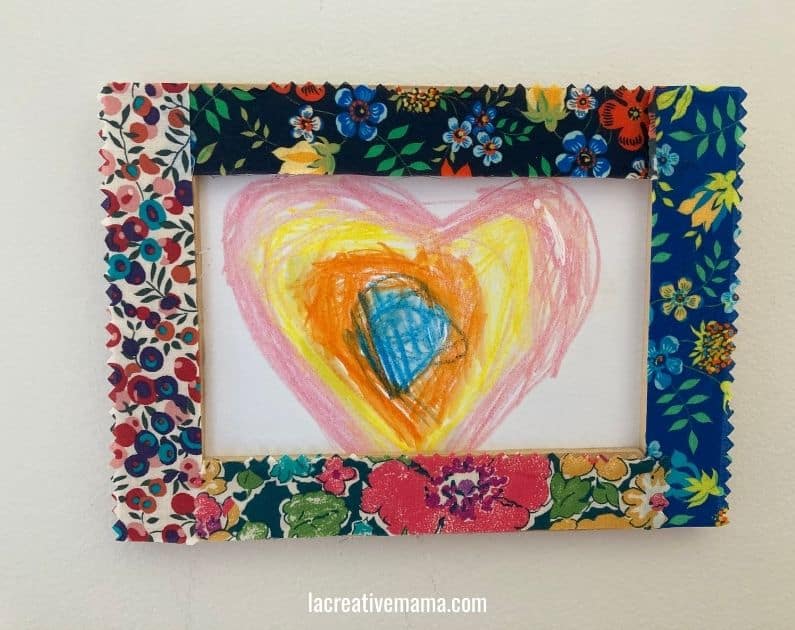
- Frame Your Masterpiece: For a polished look, consider framing your pressed flower art. A simple frame will elevate its appearance and protect your work. This makes for a lovely gift or piece of decor!
I remember visiting a botanical garden and being inspired by the vibrant colors and delicate shapes of the flowers. I collected some small blooms, pressed them at home, and created a beautiful framed piece that now graces my living room wall. It not only adds charm to my decor but also evokes fond memories of that lovely day.
Pinecone Decorations
Pinecones are another wonderful natural material that can be transformed into delightful decorations. Whether you live in a forested area or are lucky enough to find some at a local park, these rustic treasures offer endless creative possibilities. Here are some fun project ideas to make the most of your pinecone crafting session:
- Pinecone Ornaments: Perfect for the holiday season, pinecone ornaments can add a wonderful, natural touch to your Christmas tree. Simply tie a ribbon or string around the top of your pinecone and hang them on your tree. You can even paint them with glitter or holiday colors for extra flair.
- Table Centerpieces: Arrange several pinecones in a bowl or on a decorative platter for a rustic centerpiece. You can mix in some seasonal foliage or sprigs of evergreen for added color. It’s a simple, easy way to enhance your dining space.
- Pinecone Flowers: For a charming twist, transform pinecones into unique flowers. Cut the pinecone in half, and attach a stick or skewer as a stem. You can paint the pinecone halves or leave them natural, depending on the look you’re going for, and arrange them in a lovely vase or jar.
- Nature-themed Wreath: Create a stunning wreath for your front door using pinecones. Attach them to a wreath base (made from wire or a foam ring) with hot glue. You can add a touch of paint or embellish it with twine or ribbons for a personal touch.
Last autumn, my children and I went on a nature walk and collected a bunch of beautiful pinecones. We decided to make pinecone ornaments, which turned out to be a fun family activity. We painted them with sparkly colors and strung them up as decorations—we still hang them up every holiday season! In summary, nature crafts like pressed flower art and pinecone decorations allow us to explore the beauty and materials our environment offers. These projects not only promote creativity but also serve as heartfelt ways to cherish moments and memories shared in nature. So, head outside, gather some natural treasures, and let your imagination run wild with these delightful crafts! Happy crafting!

Section of Recycled Materials Crafts
Crafting with recycled materials is not only a fantastic way to reduce waste but also sparks creativity and resourcefulness. Everyday items like egg cartons and cardboard tubes can be transformed into delightful art projects that can add a touch of whimsy to your home or serve practical purposes. Let’s dive into the world of recycled materials crafts, starting with egg carton creations and exploring the endless possibilities using cardboard tubes.
Egg Carton Creations
Egg cartons are wonderfully versatile and offer a treasure trove of crafting opportunities. Whether you have the standard styrofoam or the cardboard type, these humble containers can be repurposed into various fun projects. Here are some engaging ideas to get started:
- Egg Carton Flowers: Cut the individual cups from the carton and paint them in vibrant colors. You can then glue them together to form unique flowers with stem sticks or pipe cleaners. This project adds a splash of color to any room!
- Artistic Animals: With a little creativity, egg cartons can be transformed into adorable animals. Cut and shape the cups to create insects, chicks, or even sea creatures. I once made a charming caterpillar by connecting several painted egg cups together with googly eyes, and it became a fun decoration for my daughter’s room.
- Birdfeeders: Turn half an egg carton into a simple bird feeder! Coat the outside with peanut butter and then roll it in birdseed. Attach a string for hanging and place it in your yard. It’s a beautiful way to attract birds and observe nature right at home.
- Storage Trays: Struggling to keep your workspace organized? Cut apart the egg carton and assemble the cups into a small storage tray. You can use it to hold buttons, small craft supplies, or even office items. Just paint or decorate it to match your style!
- Shadows and Lights: For a creative lighting project, cut shapes into the cups of your carton, then glue them into a structure. When you place a small LED light inside, they create beautiful shadows and patterns.
When I first introduced my kids to crafting with egg cartons, I was amazed at their creativity. They came up with their unique designs, transforming the boring cartons into vibrant masterpieces.
Cardboard Tube Crafts
Cardboard tubes, commonly found in paper towel and toilet paper rolls, can be a designer’s playground! They are sturdy, easy to work with, and can be transformed into countless creations. Here are some noteworthy examples:
- Binoculars for Play: Cut two cardboard tubes to the desired length and glue them side by side. Decorate with paint, stickers, or markers, and add a strap using yarn or string. It’s a fun way to spark imaginative outdoor adventures—the kids love pretending to be explorers with their homemade binoculars!
- Wreaths and Garlands: Cut the tubes into thick rings and paint them in bright colors. Glue them together to form a beautiful wreath or hang them to create a garland. This project adds a festive touch to any celebration.
- Creative Craft Holders: Repurpose the tubes into creative holders for pens, paintbrushes, or kitchen utensils. You can decorate the exterior and organize your craft space. They fit neatly on desks and countertops, keeping everything within easy reach.
- Puppets: Use cardboard tubes to create fun puppets. Just attach eyes, fabric, or paper to bring your characters to life! I remember making a family of tube puppets and then putting on a little show for friends and family. It was such a hit!
- Animal Figurines: Cut, paint, and glue to shape different animal figures from the tubes. You can create a whole zoo of fun animals, and they can inspire storytelling or inventive play for kids.
Engaging in recycled materials crafts like egg carton creations and cardboard tube crafts not only ignites your creativity but also instills a sense of environmental consciousness in children and adults alike. The joy of transforming what would otherwise be waste into functional and beautiful art pieces is truly fulfilling. So, gather your materials, let your imagination run wild, and enjoy the magical world of crafting with recycled items! Happy crafting!
Section of Paint Crafts
Getting creative with paint can be one of the most enjoyable and rewarding crafting experiences! Through the art of painting, you can express emotions, tell stories, and create stunning visuals that brighten any space. In this section, we’ll explore two engaging paint craft ideas: rock painting and watercolor techniques. Let’s dive in!
Rock Painting
Rock painting is an easy yet creative activity that has gained immense popularity in recent years. It’s a fantastic way to connect with nature while creating personalized pieces of art. All you need are some smooth stones, paint, and a little inspiration! Here’s how you can get started:
- Gather Your Supplies: Look for smooth stones at your local park or garden. You’ll need acrylic paint, paintbrushes, and clear sealer if you’d like to protect your finished piece. I usually find some great rocks during family walks, and it makes the adventure even more fun!
- Clean and Prepare Your Rocks: Rinse your stones under water to remove dirt, then let them dry completely. This step is crucial because a clean surface allows the paint to adhere better.
- Find Inspiration: Before you paint, think about what you’d like to create. Animals, mandalas, inspirational quotes, or fun patterns are all popular choices. When I first tried rock painting, I was inspired by the colorful flowers in my garden and painted flower designs on several rocks.
- Paint Away: Start with your base layer. Feel free to use one color or multiple colors to create a fun background. Once that’s dry, you can add details using fine paintbrushes. If you make a mistake, don’t worry—just let it dry and paint over it!
- Add a Sealant: After your paint is completely dry, a coat of clear varnish will help protect your artwork from the elements. This step is especially important if you plan to place your painted rocks outdoors.
- Join a Community: Consider joining local rock painting groups or participating in “rock hunting,” where you hide your painted rocks for others to find. It fosters kindness and adds an element of surprise to the activity!
My children and I once made a rock garden by combining our painted stones. We painted different designs and hid them around the yard, creating a delightful treasure hunt for our neighbors. It quickly became a community project as others started painting and adding their stones too!
Watercolor Techniques
Watercolor painting is a beautiful and expressive art form that allows for stunning effects and a soft finish. It’s perfect for both beginners and experienced artists alike. The fluid nature of watercolors can evoke various moods, from serene landscapes to vibrant abstract pieces. Let’s explore some essential techniques to master the medium. Here are some basic watercolor techniques to get you started:
- Wet-on-Wet: This technique involves layering wet paint on wet paper. It allows colors to blend and create soft edges. To try it, moisten your paper with clean water, then apply your paint. Watch as the colors flow and merge beautifully!
- Wet-on-Dry: This is the opposite of wet-on-wet. In this method, you apply wet paint to dry paper, resulting in cleaner, more defined edges. It’s ideal for adding details after establishing a base layer.
- Salt Technique: After applying paint to your paper, sprinkle salt onto the wet paint. As it dries, the salt absorbs water and creates unique textures. Use this approach to add interesting effects to skies or backgrounds. I love the magical results it produces!
- Lifting: If you want to lighten a specific area after the paint has dried, you can use a damp brush or a paper towel to lift some of the pigment away. This technique helps to create highlights and adds depth to your artwork.
- Watercolor Resist: Using masking fluid or tape can protect certain areas of your paper, allowing you to create interesting shapes or motifs that will stay white while painting. It’s a fun way to experiment and incorporate mixed media into your work.
- Experiment with Composition: Don’t shy away from mixing techniques! Play around with your compositions, layer colors, and integrate various methods to see what resonates with you.
I remember my first experience with watercolors was during a weekend workshop. I left with messy hands but also a newfound love for the art. I loved watching the colors come alive on the paper as I experimented with different techniques and styles. In conclusion, paint crafts like rock painting and watercolor techniques offer endless opportunities for creativity and self-expression. They invite everyone, from young artists to seasoned creators, to dive in and discover the joy of painting. So gather your supplies, unleash your imagination, and let the colors flow! Happy crafting!

