
Introduction
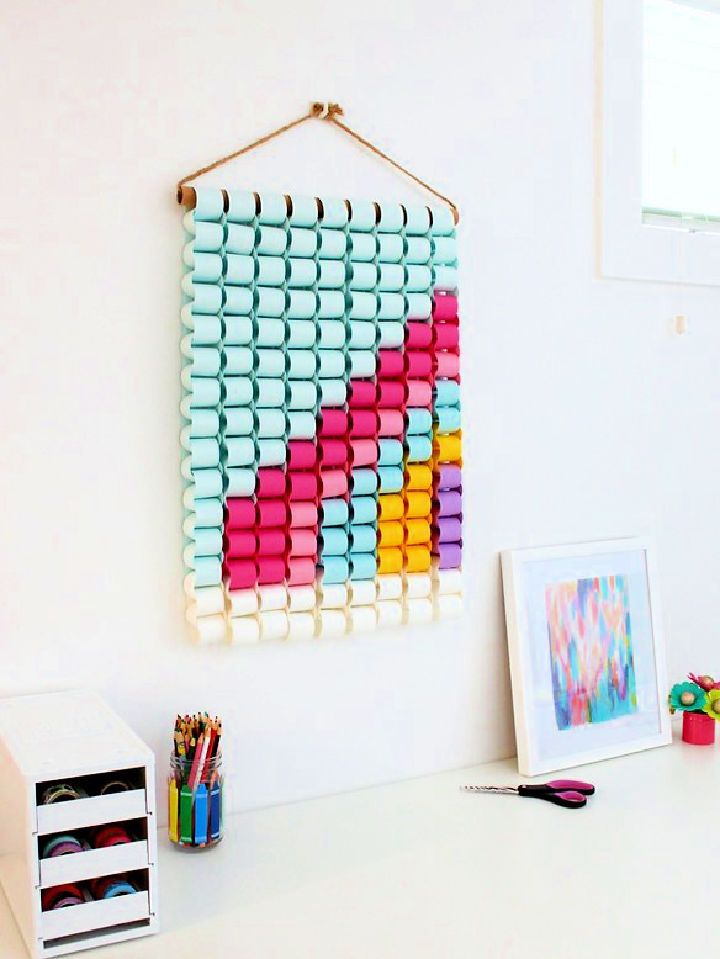
Crafting is not just a hobby; it’s a vibrant form of self-expression that brings joy and creativity into everyday life. Whether you’re winding down after a long day or looking for a fun weekend project, engaging in arts and crafts offers a satisfying outlet that can transform ordinary materials into extraordinary creations. You might discover that crafting also serves as a wonderful way to bond with family and friends, sparking creativity for all ages. It’s amazing how simple supplies like paper, fabric, or recycled materials can turn into fabulous projects that decorate our homes, gifts for loved ones, or even practical items for daily use. With that in mind, let’s explore some exciting categories of crafts that will inspire you and your loved ones to get creative and crafty!
The Joy of Paper Crafts
When thinking of crafting, one of the most versatile and accessible mediums is paper. From origami to quilling, the world of paper crafts is vast and varied.
- Origami Creations: This traditional Japanese art form involves folding paper into intricate shapes, from simple cranes to complex flowers. It’s remarkably meditative, focusing your mind on the precise movements.
- Quilling Art: By rolling and shaping strips of paper, you can create stunning designs with just a few simple techniques. The beauty is in the detail, and you can produce everything from cards to wall art.
Both paper crafts are perfect for gathering around the table with family or friends, enriching conversations while constructing beautiful art pieces.
Getting Creative with DIY Home Decor
Once you’ve dabbled in paper crafts, why not branch out into DIY home decor? This area allows you to infuse your personal style into your living space.
- Painted Plant Pots: Taking plain terracotta pots and adding colorful designs with paint creates a lively addition to your home or garden. You can customize them for each season or occasion.
- Rope Coasters: These are simple yet functional projects that can add a rustic charm to your coffee table. Use cotton rope and glue to create coasters that not only protect surfaces but also serve as beautiful decorations.
Creating decor items not only beautifies your space but also fills it with the warmth of your creativity.
Fun with Recycled Crafts
Have you ever looked at something that was headed for the trash and thought, “I can make something awesome out of that”? Recycled crafts are a fantastic way to use materials you already have around the house.
- Bottle Cap Magnets: Collect bottle caps, decorate them with images or drawings, and attach magnets to the back. Not only will they hold up your favorite photos on the fridge, but they’ll also serve as quirky conversation starters!
- Tin Can Lanterns: Transform old tin cans into beautiful lanterns for your outdoor space. Simply punch holes in a pattern, place a candle inside, and enjoy the glow while you reminisce about the fun you had making them.
Embracing recycled crafts helps you reduce waste while igniting your creativity.
Exploring Upcycled Clothing Projects
As we continue this creative journey, let’s take a look at upcycled clothing projects. With creativity, you can breathe new life into old garments.
- Tie-Dye T-Shirts: A classic and vibrant way to refresh your wardrobe! You can create unique patterns as no two t-shirts will ever turn out the same. Plus, it’s a great way to spend time with kids or friends.
- Denim Pocket Organizers: If you have old jeans lying around, cut them up and create fun storage solutions. These organizers are excellent for holding small items, keeping your space neat and stylish.
Giving your clothes a second chance not only promotes sustainability but also allows your personality to shine through.
Crafting with Nature’s Bounty
Finally, nature can be an endless source of inspiration. From pressed flower art to pine cone wreaths, the outdoors provides various materials for your next project.
- Pressed Flower Art: Collect seasonal flowers, press them, and create beautiful designs to frame. This art piece will give a natural and lovely touch to your home decor.
- Pine Cone Wreaths: Gather pine cones from your backyard, attach them to a wreath base, and hang it as a seasonal decoration—perfect for welcomes during holidays or any time of year.
Nature-inspired crafts help connect you with the environment while exploring creativity.
Crafting Fun for Kids
Lastly, explore crafts that will delight children and instill a love for creativity from a young age.
- Pipe Cleaner Animals: Simple and affordable, pipe cleaners can turn into a variety of creatures. Kids can let their imaginations run wild while creating their pet.
- Popsicle Stick Photo Frames: Using just popsicle sticks and some glue, kids can fashion their own unique photo frames to display cherished images, making it a fun project for family memories.
In conclusion, the act of crafting not only cultivates creativity but also creates opportunities for connection, fun, and sustainable living. So grab your supplies and get started! Happy crafting! 🎨
Paper Crafts
Transitioning into the delightful realm of paper crafts, there’s something inherently satisfying about manipulating a humble sheet of paper into stunning works of art. Not only are paper crafts easy to access and affordable, but they also offer endless possibilities for creativity and relaxation. Two particularly enchanting forms of paper crafts are origami and quilling, each with its unique charm and techniques. Let’s dive into these artistic endeavors!
Origami Creations
Origami, the Japanese art of folding paper, has captivated many for centuries. It requires precision, but once you get the hang of it, the possibilities are practically limitless. I still remember the first time I tried to fold an origami crane. It seemed impossible at first, but with a little practice, I managed to create a flock that now adorns my living room! Why You’ll Love Origami:
- Mindfulness: Each fold requires focus, making it a wonderful way to practice mindfulness. It’s quite therapeutic to just concentrate on the shapes.
- Portable: All you need is paper! You can fold anywhere—at home, in a park, or even on a long commute (as long as someone else is driving!).
- Great for All Ages: Kids and adults alike can enjoy folding. There are origami kits designed for beginners that make it easy to get started.
Popular Origami Projects to Consider:
- Crane: A symbol of peace and good fortune, the origami crane is a staple project for beginners.
- Origami Flowers: Impress your friends by creating beautiful bouquets that last forever.
- Animal Figures: From frogs that leap to butterflies that seem to flutter, the options are endless.
Helpful Tips for Beginners:
- Start with lighter paper, as it’s more forgiving and easier to fold.
- Follow video tutorials for tricky designs until you feel confident.
- Be patient—practice makes perfect, and each mistake is a step toward improvement!
Quilling Art
Quilling, or paper filigree, is another fantastic paper craft that involves rolling, shaping, and gluing strips of paper to create intricate designs. The first time I saw quilling was at an art show, where beautiful cards and wall hangings caught my eye. I felt instantly inspired and just had to give it a try! What Makes Quilling Special:
- Versatility: You can use quilling to make greeting cards, wall art, ornaments, and even jewelry. The only limit is your imagination!
- Detailed Designs: Quilling can produce astonishing results with relatively simple techniques. With just a few shapes, you can construct anything from delicate flowers to complex patterns.
- Social Crafting: Gather some friends for a quilling night! It’s a fun way to catch up while engaging in a creative activity.
Starting Your Quilling Journey:
- Basic Tools Needed: You’ll need quilling paper strips, a slotted tool for rolling, scissors, and glue.
- Common Shapes to Learn: Start with basic shapes: tight rolls, teardrops, and loose scrolls. These form the foundation for more complex designs.
- First Projects: Consider making a simple card for a friend or a small decorative piece for your home.
Simple Quilling Projects to Try:
- Greeting Cards: Add a quilled flower or design for a personalized touch.
- Framed Art: Create a small quilled piece and frame it as an artful decoration.
- Gift Tags: Enhance your gift-giving with uniquely quilled tags that friends will keep as mementos.
In summary, whether you are gracefully folding paper into beautiful forms or intricately shaping paper strips into stunning visual tales, both origami and quilling provide not just a creative outlet but also a way to unwind. They offer the chance to express yourself, create lasting memories through your projects, and perhaps even gift beautiful art to friends and family. So gather your paper, and let the world of paper crafts unfold before you! Happy crafting! ✂️📜

DIY Home Decor
Moving from the creative world of paper crafts, let’s explore the exciting arena of DIY home decor! The beauty of home decor projects lies in their ability to breathe new life into your space while allowing you to showcase your personal style. Two fabulous DIY projects that can easily transform your home are painted plant pots and rope coasters. Both are fun, approachable, and perfect for adding a personalized touch to your living environment.
Painted Plant Pots
One of my favorite ways to spruce up my indoor garden is through painted plant pots. It all began one rainy afternoon when I found some plain terracotta pots cluttering the garage. Instead of purchasing new decorative options, I decided to turn them into colorful companions for my houseplants. Why You’ll Love This Project:
- Personal Expression: This is a wonderful way to showcase your artistic flair. You can customize colors, patterns, and styles to match your personal taste and home decor.
- Inexpensive: Plain plant pots are quite budget-friendly, and you can often find them at dollar stores. The paint will also not break the bank.
- Therapeutic: Painting can be a meditative exercise—just you, your supplies, and a little creativity.
How to Paint Plant Pots:
- Gather Your Supplies:
- Terracotta pots
- Acrylic paint or outdoor paint
- Paintbrushes (various sizes)
- Sealant (optional)
- Palette or paper plate for mixing colors
- Select Your Design:
- Think about colors or themes that resonate with you or your home. You could opt for a modern minimalist style or go for vibrant bohemian patterns.
- I often find that flower motifs, geometric shapes, and bold stripes work great!
- Prep the Pot:
- Clean the pots to remove any dust.
- If you want a smoother application, lightly sand the surfaces.
- Start Painting:
- Use a base coat if desired and let it dry.
- Paint your design, layering different colors as needed. Let your creativity shine!
- Seal It:
- Allow the paint to dry completely, then apply a sealant to protect your artwork, especially if you’ll place the pots outside.
Tips for Success:
- Don’t rush! Take your time with the details.
- If you’re feeling adventurous, try adding textures using tools like sponges or stencils.
- Remember that perfection is not the goal; the beauty is in the creativity!
Rope Coasters
Another delightful DIY home decor project to consider is making rope coasters. I recently embarked on this fun activity during a crafting session with my kids. Not only did we enjoy creating these practical and stylish coasters together, but we also ended up with unique pieces that compliment our coffee table beautifully! Why Rope Coasters Are a Great Choice:
- Functional Art: Coasters protect your surfaces while adding a touch of style.
- Simple to Make: You don’t need a lot of experience to create something wonderful—just some rope, glue, and creativity!
- Customizable: You can choose your rope color, size, and even add embellishments like beads, fabric, or paint.
Steps to Create Your Own Rope Coasters:
- Materials Needed:
- Natural or colored cotton rope
- Hot glue gun and glue sticks
- Scissors
- Decorative elements (optional)
- Forming the Base:
- Cut several lengths of rope to your desired length and begin coiling them in a circular pattern.
- Use your hot glue gun to tack down the rope as you go. Be careful, as the glue can be hot!
- Build Up:
- Continue coiling and gluing in a spiral until you reach your desired thickness.
- To add a fun twist, try creating a few in different shapes and sizes for visual interest.
- Finishing Touches:
- Once you’ve created the coasters, let the glue set. You can also paint or decorate them for a more personalized feel.
Helpful Hints:
- Experiment with different rope colors and thicknesses to see what you love the most.
- Make a set as a thoughtful gift for family and friends—they’re perfect for housewarming gifts!
- I always find it helpful to work on multiple coasters at a time, which speeds up the process.
In conclusion, DIY home decor projects like painted plant pots and rope coasters offer a delightful way to uplift your space. Not only do they allow for creativity, but they also bring a warm, personal touch to your home that store-bought items often can’t replicate. So grab those supplies and let’s get crafting! Your home will thank you for it! 🌿🏠✨
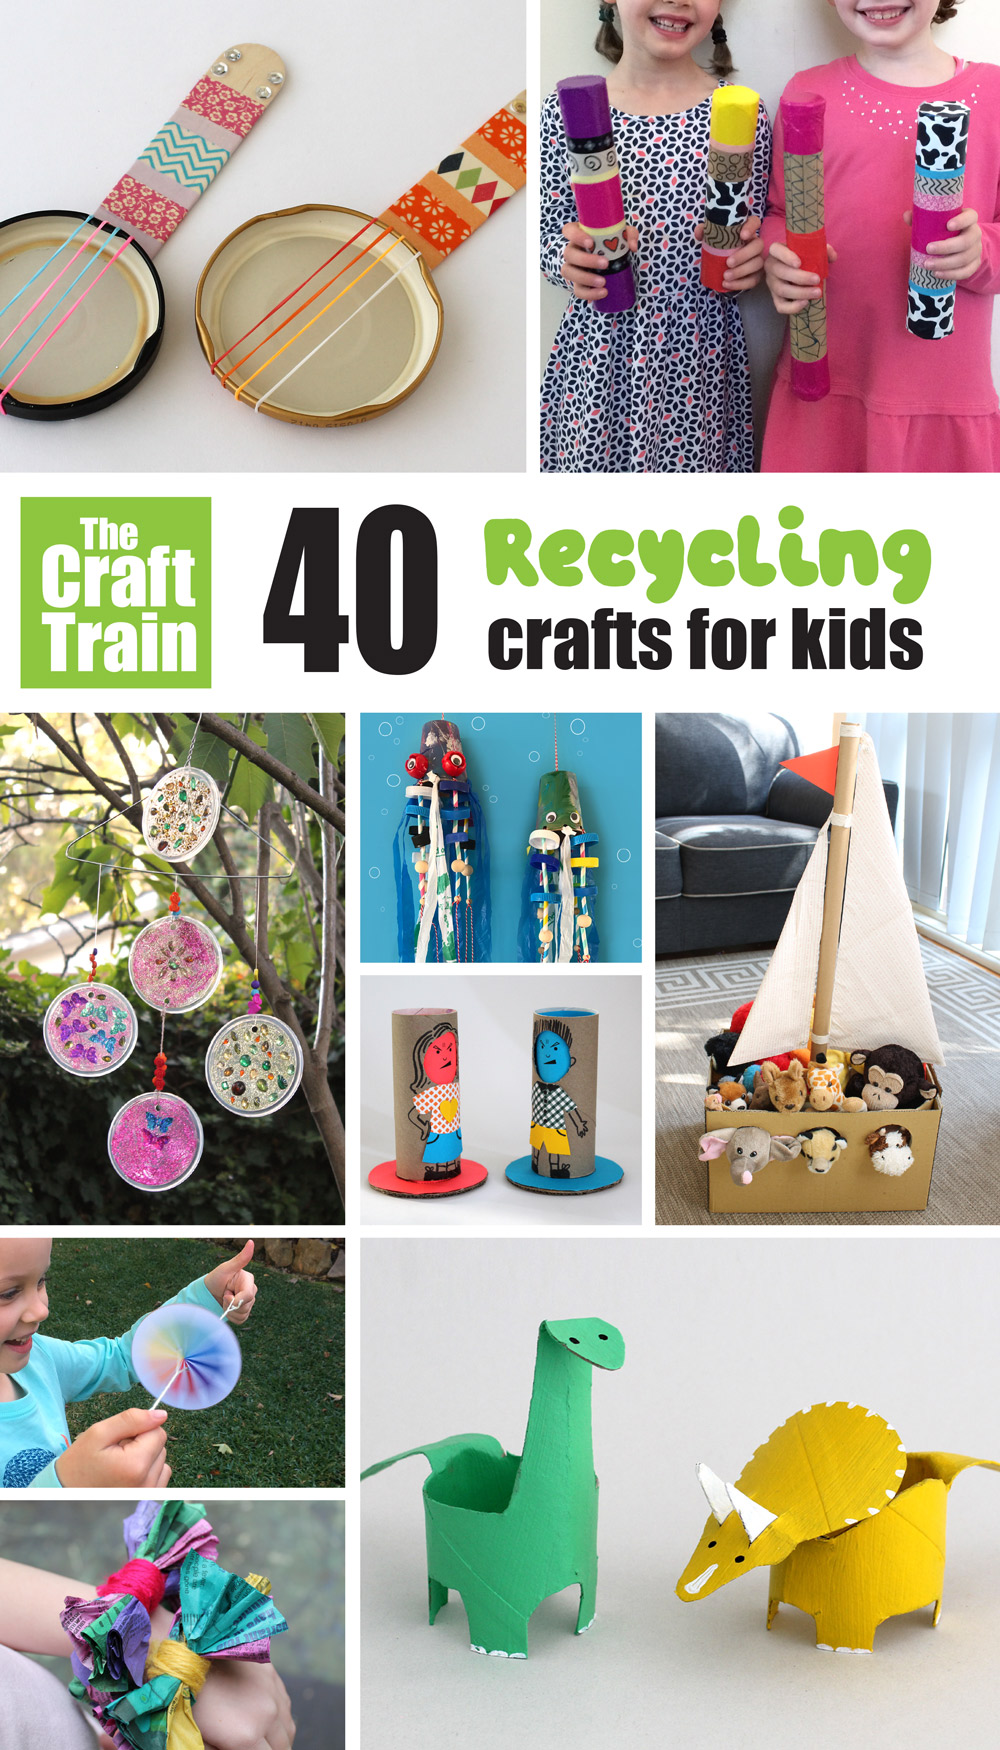
Recycled Crafts
Continuing our crafting journey, let’s delve into the wonderful world of recycled crafts! Not only are these projects environmentally friendly, but they also allow your creativity to shine by transforming everyday items into beautiful, practical pieces. Two incredibly fun and simple recycled crafts you can easily tackle at home are bottle cap magnets and tin can lanterns. Let’s explore these projects together!
Bottle Cap Magnets
One of my favorite ways to add a personal touch to my refrigerator is through bottle cap magnets. It all started when my friends and I hosted a beer-tasting party and we ended up with a mountain of forgotten bottle caps. Instead of tossing them away, we transformed them into fun magnets that now hold our family’s precious memories on the fridge. Why Bottle Cap Magnets Are Special:
- Creative Expression: You can personalize these magnets with photos, drawings, or decorative paper to showcase your style!
- Easy to Make: This project requires minimal supplies and is beginner-friendly, making it perfect for kids and adults alike.
- Fun and Practical: Not only do they beautify your space, but they’re also functional, helping you organize your reminders, pictures, or shopping lists.
Here’s How to Make Your Own Bottle Cap Magnets:
- Gather Your Materials:
- An assortment of bottle caps (cleaned)
- Magnets (can be purchased or salvaged from old fridge magnets)
- Glue (craft glue or a hot glue gun)
- Decorative elements (photos, scrapbook paper, or fabric)
- Scissors
- Prepare the Design:
- Decide how you want to fill the inside of the bottle caps. You might want to cut out small pictures or patterns that fit the bottle caps perfectly.
- I often find that printing fun images (like vacation photos) or motivational quotes works well!
- Adhere the Design:
- Using your glue, attach the chosen design to the inside of the bottle cap. Allow it to dry completely.
- For added flair, you can paint or embellish the outside of the cap.
- Attach the Magnet:
- Once the design is dry, glue a small magnet to the back of the bottle cap. Ensure it’s firmly attached so it doesn’t fall off when using it.
- Let everything dry, and voila! You now have unique bottle cap magnets ready to showcase on your fridge.
Tips for Success:
- Experiment with different sizes and styles of bottle caps for variations in your collection.
- For a family project, have everyone design their own magnets—this makes for a fun and personalized experience!
- Remember to use old magazines, newspapers, or your kids’ artwork for cute and personalized designs.
Tin Can Lanterns
Switching gears, let’s get crafty with tin can lanterns! This project is fantastic for reusing tin cans while creating stunning decor for your backyard or porch. I remember the first time my kids and I made these lanterns—our backyard turned into a magical oasis of soft glows and laughter under the stars. Why Make Tin Can Lanterns:
- Sustainable Crafting: This is a perfect way to repurpose cans that would otherwise end up in the trash or recycling bin.
- Charm and Ambiance: They add an enchanting glow to outdoor spaces, creating a cozy atmosphere for gatherings.
- Customizable: You can choose different designs, sizes, and colors to match your personal style or occasion.
Let’s Dive into Creating Tin Can Lanterns:
- Materials You’ll Need:
- Empty tin cans (try to remove labels)
- Hammer and a medium-sized nail (for puncturing the can)
- Water (for freezing)
- Paint (optional, for decorating)
- A tea light candle or battery-operated LED lights
- A towel for drying
- Prepare the Cans:
- Fill each tin can with water and place it in the freezer until solid. This prevents the can from bending while you work on it.
- Once frozen, take it out and let it sit for a few minutes until the water is firm yet soft enough to allow you to remove it.
- Create Your Design:
- Carefully tap the hammer and nail into the can to create designs. You can make hearts, stars, or even words—let your imagination guide you!
- The kids love making fun shapes, and it’s enchanting to see how their creativity shines.
- Complete the Lantern:
- After you finish designing, rinse the can to remove any ice fragments and dry it thoroughly.
- If desired, paint the outside of the can to create a colorful lantern. Allow the paint to dry completely.
- Place a tea light or LED inside, then find a suitable spot to hang or place your lantern.
Things to Keep in Mind:
- Always supervise children when using sharp tools like hammers!
- Consider hanging these lanterns from tree branches or using twine to give your outdoor space an elegant look.
In summary, recycled crafts like bottle cap magnets and tin can lanterns are not only affordable and eco-friendly but also provide an avenue for creativity and fun. By breathing new life into everyday items, you can add unique touches to your home and outdoor spaces while enjoying quality crafting time with your loved ones. These projects are perfect for any age—so gather your supplies and start crafting today! 🌟✨
Upcycled Clothing Projects
Transitioning from the creative flair of recycled crafts, let’s now explore the exciting world of upcycled clothing projects! Upcycling allows you to breathe new life into garments that may have lost their charm or practical use while reducing waste in a fun and fashionable way. Two popular upcycling projects you can try at home are tie-dye t-shirts and denim pocket organizers. Both projects are not only enjoyable but also yield fabulous results that you can proudly wear or use. Let’s dive into these crafty endeavors!
Tie-Dye T-Shirts
Tie-dyeing is a timeless skill that has recently seen a resurgence in popularity, and for good reason! It’s not only creative but also a fantastic way to transform plain or outdated t-shirts into trendy masterpieces. I remember an impromptu tie-dye party I hosted for my kids and their friends last summer. It turned out to be a delightful afternoon filled with laughter, color splashes, and some surprisingly artistic results! Why You’ll Love Tie-Dye:
- Personalization: You can create unique designs that reflect your personality. No two shirts will look alike, and that’s the beauty of it!
- Fun for Everyone: Tie-dye is suitable for all ages. Kids, teens, and adults can all participate and enjoy the colorful creations.
- Sustainable Fashion: Instead of discarding old t-shirts, give them a second chance to shine!
Getting Started with Tie-Dye:
- Gather Your Supplies:
- Cotton t-shirts (white or light-colored works best!)
- Tie-dye kit (or you can create your own using fabric dye)
- Rubber bands or string
- Plastic gloves
- Plastic table cover or trash bags (to protect your workspace)
- Water and spray bottles (for mixing colors)
- Design Your Shirt:
- There are numerous techniques to choose from, like the spiral pattern, stripes, or even hearts. I personally love the classic spiral for its vibrant results!
- To create the spiral, pinch the center of the shirt and twist it into a spiral shape, securing it with rubber bands.
- Applying the Dye:
- Follow the instructions on your dye kit; generally, you’ll mix the dye with water in spray bottles.
- Apply the dye generously to your shirt, focusing on different areas to achieve a blend of colors. Don’t be afraid to be bold; mixing colors creates stunning effects!
- Set the Dye:
- After dyeing, wrap the shirt in plastic wrap and let it sit for several hours or overnight to allow the colors to set.
- Once ready, rinse it in cold water until the water runs clear and then hang it to dry.
- Show Off Your Creation:
- Finally, wear your unique tie-dye t-shirt proudly or gift it to a friend to share the excitement!
Denim Pocket Organizers
As we continue our journey of upcycling, let’s look at another rewarding project: denim pocket organizers. This project is perfect for those well-worn jeans you can’t bear to toss away. It transforms them into functional storage solutions in a fun and creative way. I often use these organizers for everything from crafting supplies to kitchen utensils, and they’ve become a staple in my home! Why Denim Pocket Organizers Are a Great Idea:
- Functional and Stylish: These organizers are not only practical for keeping your space tidy, but they also add a rustic charm to your home decor.
- Simple to Create: You don’t need sewing expertise; just some basic skills will do!
- Eco-Friendly: By repurposing old jeans, you contribute to sustainability while showcasing your creativity.
How to Create Your Own Denim Pocket Organizer:
- Materials Needed:
- Old denim jeans
- Scissors
- Fabric glue (or a sewing machine if you’re comfortable)
- Optional: decorative elements (buttons, fabric paint, etc.)
- Preparing the Denim:
- Cut off the legs of the jeans at the desired length to create pockets. You can create several smaller pockets depending on the design you prefer.
- Think about how many pockets you want, as this will dictate where to cut.
- Assemble the Organizer:
- Start gluing or sewing the pockets together to form an organizer shape. You can attach them vertically or horizontally, depending on your preference.
- If you want to hang it, consider attaching a sturdy ribbon at the top.
- Personalize It:
- Add your personal touch by decorating the organizer with buttons, patches, or fabric paint. This is where your creativity can really shine!
- Find Its Place:
- Hang your new denim pocket organizer in your crafting area, the kitchen, or even the kids’ play area. It’s a fantastic way to keep things organized and easy to access!
Helpful Hints:
- Mix and match different denim colors for added visual appeal.
- Get creative with how you organize—these pouches can hold anything from office supplies to gardening tools.
In conclusion, upcycled projects like tie-dye t-shirts and denim pocket organizers not only allow you to express yourself creatively but also contribute to sustaining our planet by reducing waste. So gather your supplies and dive into these fun and rewarding activities today! Your wardrobe and living space will thank you, and you’ll enjoy the satisfaction of creating something unique and useful. Happy crafting! 🌈✂️🔧

Nature-inspired Crafts
Shifting gears from the colorful realm of upcycled clothing, let’s step into the enchanting world of nature-inspired crafts! There’s something truly magical about incorporating elements from nature into your creative projects. Not only do these crafts celebrate the beauty of the outdoors, but they also provide an excellent opportunity to unwind and connect with the environment. Two delightful projects to explore are pressed flower art and pine cone wreaths. Both are simple, enjoyable, and deeply satisfying. Let’s jump right in!
Pressed Flower Art
Pressed flower art is a captivating way to capture the fleeting beauty of flowers and foliage. I first discovered this craft while on a nature walk with my kids. We were collecting wildflowers and, after a bit of research, decided to press them. The results were phenomenal! We created beautiful pieces of art that now adorn our walls, reminding us of that lovely day outdoors. Why Pressed Flower Art Is Special:
- Personal Connection: Each piece tells a story, from the flowers chosen to the memories associated with their collection.
- Customizable: You can create everything from bookmarks to framed wall art, personalizing the style to match your home decor.
- Therapeutic Activity: The process of collecting, pressing, and arranging flowers is a meditative experience that allows you to unwind.
Getting Started with Pressed Flower Art:
- Gather Your Supplies:
- Fresh flowers and leaves (thin petals work best)
- A heavy book or a flower press
- Parchment paper or baking paper
- Frames or cardstock for display
- Glue (if mounting flowers)
- Collecting the Flowers:
- Choose a sunny day to collect flowers—this is when they’re at their freshest. My kids love looking for colors and types they haven’t seen before, turning it into a delightful scavenger hunt.
- Avoid collecting flowers from public or protected areas, keeping nature’s beauty intact.
- Pressing the Flowers:
- Place the flowers between two sheets of parchment paper and place them in the heavy book, closing it carefully.
- Alternatively, use a flower press if you have one. Leave them for at least a week to fully dry out.
- Create Your Artwork:
- Once the flowers are dry, carefully remove them from the book. You can then arrange and glue them onto cardstock or in frames as you wish.
- I often find that layering different flower types creates stunning visuals—experimenting is encouraged!
- Displaying Your Art:
- Display your pressed flower art in a shadow box or quirky frame to showcase your creative work. You will appreciate the reminders of the beauty nature offers!
Tips for Success:
- Experiment with different flower types and colors for diverse art pieces.
- Consider adding a personal quote or message to accompany your art, making it even more special.
Pine Cone Wreaths
Now let’s talk about pine cone wreaths, another beautiful way to bring nature into your home decor. I remember making my first pine cone wreath during the autumn season, and it quickly became a family tradition. Gathering pine cones during our nature walks and creating something lovely together brought us closer while sparking our creativity. Why Pine Cone Wreaths Are Wonderful:
- Seasonal Decor: These wreaths can be customized for any season or occasion, from festive holiday decorations to spring-inspired wreaths.
- Natural Materials: Using pine cones gives your decor a rustic, organic touch that brings the outdoors inside.
- Creative Outlet: There’s no limit to how you can decorate a pine cone wreath, allowing your imagination to lead the way.
How to Create Your Own Pine Cone Wreath:
- Gather Your Materials:
- Pine cones (the more, the merrier!)
- A foam or wire wreath frame
- Hot glue gun and glue sticks
- Optional decorations (ribbons, faux flowers, ornaments, etc.)
- Prepare the Pine Cones:
- Clean the pine cones to remove any dirt or debris. You can also bake them at a low temperature for about 20 minutes to eliminate any pests.
- If desired, you can spray paint them in colors that match your decor.
- Start Assembling:
- Use your hot glue gun to attach the pine cones around the wreath frame. Start from the outer edge and work inward, filling in any gaps as you go.
- Don’t be afraid to overlap them slightly for a fuller look!
- Add Personal Touches:
- Once your pine cones are securely attached, you can embellish your wreath with ribbons, faux flowers, or seasonal decorations.
- Personalizing it makes the wreath uniquely yours and adds character.
- Hang Your Wreath:
- Find a perfect spot to display your beautiful wreath—on the front door, in the living room, or even above the mantel.
Crafting Tips:
- Directionality matters! Lay out your pine cones before gluing them to help with placement.
- Engage the whole family; it’s a lovely way to spend time together and create cherished memories!
In conclusion, nature-inspired crafts like pressed flower art and pine cone wreaths invite you to connect with the beauty of the world around you. They offer a chance to relax while expressing your creativity and can serve as great decor pieces or heartfelt gifts. So gather your supplies and let nature inspire your next crafting adventure! 🍂🌸🍃
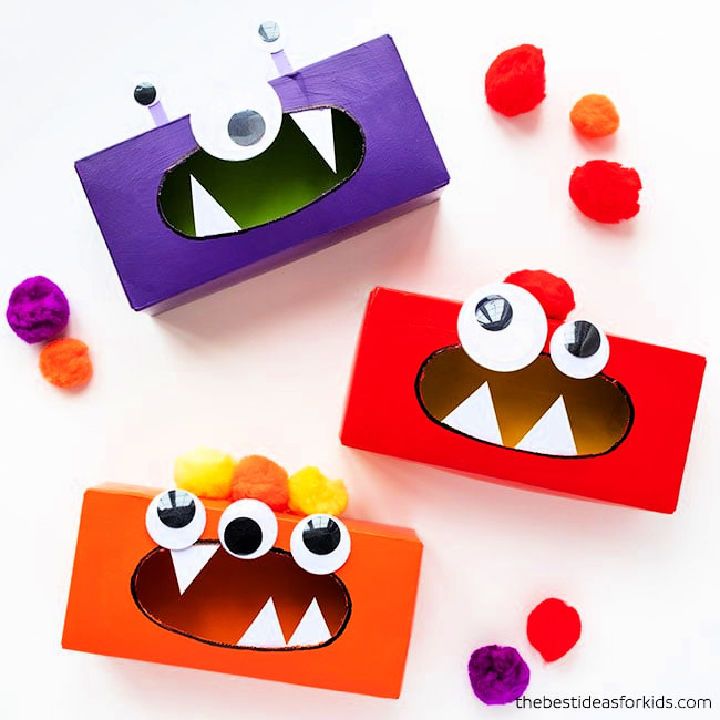
Kids’ Crafts
As we transition from nature-inspired crafts, let’s dive into the exciting world of kids’ crafts! Engaging in crafting projects with children not only sparks creativity but also nurtures fine motor skills, fosters problem-solving abilities, and strengthens bonds as you collaborate on fun activities. Two wonderfully simple and entertaining projects you can embark on with your little ones are pipe cleaner animals and popsicle stick photo frames. Both crafts are a hit among kids and will surely bring a smile to their faces. Let’s get crafting!
Pipe Cleaner Animals
Pipe cleaners are one of the most versatile crafting materials available, and they provide endless opportunities for creativity! I remember a rainy afternoon when my children and I decided to create a zoo in our living room using just pipe cleaners. It turned into a delightful adventure filled with laughter and imaginative stories, as each animal had its own personality! Why Pipe Cleaner Animals Are Fantastic:
- Imagination Unleashed: Kids can create any creature they can dream up—real or mythical—without limitations!
- Fine Motor Skills: Manipulating pipe cleaners helps develop hand-eye coordination as children twist, wrap, and bend them into shapes.
- Easy Cleanup: Unlike glitter or paint, pipe cleaners create minimal mess, making them a parent’s best friend!
Let’s Get Started on Pipe Cleaner Animals:
- Gather Your Supplies:
- A variety of colorful pipe cleaners
- Googly eyes (optional)
- Scissors (for adult supervision)
- Craft foam or felt (for additional decorations, such as ears or wings)
- Choosing Animals:
- Ask your kids to pick their favorite animals to create. I love to encourage them to think outside the box! From cats to dragons, the sky is the limit.
- For younger kids, start with simple shapes like snakes or butterflies to build confidence.
- Crafting Time:
- Show them how to bend and twist the pipe cleaners to create bodies, limbs, and heads.
- Use additional pipe cleaners and offer tips on how to create details—maybe a little crown for a pipe cleaner princess or antennae for a bug.
- Allow them to express themselves freely and make adjustments as they see fit. After all, creativity knows no bounds!
- Finishing Touches:
- Once they’re satisfied with their creations, they can embellish them with googly eyes or add accessories made from craft foam.
- For added fun, you can create a little habitat with toys or cardboard to showcase their pipe cleaner animals.
Tips for Success:
- Celebrate their creativity by letting them narrate a story about their animals. This exercise promotes storytelling and boosts confidence.
- Encourage collaborative projects where siblings or friends create a group of animals together.
Popsicle Stick Photo Frames
Now, let’s shift gears and talk about the ever-popular popsicle stick photo frames! This craft is an excellent way for kids to display their favorite memories while being creative. We recently made some during a family gathering, and the kids loved customizing their frames with stickers and paints. The laughter and excitement were contagious, and each frame ended up reflecting the personality of its creator! Why Popsicle Stick Photo Frames Are a Winner:
- Memorable Keepsakes: Children can personalize these frames with photos, creating treasured mementos.
- Simple Craft: The materials are easy to find, and the process is straightforward, making it suitable for kids of all ages.
- Room Decor: These frames make beautiful decorations for their rooms or thoughtful gifts for family members.
Creating Popsicle Stick Photo Frames:
- Gather Your Materials:
- Popsicle sticks (standard or jumbo, depending on the size of the frame you want)
- Glue (craft glue, hot glue, or glue sticks)
- Paint or markers (for decorating)
- Decorative elements (stickers, sequins, ribbons, etc.)
- A favorite photo
- Crafting the Frame:
- Start by laying out the popsicle sticks to form a rectangle or square. A basic design would be four sticks for the outer edges and two for the inner supports.
- Once they’re arranged, use glue to hold them together. Leave a small opening at the top where the photo can be inserted.
- Personalizing the Frame:
- After the glue has dried, allow your child to paint or decorate the frame however they like. This is where their creativity truly shines!
- Encourage them to illustrate designs or colors that represent their personality. Help them attach additional embellishments to make the frame uniquely theirs.
- Inserting the Photo:
- Once it’s decorated and fully dry, they can insert their favorite photo and find the perfect spot to display their creation.
- You can also loop a long piece of twine or string through the top for easy hanging.
Crafting Tips:
- Consider a themed frame for special occasions, like birthdays or holidays.
- Capture candid moments during the crafting process—it’s part of the crafting adventure!
In summary, engaging in crafts like pipe cleaner animals and popsicle stick photo frames fosters creativity and connection among children and their families. These projects not only allow kids to express themselves but also result in charming keepsakes that they can cherish for years to come. So gather your supplies and let the crafting fun begin—happy crafting! 🎨🦙📸