
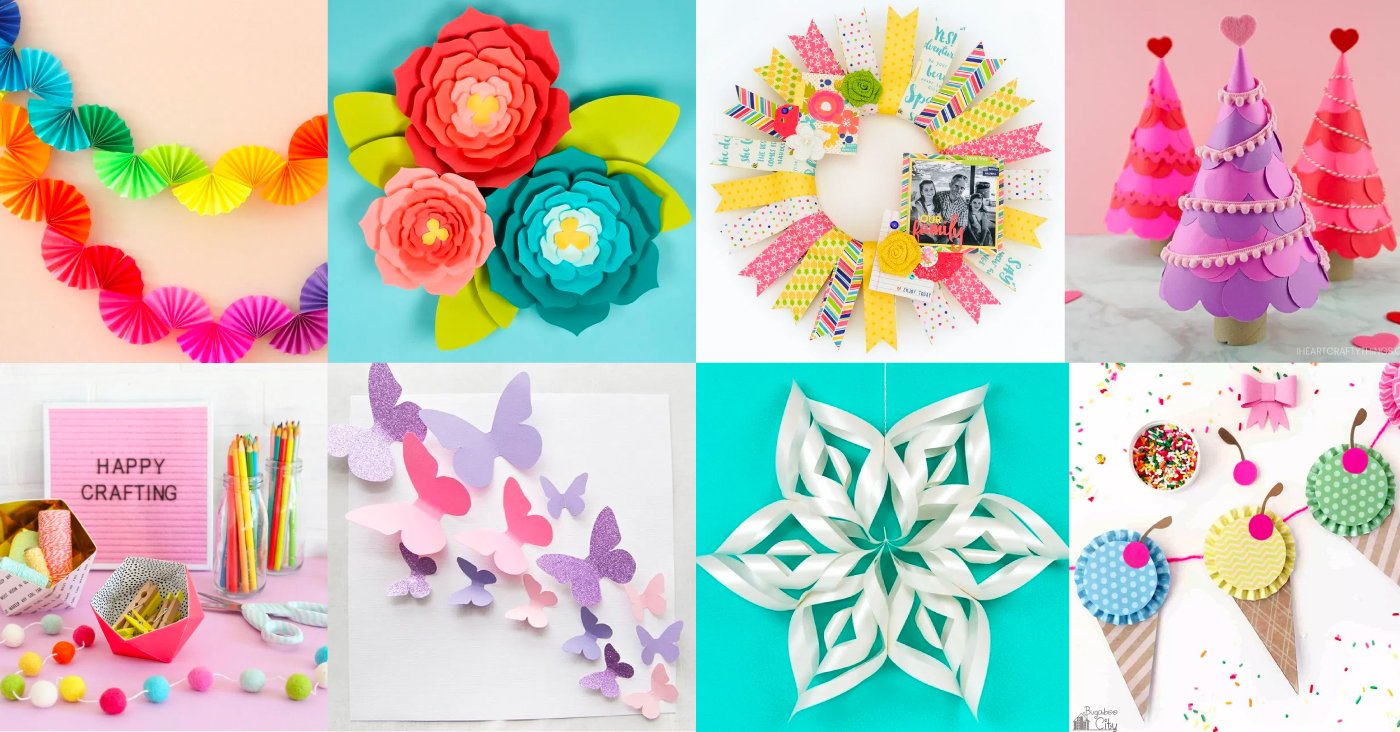
Crafting is a delightful journey that taps into our creativity and resourcefulness. It doesn’t just offer an outlet for self-expression but also invites you to explore innovative ways to transform everyday materials into beautiful pieces of art. Whether you’re at home looking for a fun project to do alone or with family, you’ll find endless possibilities in the world of crafting. Let’s dive into some popular categories and share inspiring ideas that can boost your crafting experiences!
Section 1: Paper Crafts
Origami Creations
Origami, the art of folding paper into intricate designs, has captivated many for centuries. It’s an ideal way to start crafting since it requires minimal tools—just beautiful paper and your hands.
- Cranes: A classic origami piece symbolizes peace. With a bit of practice, you can create a whole flock!
- Flowers: Imagine adorning your desk with vibrant origami flowers that never wilt. They’re perfect for gifts or home decor.
A fond memory I have was teaching my niece to fold a paper crane during a summer afternoon. Her excitement upon completing her first crane was watching her little face light up—it reminded me how satisfying crafting can be for all ages.
Paper Mache Projects
Moving beyond intricate folds, paper mache opens up a world of more substantial creations. Paper mache allows you to use old newspapers or scrap paper to create robust sculptures or decorative items.
- Decorative Bowls: Layering it in a bowl shape can yield beautiful, custom bowls perfect for holding miscellaneous items.
- Masks and Puppets: Why not make masks for an upcoming party or craft puppets for storytelling? They’re fun and interactive!
Remember the first time you tried paper mache? It’s messy, sure! But that mess is part of the fun. As the wet paper forms take shape, watching your artistic vision come alive is incredibly rewarding.
Section 2: DIY Home Decor
Hand-painted Signs
Now that you’ve explored paper crafts, let’s move onto DIY home decor. Hand-painted signs are a fantastic way to add a personal touch to your home. These can be simple, motivational quotes or unique signs for different rooms.
- Supplies Needed:
- Wooden boards or canvas
- Acrylic paints and brushes
- Stencils (if desired)
Creating this could be a wonderful activity for a weekend project. Just last fall, I painted a sign for my garden that reads “Welcome to My Sanctuary.” It instantly made my space feel more inviting!
Upcycled Furniture Ideas
Upcycling is about taking old furniture and giving it a new lease on life. It’s one of the most satisfying DIY projects you can undertake.
- Chalk Paint: A quick coat of chalk paint can revitalize tired furniture, making it look brand new.
- Fabric Reupholstery: If you’ve got a chair that needs a facelift, reupholstering it with vibrant fabric can change the entire room’s vibe!
One of my proudest upcycling accomplishments was turning an old, drab dresser into a stunning statement piece with shade transitions and drawer pulls from a flea market. It’s not just about beauty—it’s about sustainability!
Section 3: Fabric Crafts
No-Sew Pillows
Fabric crafts are an essential part of the crafting world. No-sew pillows are an ideal starting point if you prefer a hassle-free approach.
- Supplies Required:
- Fabric squares
- Scissors
- Stuffing (or a pillow insert)
By cutting fabric into squares and using simple knots, you can create beautiful, fluffy pillows in no time. I remember making a few of these for my couch a few years ago—so easy and rewarding!
Patchwork Quilting
Patchwork quilting allows you to use bits and pieces of fabric—perfect for showcasing your creativity.
- Collecting Fabric: Use old clothes, fabric scraps, or even thrifted fabrics.
- Designing Patterns: Lay it out on the floor to visualize your quilt before sewing it together.
Creating a patchwork quilt is a labor of love, but once completed, the colors and patterns create a beautiful story. I participated in a quilt-making workshop and learned just how comforting stitching with friends can be!
Section 4: Recycled Materials
Plastic Bottle Sculptures
Ready to think outside the box? Recycled materials craft offers a chance to save the planet while crafting. Plastic bottle sculptures are an innovative way to reuse and reduce waste.
- Material Needs: Empty plastic bottles, scissors, and paint.
- How-to: Cut and shape bottles into flowers or animals, and you can even use them as garden decorations!
I once crafted a colorful bouquet of plastic bottle flowers that turned my garden into a whimsical space. They are light, playful, and something I proudly display!
Cardboard Tube Organizer
Cardboard tubes, often discarded, can be transformed into chic organizers. They can keep your stationery or craft supplies sorted.
- Creation Steps: Cut tubes to varying heights and glue them together in a decorative box.
After making one for my craft supplies, I noticed things were finally organized. Plus, it’s an easy project to do with kids!
Section 5: Nature-Inspired Crafts
Pressed Flower Art
Nature’s beauty can inspire fantastic craft projects. Pressed flower art captures the essence of blooms in a timeless display. Collect flowers during a nature walk, press them between heavy books, and assemble them into art pieces after a week.
- Crafting Tip: Use glass frames to highlight your pressed flowers beautifully.
Creating framed pressed flower art brings a little touch of nature into your home. I made a few for gifts, and they were always well-received!
Pinecone Decorations
Pinecones are perfect materials to craft unique seasonal decorations that celebrate the seasons.
- Craft Ideas:
- Paint them for ornaments or centerpieces.
- Use them in wreaths or garlands for added character.
During a fall festival, I collected pinecones and crafted a stunning wreath that adorned my front door for months. It’s simple yet effective in showcasing your crafting flair. In summary, embracing the world of crafts allows you to express creativity while also providing practical benefits and sustainable options. Whether you’re folding paper, upcycling furniture, or making decor from nature, there’s something for everyone. Now, gather your supplies, unleash your creativity, and enjoy the experience that comes with crafting! Happy creating! 🎨✨
Section 1: Paper Crafts
When it comes to crafting, paper is one of the most versatile materials you can use. Not only is it readily available and budget-friendly, but it also opens up endless possibilities for creating intricate designs and fun projects. In this section, we will explore two fantastic areas of paper crafts: origami creations and paper mache projects. Whether you’re a novice or a seasoned crafter, there’s something enjoyable waiting for you!
Origami Creations
Origami, the traditional Japanese art of folding paper, has become a beloved pastime for people around the world. It’s fascinating how a simple piece of paper can transform into intricate shapes and designs just through the art of folding. Here are some key benefits of engaging in origami:
- Mindfulness Practice: The focus required for folding can be meditative, helping you unwind.
- Enhances Motor Skills: Each fold requires precision, which improves dexterity—great for both kids and adults!
- Boosts Creativity: Experimenting with designs encourages out-of-the-box thinking.
Getting Started with Origami:
- Select Your Paper: Choose origami paper for its lightweight quality and colorful designs. If you don’t have it, regular printer paper will work for practice!
- Begin with Simple Designs: Start with straightforward shapes like a crane or a boat. You can find tutorials online that guide you step by step.
- Practice Regularly: The more you fold, the better you’ll get. Challenge yourself to try new designs every week, and don’t hesitate to share your work with friends for feedback.
I remember the first time I attempted to fold an origami crane during a rainy afternoon at my friend’s house. We were so caught up in trying to perfect our cranes that we lost track of time, and by the end, we had created a whole flock! I still display those paper cranes, and they become a conversation starter whenever someone visits. Some Fun Origami Projects to Try:
- Origami Flowers: Perfect for decoration or giving as gifts. Try making a bouquet to surprise someone special!
- Bookmarks: Simple but practical. You can create animal-shaped bookmarks, which make reading more charming.
- Decorative Boxes: These can be used for storage or gifting, proving that origami is not just beautiful but functional too!
Paper Mache Projects
Next up is paper mache—another classic paper craft that allows you to make sturdy items using layers of paper and a glue mixture. It’s a fantastic way to recycle old newspapers and other paper materials, transforming them into vibrant sculptures, decor, or functional pieces. Why Try Paper Mache?
- Creativity Unleashed: You can mold your imagination into tangible forms, whether that’s a decorative animal or a functional bowl.
- Team Activity: It’s a fun project you can do with family or friends, fostering teamwork and creativity together.
- Low Cost, High Reward: With just some simple materials like paper, flour, and water, you can create something unique!
Getting Started with Paper Mache:
- Supplies You’ll Need:
- Old newspapers or scrap paper
- Flour and water (or glue)
- A form for shaping (balloons, cardboard, or even wire frames)
- Paint for decorating
- Creating Your Paper Mache Mix: Mix one part flour with two parts water to create a paste. Alternatively, you can use a mixture of water and white glue.
- Layering Technique:
- Tear your paper into strips.
- Dip the strips into the paste, removing excess.
- Layer them onto your form, creating several layers for strength. Aim for at least three layers, letting it dry in between.
- Finishing Touches: Once your piece is fully dried and sturdy, paint it to add color and personality. You can even embellish it with stickers or other craft supplies!
One memorable paper mache experience I had was creating a planet-shaped sculpture for a school project. We covered a balloon with layers of newspaper, forming the core of the planet. Once it dried, I painted it as a vibrant Earth model. I felt so accomplished when it was displayed in the school hallway! Creative Paper Mache Project Ideas:
- Animal Sculptures: Create playful animal figures for decorations or as gifts for children.
- Bowls and Plates: Craft custom bowls that can be used for holding small items or as unique centerpieces.
- Masks: Perfect for parties or Halloween. Design fun characters and really let your creativity shine!
In conclusion, paper crafts such as origami and paper mache present fantastic opportunities to explore your creativity while providing engaging activities. From delicate folds to larger-than-life sculptures, these projects are bound to spark joy and satisfaction. So gather your paper and crafting supplies, and let your imagination take flight! Remember, crafting is not just about the end product; it’s about enjoying the process and making memories along the way. Happy crafting! ✂️🌟

Section 2: DIY Home Decor
With your creativity flourishing through paper crafts, it’s time to move on to something a little closer to home—DIY home decor! Creating your own decorative items not only enhances your living space but also allows you to express your unique style. Two standout projects in this category are hand-painted signs and upcycled furniture. Let’s explore how you can elevate your home with these delightful DIY projects!
Hand-painted Signs
Hand-painted signs are a fantastic way to add a personal touch to your home. Whether you want to showcase motivational quotes, directional signs for your garden, or simply labels for different spaces, the possibilities are endless. Plus, these can be a fun project to embark on solo or with friends and family. Why Hand-painted Signs?
- Personalization: Customize your messages and designs to resonate with your personality and style.
- Versatility: Use them throughout your home, from the front porch to kitchen walls, or even in gardens!
- Creative Outlet: It’s a perfect way to express your artistic side without needing to be a master painter.
Getting Started with Your Hand-painted Signs:
- Supplies You’ll Need:
- Wooden boards or old planks (you can even use an old door!)
- Acrylic paints (these are bright and quick-drying)
- Brushes in different sizes
- Stencils (optional, but they can help you achieve precise lettering)
- Clear sealant for protection
- Design Your Sign:
- Choose a Theme: Decide what you want your sign to say. It could be something inspirational, your family name, or even a fun saying.
- Sketch It Out: Before painting, sketch your design on paper to get a feel of how it will look on the board.
- Painting Steps:
- Paint a base coat of your chosen background color on your board.
- Once dry, use stencils or freehand to add your text and designs.
- After everything dries, seal your sign with a clear coat to protect it from the elements if it’s going outdoors.
One my favorite hand-painted signs was a “Welcome” sign I created for my front porch. I used bold, cheerful colors, and despite not being a seasoned painter, I was thrilled to see how it turned out. Every guest who walks through my door comments on it, and it truly makes the entrance feel warmer and more inviting! Ideas for Unique Signs:
- Garden Signs: Point the way to vegetables, herbs, or flower beds.
- Seasonal Signs: Create different signs for holidays like Thanksgiving or Christmas.
- Quotes: A daily dose of inspiration can be a lovely addition to any wall.
Upcycled Furniture Ideas
Now let’s dive into upcycled furniture—transforming old, forgotten pieces into beautiful, functional items. This is not only budget-friendly, but it’s also an environmentally conscious choice that keeps furniture out of landfills. Why Upcycling?
- Sustainability: Reusing furniture reduces waste and promotes a circular economy.
- Uniqueness: Each piece tells a story and can be customized to fit your personal style.
- Cost-Effective: You can refresh your space without spending a fortune on new furniture.
Steps to Upcycle Furniture:
- Find Your Piece:
- Look for furniture at thrift stores, garage sales, or even from friends and family.
- Keep an eye out for quality pieces that just need a little TLC.
- Evaluate and Plan:
- Inspect the piece for any damages that need repair.
- Think about design options—could a new paint job breathe life into it?
- Choose a Refreshing Technique:
- Chalk Paint: Great for giving a vintage look. It adheres to various surfaces easily and requires minimal prep.
- Decoupage: Use decorative paper or fabric to cover surfaces, making it colorful and unique.
- Staining: Enhance the natural beauty of wood by applying a new stain to give it a fresh look.
- Get Your Hands Dirty:
- Clean and prepare the furniture surface.
- Apply paint, decoupage, or stain as planned, allowing adequate drying time between coats.
- Finish off with a sealer for added durability.
One memorable piece I upcycled was a dated wooden dresser that I found on a curb during neighborhood clean-up day! With a little sanding and some vibrant teal chalk paint, I transformed it into a stunning side table for my living room. Not only did it give my decor a pop of color, but it also became a topic of conversation for visitors! Upcycling Ideas to Inspire You:
- Old Chairs: Reupholster with cheerful fabric, giving them a fresh appearance and new use.
- Wine Crates: Stack them in a fun arrangement to create a rustic bookshelf or display for plants.
- Suitcases: Repurpose them as unique side tables or storage.
In conclusion, DIY home decor projects like hand-painted signs and upcycled furniture not only beautify your space but also reflect your personal style and creativity. Embrace the joy of crafting decor that means something to you while contributing to a more sustainable world. Grab those supplies and get started on your next DIY adventure—you’ll be amazed at what you can create! Happy decorating! 🌼🛠️
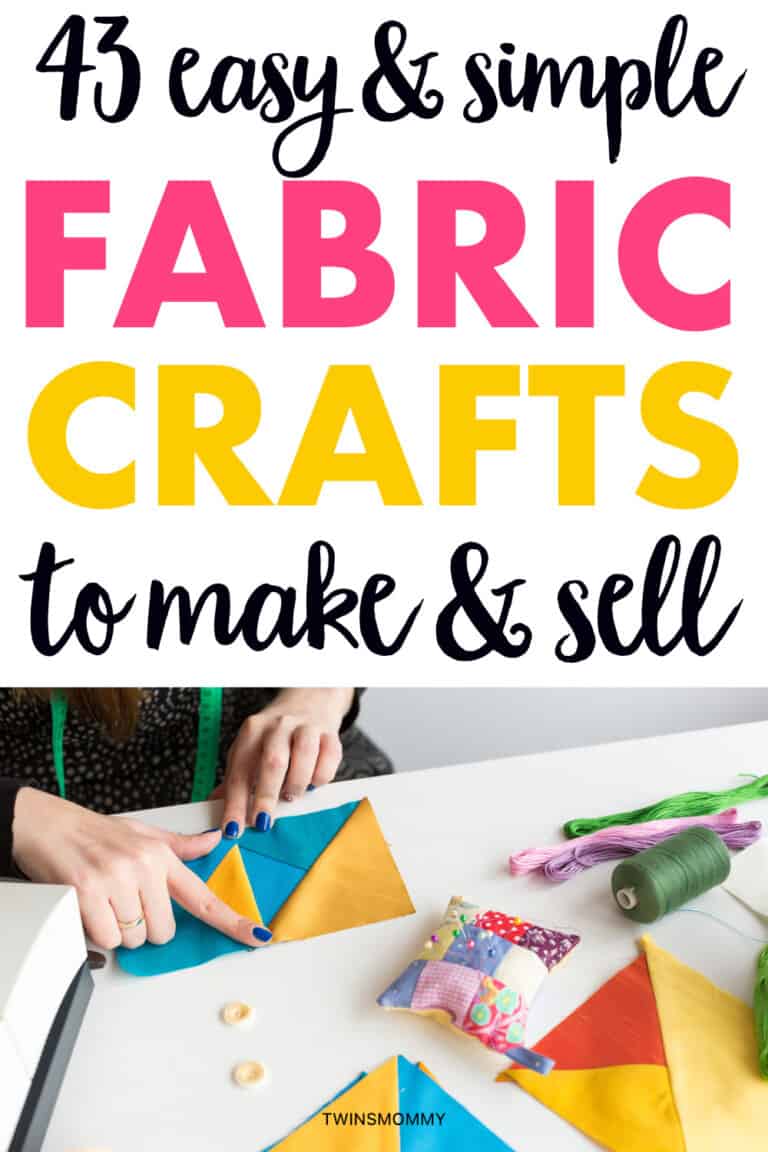
Section 3: Fabric Crafts
As we continue our creative journey, let’s delve into the world of fabric crafts! Fabric offers endless opportunities for crafting, allowing you to create beautiful and practical items for your home or as gifts. In this section, we’ll explore two popular fabric crafts: no-sew pillows and patchwork quilting. Both are amazing ways to express your personality and add a pop of color to any space!
No-Sew Pillows
No-sew pillows are fantastic for those who might feel intimidated by sewing machines or simply want to create cushions quickly and easily. They add comfort and style to any room while requiring minimal effort! Why Go for No-Sew Pillows?
- Quick and Easy: Perfect for beginners or anyone short on time.
- Flexible Design: Customize them with various fabrics and colors to match your decor.
- Fun for All Ages: A great project for kids, allowing them to participate in crafting.
Getting Started with No-Sew Pillows:
- What You’ll Need:
- Two pieces of fabric (flannel, fleece, or cotton work wonderfully)
- Scissors
- A ruler or measuring tape
- Stuffing or an old pillow insert
- Fabric markers (optional for decoration)
- Choosing Your Fabric:
- Pick a color scheme that complements your room. Think solid colors or fun patterns like florals or geometric shapes that resonate with your style.
- Cutting the Fabric:
- Cut both fabric pieces into squares or rectangles, depending on the size you want your pillow to be. A good starting size is 18×18 inches.
- Ensure that the pieces are identical in size.
- Creating the Pillow:
- Stack the fabric pieces with the patterned sides facing each other.
- Cut 1-inch slits at 1-inch intervals along the edges of the fabric (all around). You’ll need to create holes for tying.
- Tie the slits together in knots, leaving one side open for stuffing.
- Once stuffed, tie off the final side, ensuring it’s snug and secure.
I remember making my first no-sew pillow while watching a movie one evening. I grabbed some leftover fleece fabric I had from another project, cut it up, and tumbled into a cozy pillow in no time! It turned out to be so incredibly soft; it quickly became my favorite pillow to snuggle with while binge-watching shows. Decorating Your No-Sew Pillow:
- Fabric Markers: Personalize it with doodles or quotes that inspire you.
- Embellishments: Add ribbons, buttons, or fabric flowers for added flair.
Patchwork Quilting
Moving on to a more intricate fabric craft, patchwork quilting offers another layer of creativity. This craft involves sewing together pieces of fabric to create a larger design, resulting in unique blankets, wall hangings, or even bags. Why Embrace Patchwork Quilting?
- Creative Expression: Each piece of fabric can tell a different story or represent a memory.
- A Timeless Craft: Quilting has historical significance, making it a cherished tradition among many families.
- Customizable: You can create quilts for any occasion, whether it’s for a baby gift or seasonal decor.
Getting Started with Patchwork Quilting:
- Gather Your Supplies:
- Various fabric squares (in different colors/patterns)
- Rotary cutter or scissors
- Quilting ruler
- Sewing machine (or needle and thread for those who prefer hand sewing)
- Batting for added warmth
- Choosing Your Fabrics:
- Select fabrics that complement each other. Use a mix of patterns, textures, and colors to add depth to your quilt.
- Repurposing old clothes or fabric scraps can give your quilt a personal touch.
- Cutting the Fabric:
- Cut your fabric pieces into uniform sizes. A typical patchwork quilt square can be 5×5 inches, but feel free to adjust it to your liking.
- Designing the Layout:
- Lay out your squares on a flat surface. Experiment with different configurations until you find something that feels balanced and visually appealing.
- Sewing It Together:
- Start sewing your squares together row by row.
- Press seams flat with an iron to help pieces lay flat and look polished.
- Once completed, add batting and another layer of fabric to create the quilt sandwich.
- Finally, sew the layers together and bind the edges to finish.
One memorable quilting experience was when I joined a local quilting group. We decided to create a quilt for a charity, and each member contributed fabric pieces representing their backgrounds. It became a beautiful tapestry of diverse colors and textures, all stitched together with love. Tips for Successful Patchwork Quilting:
- Take Your Time: Enjoy the process and don’t rush. Crafting is about finding joy in the journey!
- Practice Patience: It may take time to see results, so embrace each step along the way.
- Don’t Hesitate to Experiment: Trying out different layouts and color combinations can lead to wonderful surprises.
In conclusion, fabric crafts, such as no-sew pillows and patchwork quilting, perfectly blend functionality with creativity. Whether you’re creating cozy cushions or unique quilts, these projects offer opportunities to showcase your personality and bring warmth into your home. So gather your fabric, embrace your creative spirit, and let’s craft something beautiful! Happy sewing! 🧵✨

Section 4: Recycled Materials
As we seamlessly transition from fabric crafts to an equally creative realm, let’s dive into the exciting world of recycled materials! Upcycling and repurposing items is not only a fantastic way to reduce waste but also an opportunity to unleash your creativity. In this section, we’ll explore how you can transform everyday items like plastic bottles and cardboard tubes into stunning and functional pieces. Let’s roll up our sleeves and get started!
Plastic Bottle Sculptures
Plastic bottle sculptures are a brilliant way to turn waste into art. With a little imagination and creativity, you can transform empty bottles into beautiful pieces that enhance your home or garden. This craft is particularly engaging for kids, making it a perfect family project! Why Create Plastic Bottle Sculptures?
- Environmental Impact: Helps reduce plastic waste by repurposing materials that might otherwise end up in landfills.
- Cost-Effective: You can create impressive sculptures without spending a dime—just gather your household recyclables!
- Endless Creativity: There are no limits to what you can create; from whimsical creatures to DIY garden decorations, the possibilities are vast.
Getting Started with Plastic Bottle Sculptures:
- What You’ll Need:
- Empty plastic bottles
- Scissors or a craft knife
- Paint (acrylic or spray paint)
- Hot glue gun or a strong adhesive
- Optional embellishments (like beads, fabric, or sequins)
- Ideas for Sculptures:
- Garden Flowers: Cut the bottles to create flower petals, paint them vibrant colors, and attach them to stakes to insert in your garden.
- Animal Figures: Transform bottles into butterflies, birds, or fish by cutting and painting them. Be creative with additional materials for eyes or fins!
- Planters: Cut the top off a bottle, add soil, and plant small flowers or herbs for unique and fun planters.
One of my fondest memories of working with plastic bottles was when my friends and I participated in a community art project. We each brought in several bottles and had a competition to see who could create the most imaginative garden sculpture. The winner crafted a majestic peacock that stood proudly in the park and was the talk of the town! 🌸🐦 Steps to Make a Simple Plastic Bottle Flower:
- Cut the Bottle: Take a clean plastic bottle, cut the top into various petal shapes.
- Paint the Petals: Use vibrant acrylic paints to add color to each petal.
- Create the Stem: Use a wooden dowel or a stick for the stem.
- Assemble: Glue the petals around the top of the stem and let them dry.
Cardboard Tube Organizer
Now let’s shift our focus to another treasured waste item—cardboard tubes! These often-overlooked items can quickly be turned into practical organizers for your home. Think of all the clutter in your drawers and on your desk; cardboard tubes can help bring order and style! Benefits of Using Cardboard Tubes:
- Impressive Organization: They can help sort pens, pencils, and craft supplies, making your workspace tidier.
- Easy to Make: Crafting with cardboard tubes requires minimal effort and basic supplies, making it perfect for all skill levels.
- Fun for All Ages: Get the kids involved! This project is a fantastic way to teach them about recycling while crafting.
How to Create a Cardboard Tube Organizer:
- Gather Your Supplies:
- Cardboard tubes (from toilet paper or paper towels)
- Decorative tape or wrapping paper
- Scissors
- A box or a tray for base (optional)
- Preparation:
- Clean the tubes to remove any residual glue or tape.
- Decide how many tubes you want to use based on your needs.
- Decorating the Tubes:
- Cover the tubes with decorative tape, fabric, or wrapping paper to add a touch of style.
- You can paint them as well, making each tube unique.
- Assemble the Organizer:
- Secure the tubes together, using glue to hold them in place, or simply place them in a container or tray to consolidate them.
- Arrange the tubes vertically to store items or lay them down to create a pen holder.
I remember setting up my own cardboard tube organizer when I was in college. I decorated it with scrapbook paper in my favorite prints, and it brightened up my desk while keeping my pens and brushes tidy. It was a fun way to add my personal touch to my study space! 🖍️📎 Creative Uses for Your Cardboard Tube Organizer:
- Desk Essentials: Use to organize pens, markers, and scissors.
- Craft Supplies: Store thread, small tools, or washi tape for easy access.
- Kids’ Arts and Crafts: Let the little ones keep track of their coloring supplies and craft interests!
In conclusion, working with recycled materials like plastic bottles and cardboard tubes provides an excellent opportunity to ignite your creativity while promoting sustainability. Both of these projects not only reduce waste but also add a personal touch to your home. So, gather those recyclables, spark your imagination, and transform everyday waste into extraordinary treasures. Happy crafting and recycling! 🌍♻️✨

Section 5: Nature-Inspired Crafts
As we’ve explored recycled materials and crafted some innovative projects, let’s now turn our attention to the beauty of nature! Nature-inspired crafts harness the exquisite designs and colors found in the great outdoors, allowing you to bring a little bit of that magic into your home. In this section, we’ll delve into two cherished nature crafts: pressed flower art and pinecone decorations. Let these projects spark your creativity while connecting you with the natural world around you!
Pressed Flower Art
Pressed flower art is a delightful way to preserve the beauty of flowers and foliage. This craft is not only aesthetically pleasing but also allows you to create lovely decorations that brighten up any room. Why Create Pressed Flower Art?
- Timeless Beauty: Preserved flowers maintain their vibrant colors and can be cherished for years.
- Personal Touch: Use flowers from your garden or meaningful events, such as weddings or anniversaries.
- Creative Expression: It offers endless possibilities for decoration, from framed art to greeting cards.
Getting Started with Pressed Flower Art:
- What You’ll Need:
- Fresh flowers and leaves (choose ones with relatively flat blooms like daisies or pansies)
- Heavy books or a flower press
- Cardstock or watercolor paper for your artwork
- Tweezers for handling delicate flowers
- A glue stick or clear-drying craft glue
- Picking Your Flowers:
- Collect flowers on a dry day (preferably in the morning when they’re fresh).
- Choose flowers that are not wilting and have vibrant colors.
- Pressing the Flowers:
- Place the flowers between two pieces of parchment paper.
- Stack them inside a heavy book or a flower press to flatten and dry. Leave them in a safe spot for about 1-2 weeks.
- Creating Your Art:
- Once dried, carefully remove the flowers using tweezers.
- Arrange them on cardstock or watercolor paper in creative designs, gluing them down once satisfied with the layout.
I remember the first time I created pressed flower art following a trip to a botanical garden. I picked various blooms that I found inspiring, and I used them to create a vibrant collage. Every time I look at that artwork hung on my wall, I’m reminded of that beautiful day spent surrounded by nature! Ideas for Displaying Your Pressed Flower Art:
- Framed Art: Frame your artwork for a beautiful wall display.
- Greeting Cards: Use pressed flowers to craft unique, personalized cards for special occasions.
- Bookmarks: Adorn bookmarks with pressed flowers, adding a touch of nature to your reading experience.
Pinecone Decorations
Pinecone decorations are another wonderful way to utilize natural materials creatively. Gather some pinecones and transform them into charming decor pieces that celebrate the seasons! Why Use Pinecones for Crafts?
- Versatile Materials: Pinecones can be used for various projects, from wreaths to table decorations.
- Natural Aesthetics: They bring a rustic and earthy element to your home decor.
- Kid-Friendly Fun: Crafting with pinecones is a great project for kids to enjoy outdoors!
Getting Started with Pinecone Decorations:
- What You’ll Need:
- Clean, dried pinecones (collect them from local parks or your backyard)
- Acrylic paint (optional, for coloring)
- Glue (a hot glue gun works best)
- Embellishments (like ribbon, glitter, or faux flowers)
- String or wire for hanging (if making ornaments)
- Creative Pinecone Ideas:
- Pinecone Garland: String pinecones together to create a lovely garland for your fireplace or mantle.
- Pinecone Ornaments: Paint pinecones and attach a ribbon to hang them on your holiday tree.
- Table Centerpieces: Fill a bowl with pinecones (maybe add some ornaments) for an easy and beautiful centerpiece.
I recall a family tradition where we would venture into the woods to collect pinecones in the fall. We’d come home and spend the afternoon painting them in bright colors or simply leaving them natural. It was incredibly rewarding to see our creations brighten up our Thanksgiving table setting—a perfect blend of fun and creativity! 🍂✨ Steps to Make a Simple Pinecone Ornament:
- Preparation: If desired, paint the pinecone using acrylic paint to add vibrant colors.
- Attaching the String: Use a glue gun to attach a loop of string or wire onto the top of the pinecone for hanging.
- Embellishment: Use glue to attach faux flowers, beads, or ribbons onto the pinecone for added decoration.
In conclusion, nature-inspired crafts like pressed flower art and pinecone decorations are a wonderful way to infuse your space with the beauty of the outdoors. These projects not only highlight the natural elements around you but also offer opportunities for creativity and relaxation. So, step outside, gather your materials, and start capturing the essence of nature in your next craft! Enjoy the process and celebrate the art of nature! 🌼🍁