
Introduction
Crafting is not just a hobby; it’s a creative outlet that brings joy, relaxation, and a sense of accomplishment. From intricate paper designs to vibrant paintings, the world of crafts is vast and enchanting. You could be sitting at your dining table, surrounded by vibrant colors, or kneeling in your garden collecting bits of nature for your next art piece. Whatever your crafting preference, it invites you to express yourself in unique ways. 😊 This guide is your portal into a treasure trove of crafting ideas that can spark your imagination and pique your interests. Each section dives into different crafting categories, showcasing various techniques, tools, and ideas to inspire your next project. Ready to tap into your creativity?
Different Craft Types
Understanding the array of available crafts is essential. Each type presents its own set of tools, materials, and techniques. Here’s a quick breakdown:
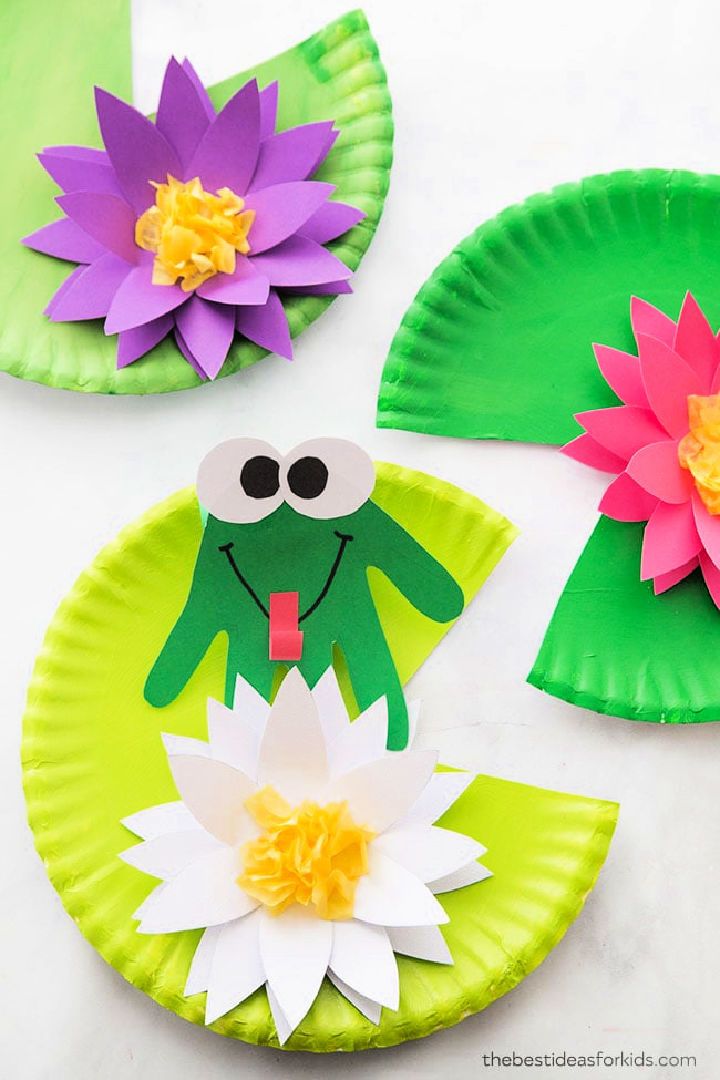
- Paper Crafts: Get ready to fold, cut, and assemble beautiful creations using paper. From origami to quilling, the possibilities are endless.
- Painting Projects: Whether you’ve got a muse or just a blank canvas, painting allows you to pour your emotions into vivid artwork. Explore watercolor and acrylic techniques!
- DIY Home Decor: Revitalize your living space with personalized projects! With crafts like macramé and upcycled bottles, you can add a personal touch to your home.
- Sewing and Embroidery: Your sewing machine is a magic wand. Create everything from simple alterations to stunning embroidered designs that tell your story.
- Polymer Clay Creations: Dive into the colorful world of polymer clay! Sculpt miniature food or design one-of-a-kind jewelry—get your hands dirty and unleash your inner artist!
- Recycled Crafts: Sustainability meets creativity. Transform everyday waste into charming art pieces that’ll leave your friends in awe.
- Nature-Inspired Crafts: Nature is your canvas. Craft pressed flowers or pinecone decorations, bringing the beauty of the outdoors into your heart and home. 🌼
Crafting Benefits
Getting into crafting has numerous benefits. Here are a few that you might not have considered:
- Stress Relief: Engaging in creative activities has been shown to reduce stress. When you focus on crafting, your mind can unwind from everyday worries.
- Improved Mood: Completing a project brings a sense of achievement that’s hard to beat. You might find yourself smiling just by looking at your creations!
- Community: Whether you’re part of a crafting club or sharing your projects online, crafting connects you to others with similar interests, creating deeper relationships.
- Skill Development: Each craft teaches you new skills and techniques that could translate into other areas of life, such as problem-solving, planning, and even math!
Let’s not forget the joy of giving. Handmade gifts carry emotional weight that store-bought items often lack. Imagine your loved one’s delight when they receive a beautifully crafted item made just for them. You’ll not only create a lasting memory but also inspire them in their own crafting journey. In the following sections, you’ll delve into distinct categories that offer numerous inspiring ideas. Remember, as you explore, the beauty of crafting lies in the process. Each project teaches you something new, whether it’s mastering a technique or unleashing your creativity. So, roll up your sleeves, gather your materials, and let’s embark on this colorful adventure together! 🖌️ Get ready to dive into the world of paper crafts, painting projects, and more. Your next masterpiece is just a project away!
Paper Crafts
Jumping into the world of paper crafts is like opening a box of endless possibilities! Whether you have a few sheets of paper lying around or a dedicated crafting station filled with decorative papers, tools, and embellishments, paper crafts are incredibly versatile and accessible. They not only allow for profound creativity but also provide a relaxing and satisfying experience. Let’s focus on two fascinating techniques: origami and paper quilling. 🌟
Origami Creations
Origami, the Japanese art of paper folding, is truly magical! With just a simple piece of paper, you can transform it into exquisite creations that amaze and delight. I still remember the first time I successfully folded a paper crane; it felt like I had unlocked a new level of creativity! Getting Started with Origami:
- Materials: All you need is paper. While traditional origami uses square paper, you can start with any paper you have. Consider using origami paper for intricate designs or recycle old greeting cards for a unique twist.
- Basic Folds: Familiarize yourself with essential folds like the valley fold, mountain fold, and reverse fold. These fundamental techniques form the building blocks for more complex designs.
- Patterns and Inspiration: Check out online resources or origami books for patterns. You can find easy ones for beginners and intricate designs for more advanced folders.
Here’s a quick list of popular origami creations that you might enjoy trying:
- Crane: A symbol of peace, and a great practice project.
- Butterfly: A fun design that can be used for decorations or cards.
- Box: Perfect for gift-giving or organizing small items.
- Flowers: Create beautiful bouquets to brighten your space!
The beauty of origami lies in its simplicity and elegance. Plus, it’s a fantastic activity to share with friends or family. Imagine hosting an origami night—everyone can fold at their own pace while enjoying snacks and conversation. What could be better?
Paper Quilling
If you’re looking for something a bit different, let’s explore paper quilling. This art form involves rolling and shaping strips of paper into intricate designs. It can range from delicate embellishments to full-scale artwork that can adorn your walls! Getting Started with Quilling:
- Materials: To dive into quilling, you’ll need quilling paper strips (often in various colors and widths), a quilling tool, glue, and scissors. You can easily make your strips using a paper cutter or scissors.
- Basic Techniques: Start with some basic shapes—tight coils, loose coils, teardrops, and scrolls. These building blocks will allow you to create a variety of designs.
- Design Ideas: Quilling can be used for multiple projects, like cards, framed art, and even 3D sculptures. Here are some fun ideas to inspire you:
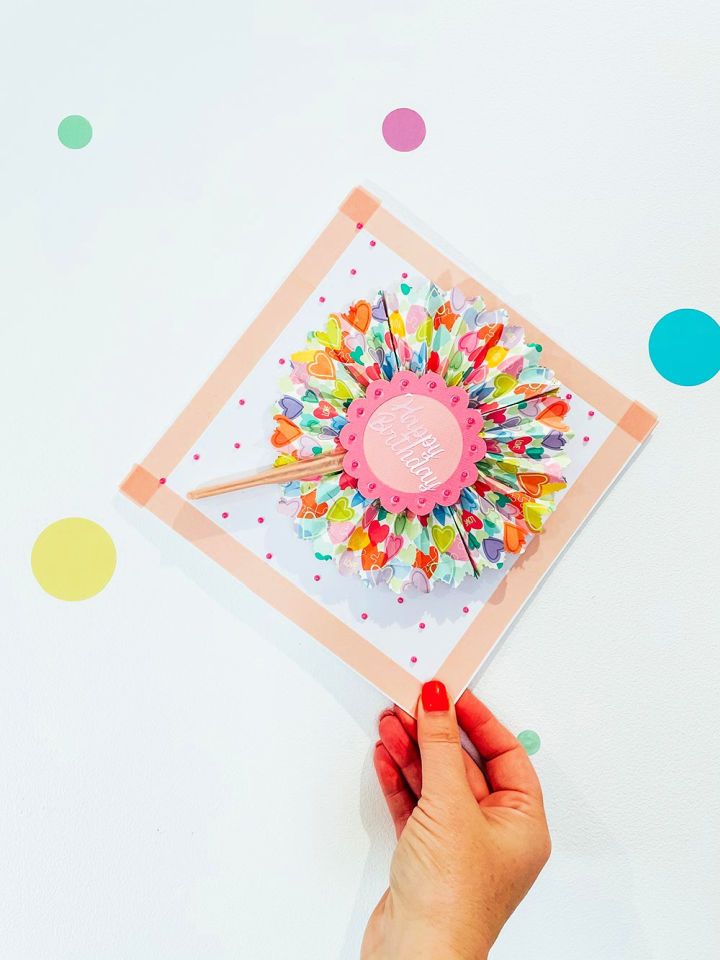
- Greeting Cards: Add a touch of quilled flowers or elements to your card designs for that personalized touch.
- Wall Art: Create stunning pieces by layering different shapes and colors.
My Personal Experience: I recall making a quilled birthday card for my friend, and they loved it so much that they kept it on their desk for years! The combination of texture and color made it a truly unique gift.
Finishing Up
Exploring paper crafts like origami and quilling opens a world of artistic expression! Each technique allows you to engage your imagination, fosters mindfulness, and leads to creating one-of-a-kind pieces. The beauty of using paper is that it’s readily available, and you can use it to create charming masterpieces that add personality to your life or make heartfelt gifts for loved ones. Next time you’re looking for a fun activity that encourages both creativity and relaxation, reach for some paper and let your imagination soar! 🥳

Painting Projects
Diving into painting projects can be one of the most rewarding experiences—there’s something truly liberating about expressing yourself on canvas or paper. Whether you’re a beginner eager to explore or an experienced artist seeking fresh inspiration, painting offers various techniques and styles to explore. Today, we’ll delve into two popular mediums: watercolor and acrylic painting. Ready your brushes because we’re about to unleash your inner artist! 🎨
Watercolor Techniques
Watercolor painting is a beautiful medium that allows for lightness and fluidity—it’s like capturing a moment of sunlight on paper. I still remember my early watercolor attempts where I was mesmerized by how the colors blended seamlessly and created soft, dreamy effects. Getting Started with Watercolors:
- Materials: You’ll need watercolor paints (tubes or pans), watercolor paper, brushes, and water. While you can find inexpensive starter sets, investing in good quality paper and brushes makes a noticeable difference.
- Basic Techniques: Mastering a few foundational techniques will elevate your watercolor skills. Here are some you might want to practice:
- Wet-on-Wet: This technique involves applying wet paint onto a wet surface. It creates soft edges and a beautiful blending effect, perfect for skies and abstract forms.
- Wet-on-Dry: Here, wet paint is applied onto a dry surface. This is excellent for sharper lines and more defined shapes.
- Glazing: Once your initial layer is dry, you can apply a transparent layer of color on top to modify shades and introduce depth.
Fun Project Ideas: Watercolors can be quite versatile. Here are a few fun projects to spark your creativity:
- Nature Scenes: Capture the beauty of sunsets, landscapes, or florals. Practice layering colors to achieve depth.
- Abstract Art: Let loose! Create random shapes and patterns, allowing colors to bleed together naturally.
- Greeting Cards: Make personalized cards for loved ones using simple flower or landscape designs.
One of my favorite memories is creating a series of greeting cards for friends using watercolor techniques. Each card had a unique design, and the joy of gifting them was incredibly fulfilling!
Acrylic Painting Ideas
Now, let’s dive into acrylic painting—a medium loved for its versatility and vibrant colors. Acrylics dry quickly, allowing you to build layers, which means you can easily experiment without long waiting periods. You can produce anything from fine art to mixed media pieces! Getting Started with Acrylics:
- Materials: Gather acrylic paints, a variety of brushes, canvas or acrylic paper, and a palette (or even a plastic plate will do!).
- Basic Techniques: Here are a few essential techniques to try your hand at:
- Layering: Since acrylics dry quickly, you can build up layers effectively. Start with a base layer and gradually add details.
- Dry Brushing: Use a dry brush with minimal paint for a textured effect—great for adding highlights or texture to objects.
- Sponge Painting: Dabbing a sponge onto the canvas can create interesting textures, perfect for backgrounds or abstract designs.
Examples of Acrylic Projects:
- Portraits: Experiment with colors and techniques to create bold, stylized portraits.
- Still Life: Set up a simple arrangement of objects and practice capturing light and shadow.
- Murals: If you’re feeling adventurous, consider painting a mural in your home. It’s a great way to showcase your creativity on a larger scale!
A personal highlight for me was when I painted a mural on my bedroom wall. It transformed the space into my serene escape, and every time I walked in, I felt vibrant and inspired!
Wrapping Up
Painting with watercolors and acrylics not only taps into your creative side but also offers moments of peaceful reflection and fun experimentation. Whether you prefer the soft washes of watercolors or the bold strokes of acrylics, there’s a joy in creating that’s simply unmatched. So gather your materials, let go of any perfectionism, and allow your creativity to flow. Your next masterpiece is just a brushstroke away! 🌟

DIY Home Decor
Creating your own home decor can be an incredibly fulfilling way to express your personal style while adding a unique touch to your space. DIY home decor projects not only save money but also allow for creativity and ingenuity. Today, let’s explore two delightful crafting ideas: macramé wall hangings and upcycled bottle crafts. These projects are perfect for beautifying your home while also showcasing your artistic flair. 🏡✨
Macrame Wall Hangings
If you’re looking to add texture and personality to your walls, consider trying your hand at macramé! This art form, using knots to create intricate patterns and designs, has made a resurgence in recent years. It’s a great way to personalize your decor and can fit into any style, from bohemian to modern. Getting Started with Macramé:
- Materials: To dive into macramé, you’ll need macramé cord (cotton or jute are popular options), scissors, and a dowel or branch to hang your creation. Optional: a measuring tape.
- Basic Knots: Familiarizing yourself with essential knots is crucial. Here are a few to practice:
- Square Knot: A fundamental knot that creates a strong, flat pattern—perfect for the foundation of your piece.
- Half Hitch Knot: This knot is great for creating curves and unique designs.
- Lark’s Head Knot: This is often used to attach the cord to the dowel.
Creating Your First Piece:
- Choose Your Design: Start with a simple design. You can find endless tutorials online, from basic wall hangings to more intricate patterns.
- Cut Your Cord: Typically, you’ll want to cut your cords to about four times the desired length of your finished wall hanging.
- Knot Away: Follow your chosen pattern and start knotting! If you make a mistake, don’t stress. Macramé is forgiving, and you can always unravel and adjust your design.
Fun Project Ideas:
- Plant Hangers: Bring greenery into your home with stylish macramé plant hangers that can hold pots at different heights.
- Boho Wall Art: Combine your knots into a stunning piece of art to hang above your couch or bed.
I recall the moment I finished my first macramé wall hanging. It hung in my living room, and every time I walked by, it felt like a warm hug that welcomed me home. Friends and family loved it, sparking conversations about crafting, and inspiring them to create their own pieces!
Upcycled Bottle Crafts
Upcycling is a fantastic way to create beautiful home decor while also being environmentally friendly. Instead of tossing those old glass or plastic bottles, consider transforming them into stunning decor items. The creativity you can unleash with upcycled bottles is endless! Getting Started with Upcycling:
- Materials: Gather your bottles (like wine, mason jars, or soda bottles), paint or spray paint, twine, glue, and various embellishments—think glitter, buttons, or beads.
- Basic Techniques:
- Painting: You can paint the bottle’s exterior to give it a fresh look. Use spray paint for a smooth finish or acrylic paint for designs.
- Wrapping: Twine or rope can be wrapped around the neck of the bottle for that rustic feel.
Creating Your Upcycled Masterpieces:
- Vase: Transform any bottle into a gorgeous vase. Paint or wrap it, add some fresh or dried flowers, and voilà—a subtle yet elegant decoration.
- Candle Holders: Cut the bottle to create unique candle holders or use the neck of a bottle to hold tea lights. Remember to empty and clean the bottles first!
- Decorative Displays: Line up several decorated bottles on a shelf, filled with fairy lights or painted in coordinating colors for an eye-catching display.
Personal Touch: Last summer, I created a series of colorful painted mason jars to use as flower vases for my outdoor gathering. It added charm to the setting, and everyone loved how they turned out! It was an effortless way to spark joy while being eco-conscious.
Conclusion
Whether you choose to go for a trendy macramé wall hanging or dive into the world of upcycled bottle crafts, DIY home decor projects allow you to personalize your space in meaningful ways. These projects not only beautify your surroundings but also bring a sense of accomplishment and creativity. Embrace your creative side, gather your materials, and let your home reflect your unique style. You’ll find that the process of crafting can be as rewarding as the final product! Happy crafting! 🌼❤️
Sewing and Embroidery
Stepping into the world of sewing and embroidery opens up a treasure trove of creative opportunities! These timeless crafts not only allow you to create beautiful items for your wardrobe or home but also provide a soothing and meditative experience. Whether you’re mending a garment or embellishing fabric with intricate patterns, sewing and embroidery can be incredibly rewarding. Let’s dive into hand stitching basics and explore some inspiring embroidery patterns that you can try at home. 🧵✨
Hand Stitching Basics
Before you can jump into sewing and embroidery projects, it’s essential to get familiar with hand stitching techniques. Hand stitching might seem old-fashioned, but it remains a fundamental skill every crafter should learn. Getting Started:
- Materials: You’ll need some basic supplies: fabric, needles, thread (preferably matching your fabric), fabric scissors, and a thimble if you want to protect your fingers.
- Basic Stitches: Here are a few essential hand stitches you should practice:
- Running Stitch: This is the simplest stitch and serves as a foundation for many projects. It involves a series of even stitches going in and out of the fabric.
- Backstitch: This stitch is ideal for stronger seams. It creates a solid line by stitching backward with each new section, which is perfect for sewing and outlining designs.
- Whip Stitch: Commonly used for hemming or closing seams, this stitch wraps around the edge of the fabric, keeping everything neatly in place.
Practice Makes Perfect:
- To practice these stitches, consider making a small sampler piece. Create a grid and practice each stitch in different sections. Not only will this help build your skills, but it can also serve as a decorative piece once you’re done!
My Personal Experience: I remember when I first learned how to sew by hand. I was determined to fix a beloved stuffed animal that had come apart at the seams. It took patience, but seeing the plush toy restored brought me a sense of accomplishment that kept me hooked on sewing.
Embroidery Patterns
Once you’ve got the basics of hand stitching down, it’s time to explore the wonderful world of embroidery! Embroidery adds texture and personality to your projects, making even simple fabric pieces truly unique. Types of Embroidery Patterns:
- Floral Designs: Flowers are a classic choice. From delicate daisies to vibrant roses, floral patterns can be as simple or complex as you like.
- Geometric Patterns: These can range from straightforward shapes to intricate designs. Geometric patterns can look modern and chic on items like bags or home decor.
- Inspirational Quotes: Stitch your favorite quote on pillows or wall hangings. It’s a fantastic way to personalize your space and create pieces that inspire you daily.
Creating Your Own Patterns:
- If you want to add your personal touch, designing your own patterns can be incredibly fun! You can use graph paper or sketch your designs before transferring them onto your fabric.
Techniques to Enhance Your Embroidery:
- Sashiko: This traditional Japanese technique uses a simple running stitch to create beautiful patterns, usually in white thread on indigo fabric. It’s not only decorative but functional, as it was originally used for reinforcing fabric.
- French Knots: These add dimensionality to your designs. They are created by wrapping the thread around the needle and pulling it through the fabric, resulting in a textured dot that can represent flower centers or stars.
Conclusion
Sewing and embroidery foster creativity while offering a sense of fulfillment as you create something beautiful with your hands. Understanding hand stitching basics forms the foundation for embarking on intricate embroidery patterns, allowing you to express your personal style through fabric. So, dust off your sewing kit, gather your materials, and let the crafting commence! Each stitch and each pattern represents a step in your creative journey, leading to artisanal pieces you can cherish or share with friends and family. Your next project awaits! 🌈🪡

Polymer Clay Creations
Polymer clay is a wonderfully versatile medium that opens up a world of creativity! It’s easy to shape and model, allowing you to craft everything from intricate miniatures to stunning jewelry. Whether you’re a seasoned artist or just starting your creative journey, polymer clay can be your go-to for creating fun and unique projects. Let’s explore two fascinating aspects of polymer clay creations: miniature food sculptures and jewelry making. 🍰💍
Miniature Food Sculptures
Sculpting miniature food is perhaps one of the most delightful aspects of working with polymer clay. These tiny replicas are not only adorable but can also serve as charming decor pieces or playful toys! Getting Started:
- Materials: To begin, you’ll need polymer clay in various colors, sculpting tools, a craft knife, a baking tray, and an oven (for curing the clay). You can also use liquid polymer clay for adding fine details.
- Basic Techniques:
- Color Mixing: Blend different colors to create shades that mimic real food items. For example, mix yellow and red for a perfect shade of orange for carrots or peppers.
- Layering and Texturing: Use different tools to add textures. For instance, a toothpick can create realistic lines on a sushi roll, while small balls can represent seeds on a burger.
- Practice Projects: Here are some fun ideas to get you started:
- Fruits and Vegetables: Try making tiny versions of your favorite produce, like strawberries, carrots, or apples.
- Desserts: Cupcakes and donuts are not only visually appealing but also allow for plenty of creative decoration.
- Breakfast Foods: Think mini pancakes, eggs, and bacon. You can have fun layering and arranging these items for a realistic plate!
Enjoying the Process: When I first attempted miniature food sculptures, I made tiny burgers and fries. The joy of adding details—like tiny sesame seeds on the bun—was almost therapeutic! Plus, I’ve gifted several mini food sculptures to friends, and their reactions have been priceless.
Jewelry Making
Crafting jewelry with polymer clay allows for self-expression while making unique pieces that you won’t find in stores. The customizable nature of polymer clay means you can create earrings, necklaces, or bracelets that reflect your personal style. Getting Started:
- Materials: For jewelry making, gather polymer clay, crafting tools (like cutters and molds), bead caps, jump rings, earring hooks, and a baking tray.
- Basic Techniques:
- Shape and Roll: Start with basic shapes—think beads, pendants, or charms. Rolling the clay into different shapes opens up infinite possibilities.
- Molding and Stamping: Use molds to create intricate designs or stamp patterns onto your pieces for added texture.
- Design Ideas: Here are a few jewelry project ideas to get your creative juices flowing:
- Statement Earrings: Create bold and colorful earrings. You can experiment with patterns and shapes to match your outfits.
- Personalized Necklaces: Make letter charms or unique pendants that represent something meaningful to you.
- Bracelets with Beads: Mold several beads in different textures and colors, then string them together for a fun bracelet.
Sharing the Love: A memorable experience for me was creating a set of matching earrings and a necklace for a close friend’s birthday. I mixed vibrant colors and added little gold accents to elevate the designs. She loved them so much that she wore them for a special event, and seeing her shine in my handmade creations was incredibly fulfilling!
Conclusion
Working with polymer clay opens up endless creative avenues, from crafting enchanting miniature food sculptures to designing unique, personalized jewelry. The beauty lies in the process—experimenting with colors, shapes, and textures while making something truly one-of-a-kind. So gather your supplies, get inspired, and let your imagination run wild. With every piece you create, you’re not just making art; you’re expressing your individuality and spreading joy—both to yourself and those around you. Happy crafting! 🌟🖌️
Recycled Crafts
Recycling isn’t just good for the planet—it’s also a wonderful gateway to creativity! Engaging in recycled crafts allows you to give new life to everyday items that may otherwise end up in the landfill. The thrill of transforming trash into treasure is not only satisfying but can also lead to stunning home decor or fun gifts. Today, let’s dive into two fantastic recycled craft ideas: CD mosaic art and tin can lanterns. Let’s unleash the artist within and start crafting! ♻️✨
CD Mosaic Art
Have a pile of old CDs lying around? Instead of letting them collect dust, why not turn them into beautiful mosaic art? CD mosaic art can produce stunning pieces that reflect light and color, adding a unique flair to your home decor. Getting Started:
- Materials: You’ll need old CDs, a sturdy base (like a piece of cardboard or a wooden board), scissors, a hot glue gun or strong adhesive, and optionally, acrylic paint to create a background.
- Basic Techniques:
- Breaking the CDs: Carefully break the CDs into pieces. You can wrap them in a cloth and apply gentle pressure to avoid sharp edges. You can also use scissors to cut them into desired shapes, but breaking them will often give you a more organic look.
- Designing Your Mosaic: Plan your design beforehand. You can create abstract art, patterns, or recognizable shapes, like animals or flowers.
- Assembling Your Art:
- Start gluing the pieces onto your base, working from the outer edges toward the center (or vice versa).
- Feel free to overlap pieces for added depth and interest. With every piece, you’ll notice how light reflects beautifully off the shiny surfaces, creating a stunning effect.
Personal Experience: I once made a large CD mosaic that spelled out the word “LOVE” for my living room wall. Choosing the colors and arranging the shiny pieces was incredibly satisfying! The best part was watching friends admire it when they visited, often asking how I made it.
Tin Can Lanterns
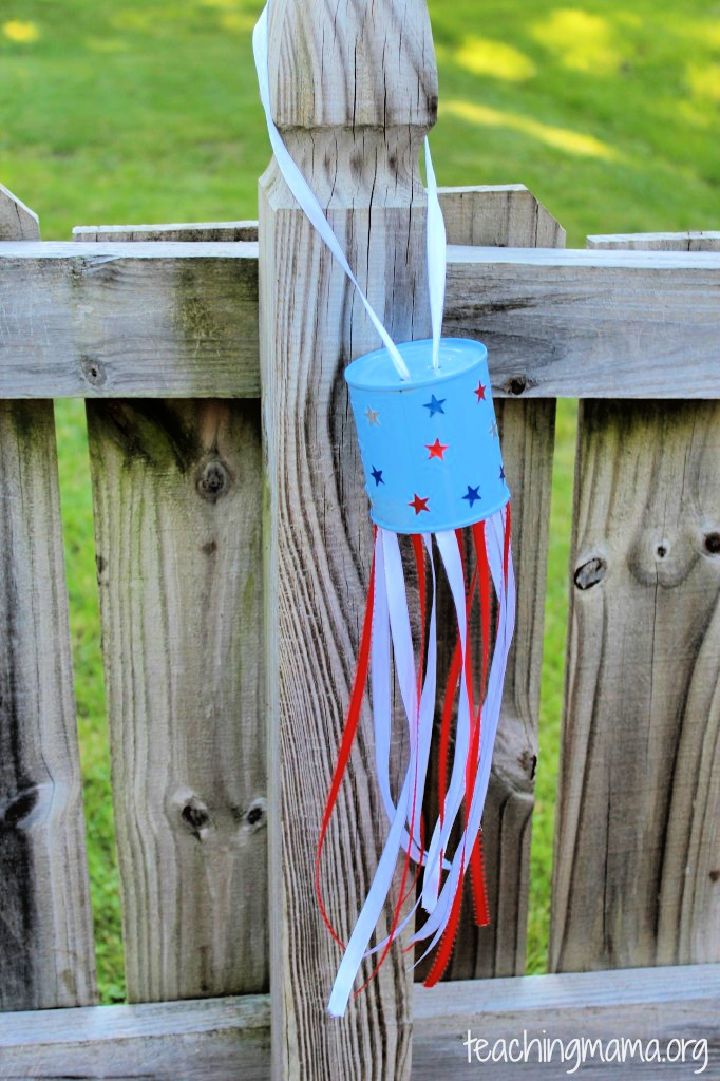
Next up, let’s explore the whimsical world of tin can lanterns. These lanterns not only serve as delightful decor but can also enhance your outdoor gatherings with their enchanting glow. Getting Started:
- Materials: Collect empty tin cans, a hammer, a large nail or screwdriver, a bowl of water, a candle (or LED tea light), and paint (if you wish to add color).
- Safety First: Before you start your project, it’s important to ensure safety. The edges of the cans can be sharp after puncturing, so wear gloves during the process, especially while handling the cans.
Basic Techniques:
- Preparation:
- Fill the tin can with water and freeze it overnight. This will provide stability while you hammer.
- Creating Your Design:
- Once frozen, take the can out of the freezer and carefully remove it from the water (you’ll have to run warm water over it if it doesn’t come out easily).
- Use the hammer and large nail to make holes in the can. You can create simple patterns, shapes, or even letters for personalized lanterns.
- Painting: After you’ve made your designs, you can paint the outside of the can if you want to add color.
- Finishing Touches:
- Place a candle or LED tea light inside the can, and watch your lantern light up the night!
Fun Idea: I once hosted a summer barbecue and made a series of these lanterns with different patterns. When the sun set, the flickering light created mesmerizing shadows on the tables and walls, adding a cozy atmosphere that everyone loved. I even let guests take home their favorite lantern as a party favor!
Conclusion
Recycled crafts like CD mosaic art and tin can lanterns provide a wonderful opportunity to express creativity while doing a service for the planet. Each project represents not only an artistic venture but also the joy of reimagining everyday objects. So gather your supplies, get inspired, and start transforming your household items into beautiful art pieces. The possibilities are endless, and your next creation could just be a few items away! Happy crafting! 🌟🛠️
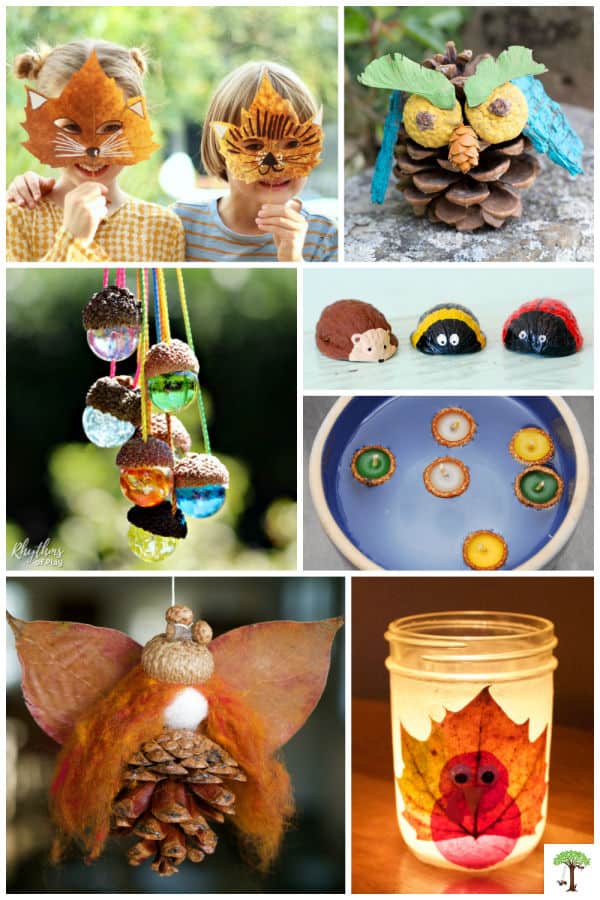
Nature-Inspired Crafts
Bringing the beauty of nature into your home through crafting can have a rejuvenating effect on your spirit. Nature-inspired crafts not only allow you to express your creativity, but they also foster a deeper connection with the outdoors. Among the many options, pressed flower art and pinecone decorations stand out as delightful projects sure to enhance any space. Let’s explore how you can transform natural elements into stunning works of art! 🌼🌲
Pressed Flower Art
Creating pressed flower art is a lovely way to immortalize the beauty of flowers and capture the essence of a specific season. The delicate nature of pressed flowers makes them perfect for crafting unique pieces that evoke memories and emotions. Getting Started:
- Materials: You’ll need fresh flowers or foliage, a heavy book or a flower press, parchment paper, scissors, and a frame or canvas for display.
- Choosing Flowers: Some great options include daisies, pansies, and ferns. Choose blooms that are in good condition and free of any browning.
Basic Techniques:
- Pressing the Flowers:
- Place the flowers between two sheets of parchment paper.
- Place the parchment paper in a heavy book or utilize a commercial flower press. The heavier the book, the better, as this will help flatten the flowers effectively.
- Leave them to press for about a week or until completely dried.
- Creating Your Artwork:
- Once dried, carefully remove the flowers and trim any excess stems or leaves.
- Arrange the pressed flowers on a canvas, frame, or paper as you see fit.
- Adhering and Framing:
- Use a glue stick or craft glue to adhere your flowers in place.
- For added elegance, consider adding a border of watercolor or penwork around the flowers to enhance the aesthetic.
Personal Experience: I remember collecting flowers during a lovely summer walk and deciding to preserve them. Once pressed, I arranged them in a simple frame, creating a beautiful piece of art that now hangs in my living room. Every time I look at it, I’m reminded of that sunny day and the vibrant colors of nature!
Pinecone Decorations
Pinecones are not only abundant in nature, but they also make for charming decorations that can be used in numerous creative ways. From rustic ornaments to table centerpieces, pinecones add a natural touch to your home decor. Getting Started:
- Materials: Gather pinecones (you can collect these from your backyard or local park), paint (optional), twine or ribbon, glue, and embellishments like glitter or beads.
Basic Techniques:
- Preparing the Pinecones:
- If desired, you can spray paint or paint your pinecones in various colors. This can create a vibrant conversation piece or match your holiday decor.
- Creating Decorations: Here are some creative project ideas:
- Pinecone Garland: String together multiple pinecones using twine or ribbon to create a beautiful garland for your mantel or staircase. Adding bells or small ornaments can enhance the festive feel!
- Table Centerpiece: Fill a bowl with pinecones and add seasonal items like cranberries or greenery for a stunning centerpiece. The rustic element can seamlessly blend with any decor.
- Pinecone Ornaments: Attach a loop of twine to the top of a pinecone and hang them on your Christmas tree or around your home for a seasonal touch.
Fun Idea: When my family decorated our home for winter last year, we created pinecone ornaments and garlands together. It turned into a fun bonding experience, and our tree looked beautiful adorned with our handmade pieces—each one telling a story.
Conclusion
Nature-inspired crafts like pressed flower art and pinecone decorations provide a wonderful way to express creativity while celebrating the beauty of the outdoors. They invite the essence of nature into your home, creating unique decor that carries personal meaning. So, gather your materials, venture outside to collect your nature treasures, and let your creativity flow. Each piece you create will remind you of the beauty of nature, bringing warmth and joy into your space. Happy crafting! 🌳🌸