
In the realm of home décor and organization, IKEA has established itself as a household name, offering stylish yet affordable furniture. However, what truly sets IKEA apart is its potential for customization and creativity. The beauty of IKEA pieces lies in their simple design, which allows you to easily modify them to fit your personal style and home needs. As someone who has spent countless weekends roaming the aisles of IKEA, I can relate to the thrill of picking up a flatpack, only to dream of the endless possibilities it holds. From turning a basic bookshelf into a stunning kitchen island to transforming a simple dresser into an eye-catching vanity, the world of IKEA hacks is both exciting and rewarding. Let’s dive into some creative approaches to repurpose and personalize IKEA furniture, ensuring your home reflects who you are.
What are IKEA Hacks?
IKEA hacks are creative modifications of standard IKEA products. Whether through upcycling, painting, or reconfiguring, these hacks breathe new life into everyday items. Imagine walking into a friend’s home and spotting a familiar piece of IKEA furniture, only to realize it’s been transformed into something uniquely beautiful. That’s the magic of IKEA hacks! The joy of DIY projects lies not just in the outcome, but in the process itself. The satisfaction of creating something with your own hands can be incredibly fulfilling. Plus, these projects often save you money compared to buying custom pieces.
Why Engage in IKEA Hacks?
Here are some reasons why you might want to explore IKEA hacks for your home:
- Cost-Effectiveness: Custom furniture can be expensive. By hacking existing IKEA pieces, you can save significantly while achieving a high-end look.
- Personalization: You can reflect your unique style by putting your twist on standard products. This can be through color choices, additional functionality, or aesthetic alterations.
- Sustainability: Upcycling and repurposing furniture reduces waste and contributes to a more sustainable lifestyle. When you take something old and make it new, you’re helping the environment.
- Skill Development: Tackling different hacks enhances your DIY skills—whether it’s painting, sewing, or woodworking. These skills can be incredibly useful in future projects.
Getting Started with IKEA Hacks
If you’re new to IKEA hacking, consider starting small. Here are a few simple hacks that can ease you into the process:
- Shelf Height Adjustment: Have an IKEA shelf that’s the wrong height for your space? Consider adjusting the legs, or even stacking shelves for increased height.
- Paint Refresh: A coat of paint can transform virtually any piece. Try using bold colors for a modern look or soft pastels for a vintage feel.
- Decals and Stencils: Use vinyl decals or stencils to add fun designs to your furniture without committing to a full paint job.
Essential Tools You’ll Need
Before embarking on your IKEA hacking journey, arm yourself with a reliable toolkit. Here’s a quick rundown of essentials:
| Tool | Purpose |
|---|---|
| Screwdriver | For assembling and disassembling pieces |
| Paintbrushes | For applying paint or stain |
| Sandpaper | To prep surfaces for painting |
| Measuring Tape | For accurate dimensions |
| Utility Knife | For cutting adhesive or fabric |
Personal Anecdote
I remember the first IKEA hack I ever attempted was an old bookshelf. With a fresh coat of white paint, some fabric-covered foam, and a few hours, it turned into a chic window seat for my living room. Not only did it add character to my space, but it also became my favorite spot to sip coffee and read. That sense of accomplishment was unforgettable! Venturing into the world of IKEA hacks can be both exciting and daunting, but the rewards are plentiful. Whether you’re looking to save cash, express your creativity, or simply have fun with a DIY project, IKEA offers a fantastic foundation for making unique and personalized furniture. Now that you’re equipped with the basics, let’s explore how to repurpose specific pieces you may already have at home.

Now that you’re familiar with the concept of IKEA hacks and the satisfaction of modifying your furniture, let’s delve into the exciting world of specific solutions to transform ordinary items into extraordinary pieces. IKEA’s versatile selections are a playground for creativity, which leaves plenty of room for your personal touch. When you start thinking about hackable IKEA products, the possibilities might seem endless. What if I told you that with a little time, effort, and imagination, you could create unique storage solutions, stylish seating options, and eye-catching decorations? Here’s a general overview of some popular categories of IKEA furniture hacks that can elevate your home and lifestyle.
Why Choose IKEA for Hacking?
IKEA pieces are not just affordable; they’re also designed for modification. Here are a few reasons to choose IKEA for your next furniture hack:
- Modular Designs: Many IKEA products are designed to be combined or easily adjusted, making them perfect for DIY projects.
- Popularity: Since IKEA is globally recognized, it’s highly likely that you already own some popular pieces, making the hacking that much more accessible.
- Ease of Assembly: Their straightforward assembly methods often mean that disassembling and reassembling for a hack is relatively easy.
Types of IKEA Hacks You Can Explore
Whether you’re a novice or experienced DIYer, there’s something for everyone in the IKEA hacking universe. Here’s a sneak peek into various categories of hacks that spark creativity:
1. Repurposing Bookshelves
Bookshelves are often the stars of an IKEA hack. They possess a strong structure and ample space while being adaptable:
- Billy Bookcase: Transform it into a trendy kitchen island by adding a countertop and casters for mobility.
- Expedit (Kallax) Shelves: These can be reconfigured to create a cozy window seat by adding cushions atop the shelves.
2. Upcycling Dressers
Dressers often get overlooked, but their potential is immense. Creative thinking can turn a functional piece into a showstopper:
- Malm Dressers: With a fresh coat of paint and stylish knobs, they can easily transition into chic bathroom vanities.
- Stenciled Patterns: Dressers can become artistic statements with the addition of unique stencils or decals.
3. Personalizing Tables
There’s always room at your table for creativity:
- Lack Coffee Table: A simple stain can radically change its look, giving it a rustic feel.
- Linnmon Desk: Combine it with drawer units for added functionality while customizing the colors.
4. Innovative Lighting Solutions
Don’t forget about lighting when it comes to home décor. IKEA has some fantastic pieces you can hack:
- Rimforsa Cutting Board: This can be transformed into a stunning pendant light—simply add a light fixture and you’re golden.
- Forsa Work Lamp: Modify it with your favorite colors or fabrics to create a unique floor lamp.
5. Creative Storage Solutions
IKEA is synonymous with unique storage solutions. With a little ingenuity, you can maximize your space:
- Grundtal Rail: This can easily hold hanging fabric storage, providing an organized solution for small items.
- Kallax Shelf: Beyond just being a cube organizer, it can also serve as a room divider, effectively separating spaces without losing an open feel.
A World of Possibilities Awaits 🎉
When you look around your home, you might see plain, old furniture that can easily become stunning focal points with a little creativity. Personally, I was amazed by the transformation when I added a few bright cushions to a basic IKEA chair; it became the centerpiece of my reading nook! As we journey deeper into IKEA hacks, you’ll find practical methods to bring your visions to life. By the end of this exploration, you’ll be ready to tackle any IKEA challenge with confidence and flair. So grab your tools, channel that creativity, and let’s get ready to dive deeper into specific projects that will elevate your home environment!
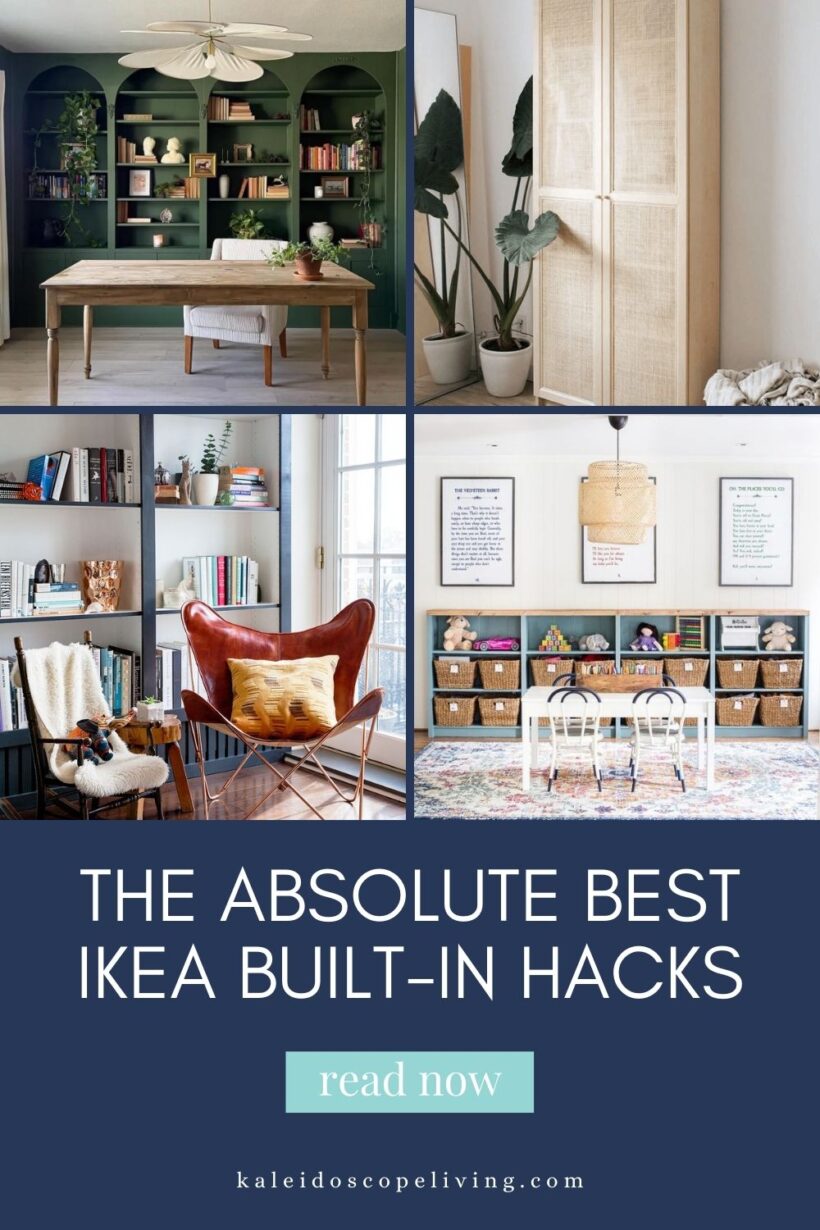
As we’ve explored the world of IKEA furniture hacks, one of the most exciting transformations you can realize is through repurposing bookshelves. These versatile pieces, particularly the beloved Billy and Expedit (now Kallax) shelves, are perfect foundations for creative projects. Let’s dive into two standout projects that can elevate your home—transforming a Billy Bookcase into a kitchen island and creating a cozy window seat with Expedit shelves.
Transforming a Billy Bookcase into a Kitchen Island
The IKEA Billy bookcase is iconic for a reason—it’s affordable, sturdy, and lends itself beautifully to various modifications. Have you ever found yourself wishing for more prep space in your kitchen? Why not turn a Billy bookcase into a functional and attractive kitchen island?
Step-by-Step Guide
Here’s how you can do it:
- Materials Needed:
- One Billy Bookcase
- A sturdy countertop (butcher block or laminate)
- Casters (for mobility)
- Brackets or L-brackets
- Paint or wood stain (optional)
- Tools: screwdriver, measuring tape, and saw (if needed)
- Instructions:
- Preparation: Start by disassembling the bookcase if needed and giving it a fresh coat of paint or stain to match your kitchen décor.
- Install Casters: Attach casters to the bottom of your bookshelf for mobility. This allows you to move the island as needed, especially during cleaning.
- Attach Countertop: Secure the countertop to the top of your bookshelf using brackets. Ensure it’s firmly attached and level.
- Final Touches: Add some decorative items like a fruit bowl or a cutting board to complete the look!
Benefits
This kitchen island hack provides additional prep and storage space. Imagine hosting dinner parties and having all your ingredients within reach, tucked away in the shelves underneath! Plus, there’s something incredibly satisfying about stepping into your kitchen and seeing a unique piece you crafted yourself. Having tried this method in my own kitchen, the island quickly became the focal point and has been a conversation starter for guests.
Creating a Window Seat with Expedit Shelves
When it comes to maximizing space and creating cozy nooks, Expedit shelves (now known as Kallax) are your best friend. They’re modular and robust, making them perfect for a multitude of projects. Picture a sunlit corner in your home turned into a dreamy window seat. Not only is it a charming addition, but it also provides extra storage!
Steps for Transformation
- Materials Needed:
- Two or more Kallax shelves
- Plywood or foam for the seat
- Fabric (for upholstery)
- Cushions (optional)
- Wood screws
- Tools: screwdriver, staple gun, and measuring tape
- Instructions:
- Position the Kallax Shelves: Decide how many you’ll need and place them side by side against the wall beneath the window.
- Secure the Structure: Fasten the shelves together using wood screws to ensure stability.
- Create the Seat: Cut plywood to fit on top of the shelves. If you want extra comfort, stack foam and cover it with fabric, securing it with a staple gun to the underside of the plywood.
- Accessorize: Top it off with cushions or throw pillows. This addition not only makes it inviting but also allows for a vibrant color palette.
The Result
Now you have a beautiful and functional window seat that’s perfect for reading, relaxing, or soaking up the sun. And with hidden storage, you can utilize the shelves below for books, blankets, or other odds and ends. Speaking from experience, transforming my Kallax shelves into a window seat transformed a previously dull corner into a cozy retreat. I often find myself curling up there on sunny afternoons, a cup of tea in hand, enjoying the little sanctuary I’ve created.
Final Thoughts
Repurposing these IKEA bookshelves can yield wonderful results for your home. Each project not only adds functionality and beauty to your space but also beckons creativity. So, grab those shelves you’ve been eyeing, channel your inner DIYer, and let’s make some magic happen! Check back as we delve further into other innovative IKEA hacks that will inspire your next project!

After exploring the world of IKEA bookshelves, let’s venture into another versatile category of IKEA furniture—the dresser. Dressers are functional essentials in any home, but they can often feel plain or uninspired. With a little creativity, you can upcycle an IKEA dresser into a stunning centerpiece in your home. In this section, we’ll discuss two exciting projects involving stenciling and transforming a Malm dresser into a chic bathroom vanity.
Adding Patterns with Stencils
One of the easiest yet most impactful ways to breathe new life into an IKEA dresser is by using stencils for patterns. This technique allows you to express your personal style while enhancing the aesthetics of the piece.
Step-by-Step Guide
Here’s how to take your IKEA dresser from basic to beautiful:
- Materials Needed:
- A plain IKEA dresser (I recommend the Malm or Hemnes for their smooth surfaces)
- Stencils (available at craft stores or online)
- Paint (acrylic or chalk paint works well)
- Paintbrushes or a foam roller
- Painter’s tape
- Clear sealant (optional)
- Instructions:
- Prep the Surface: Begin by cleaning your dresser to remove dust and debris. If necessary, lightly sand the surface to allow for better paint adhesion.
- Choose Your Design: Pick a stencil pattern that resonates with your style—florals, geometric shapes, or even abstract art can work beautifully.
- Secure the Stencils: Use painter’s tape to keep the stencils in place on the dresser. This will help prevent any bleeding of the paint.
- Apply Paint: With a paintbrush or foam roller, carefully apply the paint for your chosen pattern. Start with a light hand to achieve a clean look.
- Remove the Stencil: Once you’ve painted the design, slowly remove the stencil to reveal your pattern. If you’d like, add a clear sealant over the entire surface to protect your new artwork from scratches and wear.
Personal Experience
I recently tackled this project and opted for a floral design on my old Hemnes dresser, and I was amazed at the transformation! It ended up being a statement piece in my bedroom, drawing compliments from friends and family. The process was straightforward, and it was so rewarding to see how a simple design change could enhance my room’s ambiance.
Turning a Malm Dresser into a Bathroom Vanity
If you’re looking to elevate your bathroom without breaking the bank, consider upcycling a Malm dresser into a stylish bathroom vanity. It’s a practical project that adds charm and personality to your space.
Step-by-Step Guide
Here’s how you can successfully transform a Malm dresser into a fabulous vanity:
- Materials Needed:
- A Malm dresser (choose a size that fits your bathroom space)
- A sink (drop-in or under-mount depending on your preference)
- A countertop (consider materials like laminate or solid wood)
- Plumbing supplies (sink drain, faucet, etc.)
- Paint (if desired)
- Tools: a drill, measuring tape, screws, and a saw (if needed)
- Instructions:
- Measure Your Space: Begin by measuring your bathroom area to ensure the dresser will fit comfortably. Also, measure the sink and countertop you’ll be using.
- Prep the Dresser: If you wish, give the dresser a coat of paint or stain to match your bathroom’s aesthetics.
- Cut Opening for Sink: Use a saw to create an opening in the top of the dresser that matches the sink shape. Be precise to ensure it fits perfectly.
- Install the Sink: Place the sink into the newly cut hole and follow the manufacturer’s instructions for installation. Secure it based on the type of sink you have chosen.
- Connect Plumbing: Lastly, connect the plumbing to complete the setup.
The Result
Transforming my Malm dresser into a bathroom vanity was a game-changer for my space. I ended up adding a modern vessel sink, which brought an unexpected touch of elegance, and the extra storage was a lifesaver, keeping toiletries neatly tucked away.
Final Thoughts
Upcycling IKEA dressers not only reveals hidden potential but also gives you a chance to showcase your creativity. Whether you prefer the artistic approach of stenciling or the functional charm of a bathroom vanity, there’s so much you can achieve. Remember, these transformations aren’t just about the end result; they are a wonderful journey of creativity and expression. So, gather your materials, roll up your sleeves, and let’s continue exploring more ways to make IKEA furniture uniquely yours!
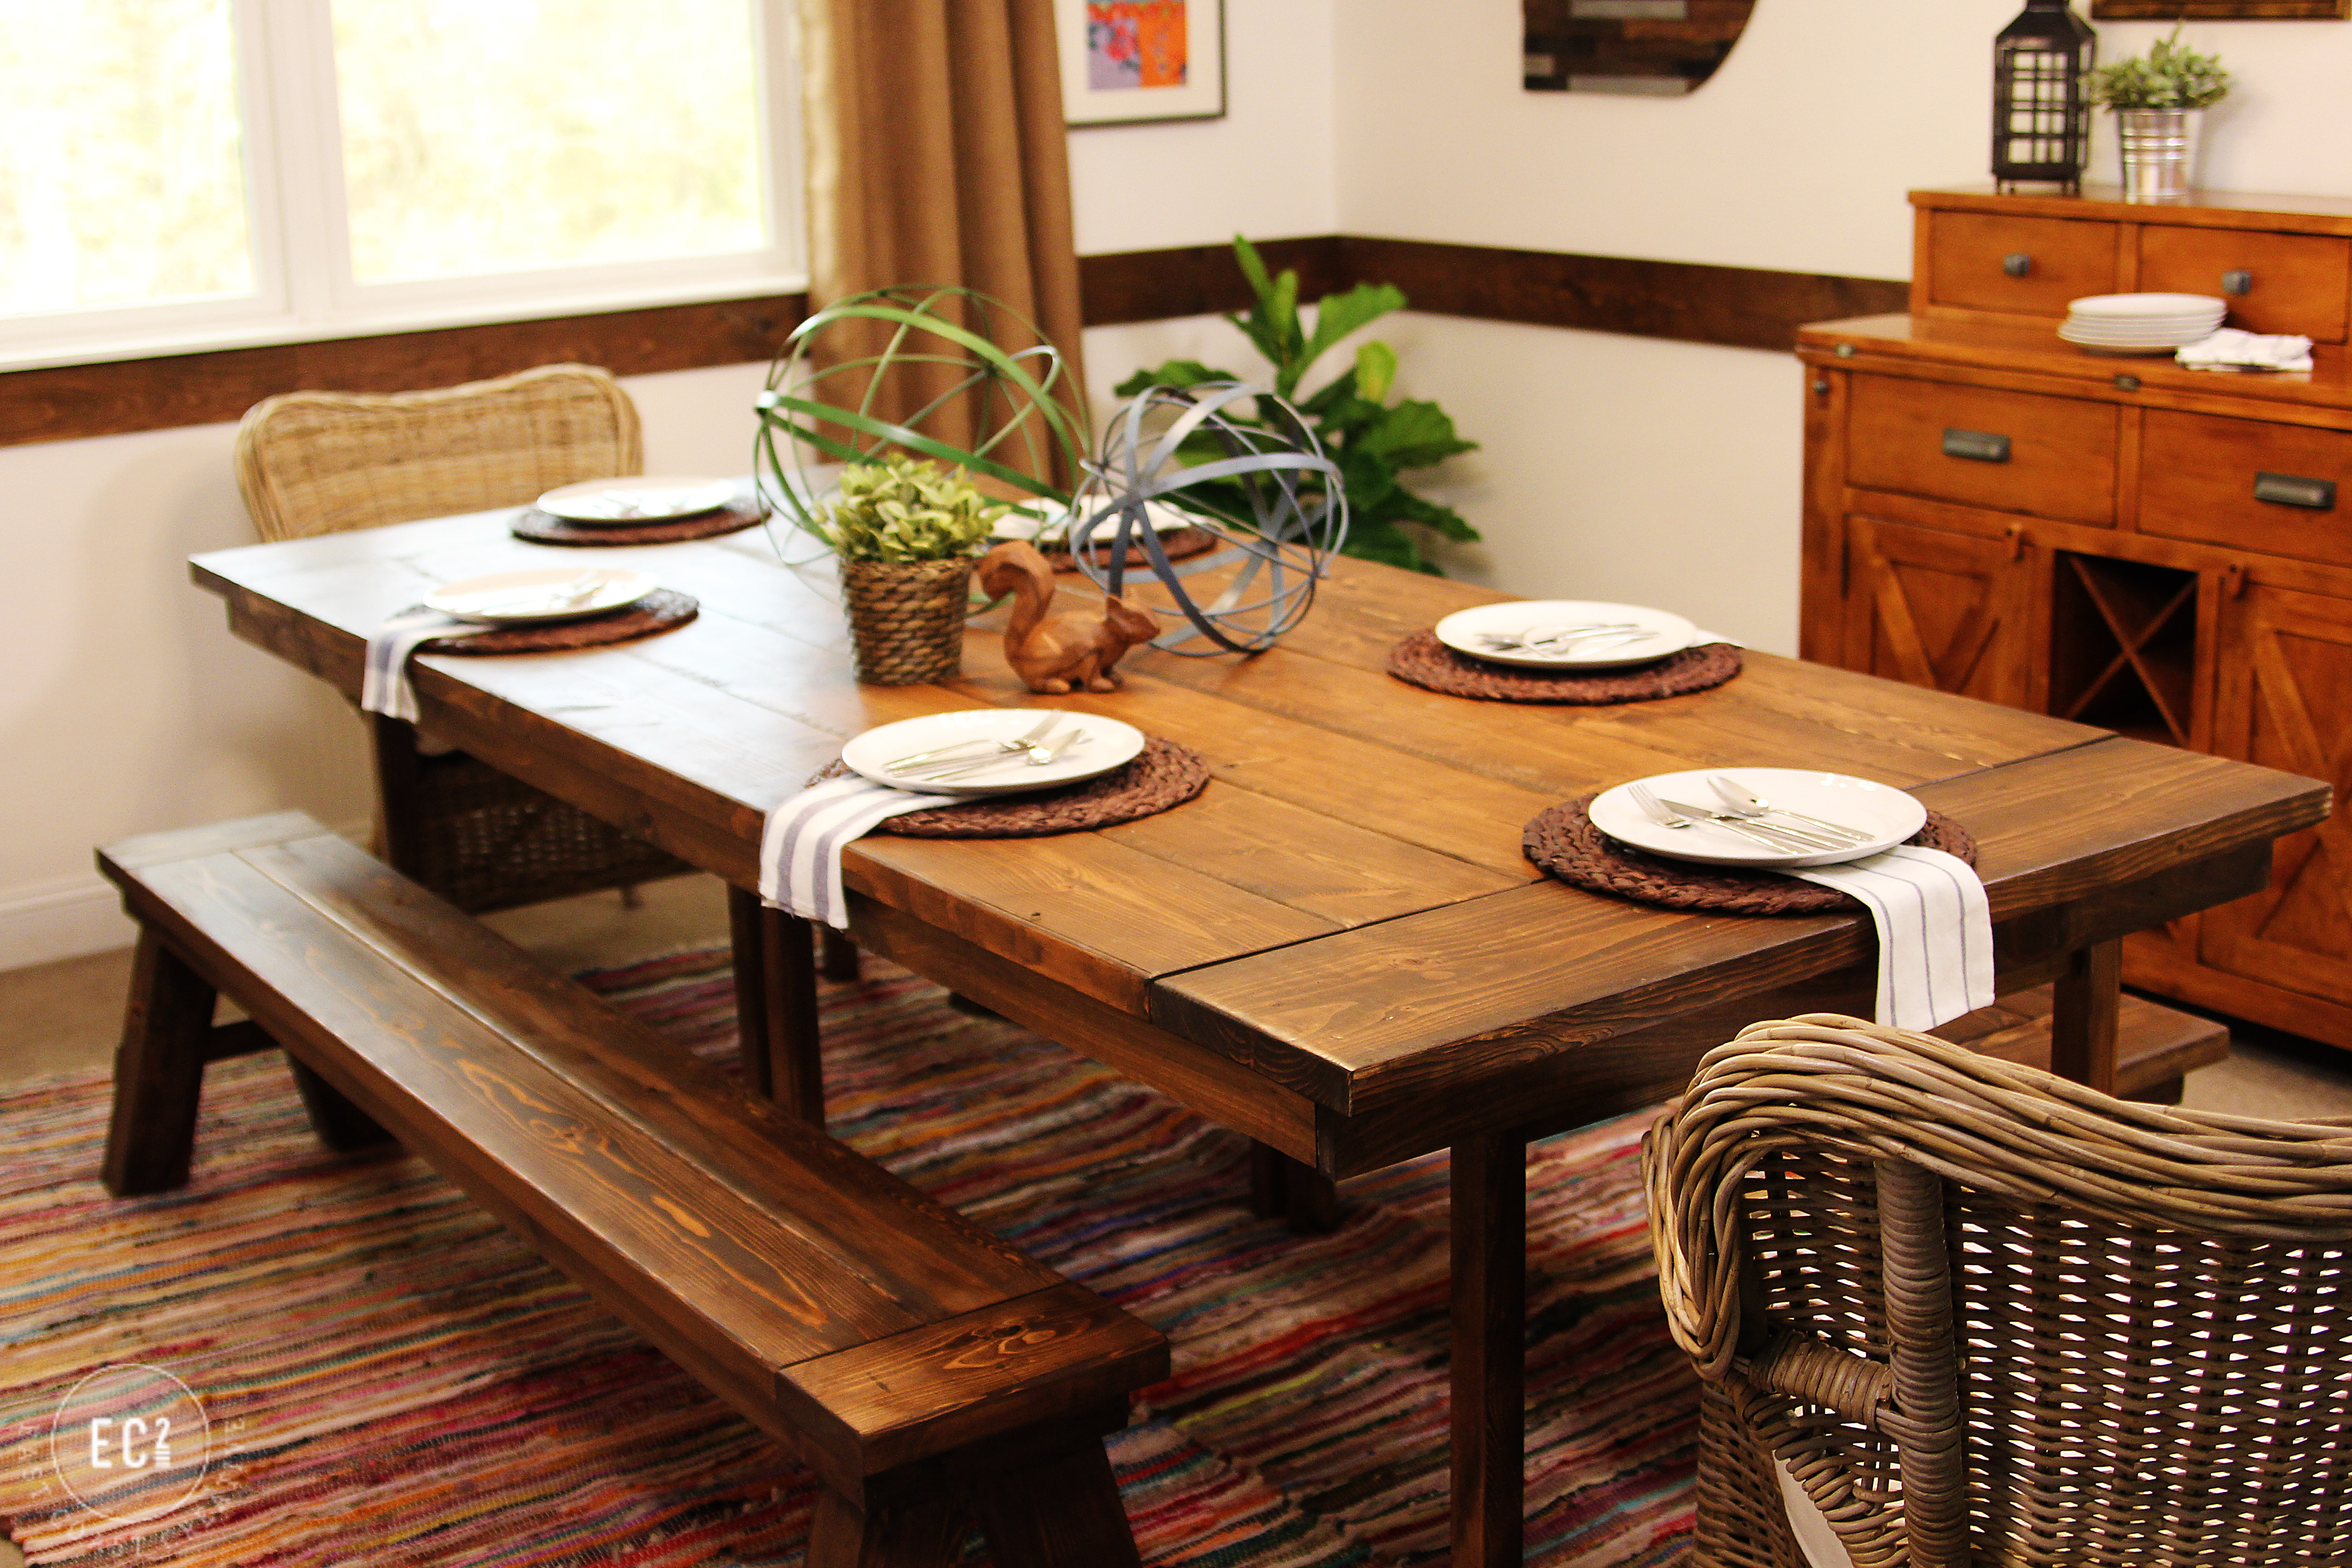
As we transition from upcycling dressers, let’s shift our focus to tables—another essential element of home decor that can benefit immensely from a bit of personal flair. IKEA tables, particularly the popular Lack and Linnmon series, offer versatility and functionality but sometimes lack the character we desire. Thankfully, there are easy ways to personalize these pieces, turning them into something truly unique. In this section, we’ll explore how to stain a Lack coffee table and customize a Linnmon desk with drawer units.
Staining a Lack Coffee Table
The Lack coffee table is a beloved staple in many homes due to its minimalistic design and affordability. However, if you find its typical finish a bit bland, staining it can add depth and character. Here’s how to give your Lack coffee table a stunning makeover!
Step-by-Step Guide
- Materials Needed:
- Lack coffee table
- Wood stain (choose your favorite color)
- Sandpaper (220-grit)
- Clean cloth or sponge
- Clear protective finish (polyurethane or similar)
- Paintbrush or foam applicator
- Gloves (to protect your hands)
- Instructions:
- Prep the Table: Start by clearing off any items on the table and giving it a solid cleaning. Lightly sand the surface to remove the existing finish, which helps the stain absorb better.
- Apply Stain: With your brush or foam applicator, apply the wood stain in the direction of the grain. Use a clean cloth to wipe away any excess after waiting a few minutes, allowing for an even finish.
- Drying Time: Allow the stain to dry completely, following the manufacturer’s guidelines. This usually takes several hours.
- Seal the Deal: For added protection, apply a clear finish over the stained surface. This step is crucial for preventing scratches and moisture damage.
Personal Experience
I recently undertook this project myself, choosing a deep walnut stain for my Lack table. The transformation was nothing short of magical! The rich coloring added warmth to my living room, making it feel more inviting. It was a simple two-day project, but it completely changed the ambiance of my space. Plus, every time I see it, I beam with pride knowing that I took it from plain to stunning all on my own!
Customizing a Linnmon Desk with Drawer Units
Next up, the Linnmon desk—a popular choice for many due to its clean lines and ample surface area. While it’s a functional piece, it can often use a little personality to prevent it from feeling sterile. By adding drawer units and customizing the look, you can create a workspace that feels both stylish and organized.
Step-by-Step Guide
- Materials Needed:
- A Linnmon desk
- Drawer units (you can choose the Alex or other compatible units)
- Contact paper or paint (for customization)
- Decorative hardware (knobs or handles)
- Level (to ensure everything is straight)
- Instructions:
- Assemble the Desk: Start by assembling your Linnmon desk, ensuring it’s sturdy and level. If you want to customize the tabletop, consider adding contact paper for a pop of color or pattern.
- Attach Drawer Units: Position your chosen drawer units under the desk to provide extra storage. Secure them together with screws or connectors, making sure everything is stable.
- Add Hardware: Customize the look by swapping out the standard knobs or handles on the drawer units. This small touch can add a lot of personality without requiring too much effort.
- Final Touches: Consider adding decorative elements to your desk setup—think stylish desk organizers, a chic lamp, or artwork above to tie your workspace together.
The Result
The Linnmon desk project resulted in a workspace that reflects my personal style while remaining functional. By crafting a designated area that feels inspiring, my productivity has skyrocketed! I now have a place where I feel motivated, a sanctuary for creativity amidst the chaos of life.
Final Thoughts
Personalizing IKEA tables is a fantastic way to add character to your home while enhancing usability. Whether it’s through staining a simple coffee table or customizing a workspace with drawer units, the transformation allows you to express your unique style. So, gather your tools and materials, and let’s unleash your creativity—because every piece of furniture tells a story, and you are the author! Keep your eye out as we continue exploring more innovative IKEA hacks that will inspire your next home project!

After giving your tables new life, let’s illuminate your space with some creative lighting hacks. A well-placed light fixture can completely transform the ambiance of a room, making it feel more inviting and warm. Two innovative projects that embody this spirit are making a pendant light from a Rimforsa cutting board and building a floor lamp using a Forsa work lamp. Each of these hacks allows you to beautify your home while adding functional lighting.
Making a Pendant Light from a Rimforsa Cutting Board
The Rimforsa cutting board may seem like an unconventional choice for a light fixture, but this project can yield stunning results! The natural wood finish adds a rustic charm to any space, and the warmth of the wood grain creates a cozy atmosphere.
Step-by-Step Guide
- Materials Needed:
- Rimforsa cutting board
- Pendant light kit (available at most hardware stores)
- Drill and drill bits
- Ceiling hook
- Light bulb (choose an LED for efficiency)
- Sandpaper (optional)
- Clear sealant (optional)
- Instructions:
- Prep Your Cutting Board: Start by sanding the cutting board if you’d like a smoother surface and then clean it thoroughly. If you wish to preserve the natural wood look, consider applying a clear sealant once the sanding is complete.
- Create Hanging Holes: Use a drill to make a hole in the center of the cutting board. This will allow for the pendant light fixture to hang through the board.
- Assemble the Pendant Light: Follow the instructions for your pendant light kit to install the light fixture into the hole on the cutting board.
- Install the Ceiling Hook: Secure a hook in the ceiling where you wish to hang the light. Ensure it’s anchored well, especially if the board will have weight from the light.
- Hang and Enjoy: Finally, attach the lights to the ceiling hook and screw in your light bulb. Turn it on, step back, and admire your handiwork!
A Personal Touch
I just can’t emphasize enough how much this project elevated my kitchen! Initially, I had plain overhead lighting, but now I have a unique, rustic pendant lamp that draws the eye and becomes a conversation starter whenever I have guests over. It was a quick and enjoyable craft session, and my friends were amazed when they realized what it used to be!
Building a Floor Lamp with Forsa Work Lamp
If you’re looking for an easy yet stylish way to light up a corner of your room, consider building a floor lamp using the Forsa work lamp. This hack blends functionality with a modern aesthetic, making it an ideal addition to any space.
Step-by-Step Guide
- Materials Needed:
- Forsa work lamp
- A sturdy base (you can use an old lamp base or create one with wood)
- Light bulb (consider a warm LED for comfort)
- Paint or contact paper (for customization)
- Optional: decorative fabric or lampshade
- Instructions:
- Choose Your Base: Decide on the base for your floor lamp. If you’re using an old lamp base, ensure it’s stable. For a DIY base, cut a piece of sturdy wood into a desired shape, making sure it’s heavy enough to support the lamp.
- Assemble the Forsa Lamp: Follow the assembly instructions for the Forsa work lamp. Attach the lamp arm to the base securely.
- Customize the Look: If desired, paint or cover the base with contact paper. You can also add fabric or a lampshade to soften the harsh industrial look of the work lamp.
- Add a Light Bulb: Screw in your light bulb, ensuring that it matches the style of the lamp.
- Position and Enjoy: Place your new floor lamp in your desired corner, turn it on, and enjoy the ambiance it creates!
A Note on Success
When I put together my Forsa floor lamp, I was stunned by how it instantly made my living room feel cozier. I opted for a bright yellow paint on the base, blending with my decor, and topped it with a quirky lampshade. Now, it’s not just a source of light; it’s an artistic piece that reflects my personality!
Final Thoughts
Innovative lighting hacks like these transform everyday items into stunning fixtures that elevate your home decor. By thinking outside the box—er, cutting board—you can create functional art that’s perfect for your living space. So gather your materials and unleash your creativity! Remember, well-lit spaces lead to beautiful gatherings and warm memories. Stay tuned as we continue exploring even more exciting IKEA hacks that can breathe new life into your home!
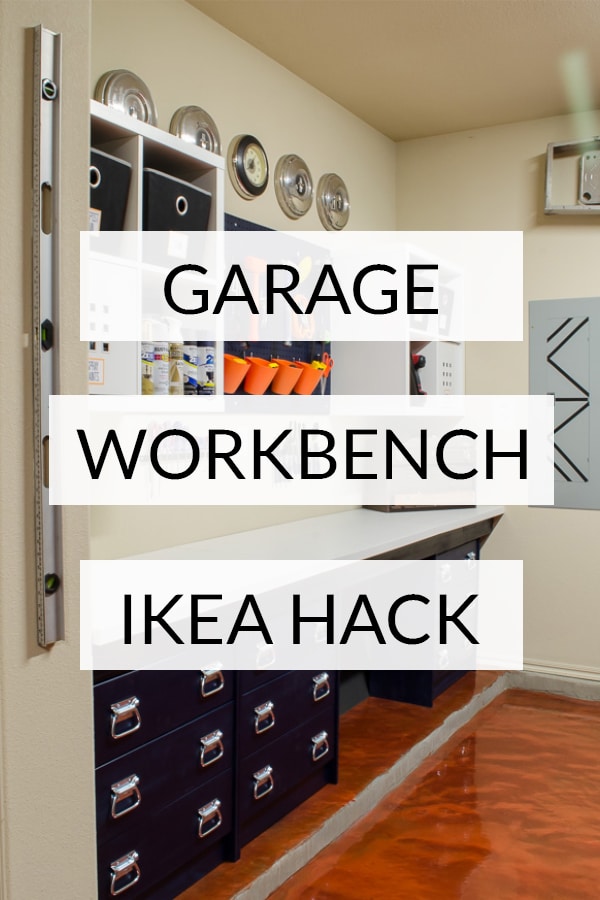
As we conclude our journey through IKEA hacks, we arrive at a crucial aspect of any home—storage solutions. Keeping our spaces organized can sometimes feel overwhelming, but with a little creativity and the right approach, IKEA furniture can help maximize your storage needs effectively. In this section, we’ll explore two fantastic projects: hanging fabric storage from a Grundtal rail and using a Kallax shelf as a creative room divider.
Hanging Fabric Storage from a Grundtal Rail
The Grundtal rail isn’t just for hanging pots and utensils in the kitchen. It can be a game-changer for organizing craft supplies, tools, or even kids’ toys. By utilizing a rail, you not only save space but also keep your items visible and easily accessible.
Step-by-Step Guide
- Materials Needed:
- Grundtal rail (available at IKEA)
- Hanging fabric storage organizers (these can be purchased or you can sew your own)
- Hooks or clips (if needed for hanging)
- Wall anchors and screws
- Measuring tape and level
- Instructions:
- Choose Your Location: Decide where you want to install your Grundtal rail. It could be in a craft area, mudroom, or even a playroom.
- Measure and Mark: Use your measuring tape and level to mark where you’ll install the rail. Make sure it’s at a height that’s convenient for you.
- Mount the Rail: Install the rail using screws and wall anchors to ensure it can support the weight of the fabric organizers.
- Add Fabric Storage: Hang your fabric organizers on the rail. If you’re using hooks or clips, ensure they’re securely attached to avoid any mishaps.
- Organize: Fill the fabric storage with clothes, craft supplies, or whatever items you want to keep handy.
A Personal Experience
When I first set up my fabric storage on the Grundtal rail, I was amazed at how much more organized my craft corner became! I opted for a mix of bright and colorful fabric bins, which not only helped me sort everything (from yarn to paints) but also added a pop of color to my space. The best part? It’s easy to grab what I need when inspiration strikes, and cleaning up is a breeze.
Using a Kallax Shelf as a Room Divider
The Kallax shelf is incredibly versatile and can serve multiple functions in your home. One of the most creative uses is utilizing it as a room divider. This hack works particularly well in small apartments where you want to define spaces without building walls.
Step-by-Step Guide
- Materials Needed:
- Kallax shelf unit (select a size that suits your space)
- Optional: casters for mobility
- Decorative items (like books, plants, or storage boxes)
- Level (to ensure stability if you want to mount it)
- Instructions:
- Position Your Kallax: Decide where you want the Kallax to be placed to effectively divide your room. You can choose to set it up vertically or horizontally depending on your style.
- Stabilize: If you’re concerned about stability, especially for a taller unit, consider securing it to the wall using brackets or a wall anchor.
- Style the Shelves: Decorate the Kallax with items that reflect your taste. Use the open cubbies for books, plants, or decorative boxes, and keep some more functional items, like office supplies, hidden behind closed doors.
- Optional Casters: If you want to make the Kallax mobile for flexibility in your layout, consider adding casters to the bottom, allowing you to easily change the configuration of your space as needed.
A Note on Functionality
When I introduced a Kallax shelf into my living space as a room divider, it felt like I had created a whole new room! I filled one side with books and personal photos, creating a cozy reading nook, while the other side houses my work essentials. It not only separates my living area from my workspace but also adds character and organization.
Final Thoughts
Incorporating intelligent storage solutions into your home doesn’t have to be a daunting task. By utilizing items like the Grundtal rail for hanging fabric storage and the Kallax shelf as a room divider, you can enhance both the functionality and aesthetic of your space. These hacks are easy to implement and can bring a sense of order to the chaos we often face daily. As you continue your journey of creating a personalized living environment, remember that IKEA furniture is just a starting point for your creativity. With the right hacks, your home can truly reflect your sense of style while meeting all your storage needs. We’ve explored many innovative IKEA projects—now it’s your turn to turn those ideas into reality! Keep innovating and transforming your space one project at a time!

As we wrap up our exploration of IKEA hacks, it’s clear that the possibilities are endless! From transforming basic bookshelves into eye-catching kitchen islands to creating innovative storage solutions, these projects can breathe new life into your home. Each of the hacks we’ve discussed not only serves a function but also offers a chance to express your personal style and creativity. Let’s reflect on what we’ve covered and inspire you to start your next DIY adventure! 🎉
Embrace Your Creativity
One of the standout features of using IKEA furniture is its ability to adapt. Whether you’re an experienced DIY enthusiast or just dipping your toes into the water of home improvement, these projects can be a rewarding experience. Here’s a quick recap of the incredible hacks we explored:
- Repurposing Bookshelves: Whether it’s turning a Billy bookcase into a kitchen island or creating a cozy window seat with Expedit shelves, the potential is exciting. I can vouch for the satisfaction that comes from seeing a functional piece of furniture transformed into something uniquely yours!
- Upcycling Dressers: Adding stencils to dressers or repurposing a Malm dresser into a chic bathroom vanity demonstrates how simple, thoughtful changes can make a significant impact. Not only does it save money, but it creates functional pieces that support your lifestyle.
- Personalizing Tables: Whether you’re staining a Lack coffee table for warmth or customizing a Linnmon desk, these small modifications can turn functional pieces into stylish focal points that speak to your personality.
- Innovative Lighting Hacks: Using a Rimforsa cutting board as a pendant light or a Forsa work lamp as a floor lamp illustrates that even everyday items can be transformed into artistic statements that brighten up your space.
- Storage Solutions: Implementing hanging fabric storage from a Grundtal rail and using a Kallax shelf as a room divider showcases quick and accessible ways to organize living spaces while adding a decorative touch.
Finding Joy in the Process
While every hack is about the end result, don’t forget that the journey is just as important! Each moment spent sanding, painting, or arranging is an opportunity to unwind, channel your creativity, and invest in the spaces you cherish most. With every project, you’re not just crafting furniture; you’re building a home that reflects who you are. 🏡💖 Tips for Staying Engaged:
- Start Small: If you’re feeling overwhelmed, pick one simple project and dive in.
- Document Your Journey: Consider taking photos during the process to highlight your before-and-after transformations. It’s amazing to see how far you’ve come!
- Invite Friends: DIYing can be a social activity! Grab a friend or two, make it a fun project day complete with snacks and music.
Your Next Steps
Now that you’re armed with inspiration and ideas, it’s time to get started! Head to your local IKEA store or online to gather materials. Trust your instincts and don’t hesitate to experiment with your favorite styles and colors. Remember, there’s no right or wrong way to hack—only what feels right for you. If you ever feel stuck in the process, consider tapping into online resources or community workshops that encourage creativity and support. There’s a vast world of DIY enthusiasts who can share tips, techniques, and motivation. And don’t forget, your home is your sanctuary. With every hack and project, you’re crafting a space that speaks to your heart, and there’s nothing more fulfilling than that! So roll up your sleeves, grab those tools, and let your imagination lead the way. The best part? You’ll not only create practical solutions but also memories that last a lifetime. 💪✨ Happy hacking! Keep shining your light and making your home the place you love! 🌟