

Introduction
When was the last time you took a moment to truly appreciate the teachers who have shaped your life? Whether it was a favorite elementary school educator, a mentor in high school, or a professor who inspired you at university, teachers play a pivotal role in our personal and academic growth. As we navigate through our educational journeys, these incredible individuals dedicate their lives to fostering our potential, and it’s essential that we show our appreciation.
The Impact of Teachers
Reflecting on your school years, you can probably recall specific moments when a teacher made a difference in your life. Perhaps it was a heartfelt conversation that motivated you or an endless supply of patience when you struggled with complex subject matter. Teachers not only impart knowledge but also instill values, confidence, and resilience in their students.
- Encouragement: They’re the ones cheering you on during presentations or tough exams.
- Guidance: They often provide insights that help you navigate career choices or personal challenges.
- Support: Many teachers go above and beyond to ensure their students feel valued and secure.
Why Show Appreciation?
With educational demands ever-increasing, it’s vital to reciprocate the care and effort teachers invest in their students. Showing appreciation not only boosts their morale but also strengthens the teacher-student relationship. This acknowledgment can motivate them to continue their exceptional work, knowing their efforts do not go unnoticed. Crafting thoughtful gifts embodies gratitude on a personal level and sends a resounding message to your teachers: “Your hard work matters.” In this blog, you’ll discover ten unique and heartfelt craft ideas that can help you express your gratitude creatively. Each suggestion not only showcases appreciation but also adds a personal touch that every educator will treasure. Let’s start crafting! ✂️❤️

Why It’s Important to Appreciate Teachers
Moving from recognizing the significant impact teachers have on our lives, it’s crucial to delve into why showing appreciation is not just a nicety but an essential practice. Educators often go the extra mile for their students, and acknowledging their efforts cultivates a supportive learning environment.
The Emotional Connection
At the heart of education is the relationship between teachers and students. When you take the time to express gratitude, it strengthens that bond:
- Mutual Respect: Acknowledging a teacher’s hard work fosters respect, creating an atmosphere where open communication thrives.
- Boosting Morale: Teachers face numerous challenges daily. A simple thank-you can uplift their spirits and reinforce their commitment to teaching.
Reflecting on my own experiences, I remember a teacher who brought personalized notes to each student during finals. Receiving one made me feel seen and valued, which significantly alleviated my anxiety.
The Ripple Effect
When you appreciate a teacher, you’re not just impacting their day; you’re contributing to a positive ripple effect throughout the entire school community. Here’s how:
- Inspiring Others: Other students may feel encouraged to express their gratitude, creating a culture of appreciation.
- Enhanced Learning Environment: A respected and appreciated teacher is more engaged and motivated, directly benefiting students’ learning experiences.
The Lifelong Benefits
Recognizing teachers’ efforts can lead to long-lasting impacts on both students and educators.
- Fostering Lifelong Relationships: Teachers often remember those who appreciated them, sometimes forming lifelong connections that extend beyond the classroom.
- Nurturing Future Educators: When students feel appreciated, they may be inspired to become educators themselves, perpetuating a cycle of gratitude and respect.
Clearly, appreciating teachers goes beyond just one moment—it’s about building a brighter future through acknowledgment and support. Let’s explore how to express this appreciation through thoughtful crafts! 🎨🌟

Craft Idea 1: Handmade Thank You Cards
Now that we’ve discussed the importance of appreciating teachers, let’s dive into our first craft idea: handmade thank you cards. This simple yet meaningful gesture can bring a smile to any educator’s face and allows you to express your feelings in a personal way.
Why Handmade Cards? 🎨
Store-bought cards are lovely, but nothing quite compares to the thought and effort put into a handmade card. Here are a few reasons why creating your own can make a more significant impact:
- Personal Touch: A handmade card showcases your creativity and thoughtfulness, making it more special than a generic card.
- Customization: You can tailor the message and design to reflect your relationship with the teacher, whether it’s a heartfelt note or a funny drawing!
Materials You’ll Need
Getting started is easy! Here’s a simple checklist of materials you might need:
- Cardstock paper (any color you like!)
- Markers, colored pencils, or paints
- Stickers or embellishments (think sparkly stars, smiley faces, or even cute icons!)
- Scissors and glue
- Optional: A handwritten letter or note inside the card
Steps to Create Your Card
- Choose Your Card Size: Cut the cardstock to your preferred size (common sizes are 4×6 or 5×7 inches).
- Design the Front: Use your markers and embellishments to create a fun design. You could write “Thank You!” or even add a drawing of an apple 🍏 (a classic symbol of teaching).
- Write Your Message: Inside the card, express your gratitude! Mention specific things you appreciated or memorable moments you shared.
- Personalize Further: Feel free to add a photo or small drawing to make it more heartfelt.
Reflecting on my own experience, I once gave a handmade card to a teacher who always encouraged my artistic pursuits. Her smile when she read it reminded me that small gestures could leave lasting impressions. Creating these handmade thank you cards is a wonderful way to show your appreciation and spread joy—let your creativity flow! 💌✨

Craft Idea 2: Personalized Pencil Holder
Continuing our journey of expressing gratitude, let’s explore our second craft idea: a personalized pencil holder. This functional gift not only helps keep a teacher’s desk organized but also serves as a constant reminder of your appreciation every time they use it.
Why a Pencil Holder? ✏️
Teachers often juggle a myriad of tasks, and having a dedicated space for their writing tools can make their lives a little easier. A personalized pencil holder adds a touch of warmth to the classroom, turning a simple desk accessory into a cherished keepsake for educators.
- Practicality: It’s something they will use daily, blending functionality with thoughtfulness.
- Creative Expression: You can craft it to reflect their personality, interests, or favorite colors.
Materials Needed
Gathering your supplies is simple! Here’s a checklist to guide you:
- An empty tin can or small wooden box
- Paint or decorative paper
- Paintbrushes or glue (depending on your material)
- Markers or sharpies for personalization
- Optional: Ribbons, buttons, or any decorative elements you like
Steps to Create Your Pencil Holder
- Choose Your Base: Start with a clean tin can or small box. If using a can, remove any sharp edges to ensure safety.
- Decoration: Use paint or decorative paper to cover the outside. If you choose paint, let it dry completely before moving to the next step.
- Personalize: Once dry, grab your markers or sharpies and write the teacher’s name, a favorite quote, or even a fun saying like “Master of the Classroom” on the holder.
- Add Embellishments: For an extra personal touch, glue on buttons, ribbons, or stickers that reflect their interests (think flowers, animals, or subjects they teach!).
Reflecting on my own time in school, I recall a teacher who had a beautifully decorated pencil holder filled with colorful pens. It sparked conversations and made the atmosphere feel more inviting, reminding students they were valued. Crafting a personalized pencil holder is a delightful way to blend creativity with practicality—your teacher will surely appreciate this thoughtful gesture! 🎨💖

Craft Idea 3: Apple-shaped Keychain
As we continue our creative journey in celebrating teachers, let’s dive into our third craft idea: an apple-shaped keychain. This charming little gift not only adds a personal touch to any set of keys but also symbolizes knowledge and appreciation—the perfect way to say thanks!
Why an Apple-themed Gift? 🍎
Apples have been a longstanding emblem of education, representing a teacher’s dedication to nurturing young minds. A handmade apple keychain captures that spirit, providing both style and sentiment.
- Meaningful Symbolism: The apple represents education and gratitude, making it a classic choice for a teacher gift.
- Everyday Use: Keychains are practical items that teachers can use daily, keeping your thoughtful gesture close at hand.
Materials You’ll Need
Creating your own apple-shaped keychain is quite straightforward. Here’s what you’ll need to gather:
- Fimo clay (or any air-dry clay) in red and green
- A keyring
- A sculpting tool or a toothpick
- Paint (optional for detailing)
- Clear sealant (optional for a polished finish)
Steps to Create Your Apple Keychain
- Form the Apple Shape: Start by taking a small ball of red clay and rolling it into an apple shape. Make a small indentation at the top for where the leaves will attach.
- Add the Leaves: Roll a small piece of green clay into a leaf shape and press it onto the top of the apple. Use a toothpick to add some vein details if you’re feeling artistic!
- Create a Hole for the Keyring: Before the clay hardens, poke a small hole at the top using a toothpick; this will be where the keyring will go.
- Dry or Bake: Follow the instructions for your clay type: either let it air dry or bake it according to the package directions.
- Attach to Keyring: Once dry or baked, thread the keyring through the hole and voila!
I still remember gifting a handmade apple keychain to my favorite teacher, who proudly displayed it on her classroom door. It became a meaningful part of her daily routine, reminding her of her passion for teaching. Crafting a personalized apple-shaped keychain is a fun and heartfelt way to show your appreciation—let your creativity shine! 🍏✨
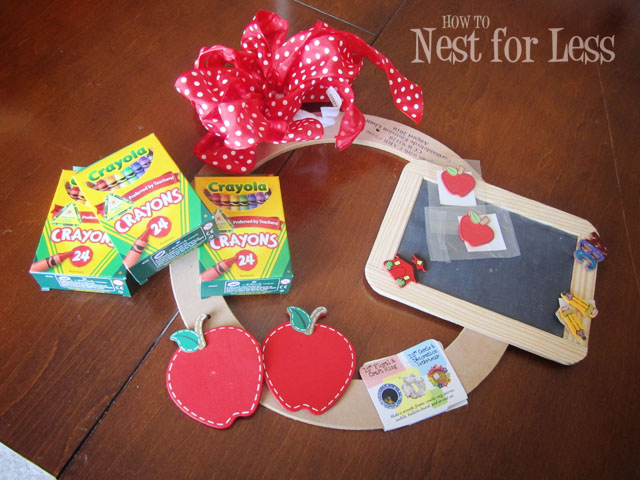
Craft Idea 4: Classroom Door Wreath
Now that we’ve explored the delightful apple-shaped keychain, let’s move on to our fourth craft idea: a classroom door wreath. This charming decoration is not only visually appealing but also creates a welcoming atmosphere for students and visitors alike, all while showing appreciation for your teacher.
Why a Door Wreath? 🌼
A classroom door wreath serves as a cheerful greeting that expresses warmth and creativity. It can brighten up any hallway and set the tone for a positive learning environment. Here are a few reasons why this craft shines:
- Personalization: You can customize it to reflect your teacher’s personality, interests, or the theme of the class.
- Community Spirit: A wreath that incorporates student artwork or messages brings everyone together, allowing classmates to participate in the gratitude.
Materials You’ll Need
Gather these supplies to create your unique classroom door wreath:
- A foam or wooden wreath base (available at craft stores)
- Artificial flowers or leaves (consider seasonal themes)
- Ribbons, twine, or burlap for a rustic touch
- Hot glue gun and glue sticks
- Scissors
- Optional: Personalized elements like a sign or student messages
Steps to Create Your Classroom Door Wreath
- Choose Your Base: Start with a foam or wooden wreath base as your foundation. This will support all the decorations.
- Plan Your Design: Arrange the artificial flowers and leaves on the wreath without gluing them first. This way, you can play with the layout until it’s just right!
- Attach Flowers and Leaves: Once satisfied, use the hot glue gun to secure the flowers and leaves to the wreath.
- Add Ribbons: Incorporate ribbons, twine, or burlap to create beautiful bows or trailing elements. This adds a delightful layer of texture.
- Personalize It: Create a small sign that says “Welcome” or “Our Amazing Teacher” and attach it to the wreath. If you have student messages, you could also weave those in creatively!
Reflecting on my own school days, a teacher had a wreath filled with artwork and notes from students, and it became a symbol of the community we built in that classroom. Crafting a classroom door wreath not only brightens up the space but also is a meaningful way to honor your teacher’s dedication. Let’s get crafting and spread the love! 🌷🎉

Craft Idea 5: Bookmarks with Inspirational Quotes
Having crafted a beautiful classroom door wreath, let’s explore another creative way to show your appreciation: bookmarks with inspirational quotes. These little treasures are not only practical but can also uplift your teacher’s spirits every time they use them.
Why Bookmarks? 📚
Bookmarks are a thoughtful gift for any educator, as they align perfectly with the love for reading and learning. Here’s why they make such a wonderful choice:
- Practical Use: Teachers often juggle multiple books—whether for grading, lesson planning, or personal reading. A personalized bookmark is a helping hand in their reading journey.
- Boosting Morale: Adding an inspirational quote can remind them of the impact they have on their students, providing daily encouragement in their important work.
Materials You’ll Need**
Creating these bookmarks is straightforward and fun! Gather the following materials:
- Thick cardstock or decorative scrapbook paper
- Scissors or a paper cutter
- Markers, colored pencils, or watercolor paints
- Ribbon, string, or washi tape for decoration
- Optional: Laminating sheets or clear contact paper for durability
Steps to Create Your Inspirational Bookmarks**
- Cut Your Cardstock: Begin by cutting your cardstock into bookmark-sized pieces, typically around 2 inches by 6 inches.
- Choose Your Quotes: Think of inspirational quotes that resonate with you or would uplift your teacher. Suggestions include:
- “The future belongs to those who believe in the beauty of their dreams.” – Eleanor Roosevelt
- “Teaching is the greatest act of optimism.” – Colleen Wilcox
- Design the Bookmark: Use markers or paints to write the quote neatly on one side. Decorate with doodles, patterns, or colorful borders that reflect their personality!
- Add a Touch of Flair: Attach a piece of ribbon or string at the top for an elegant touch. It can also make it easy to grab the bookmark from a stack of books!
- Optional – Laminate: If you want to make your bookmarks more durable, consider laminating them or covering them with clear contact paper.
I remember giving my history teacher a personalized bookmark adorned with quotes from notable figures in history. It became a conversation starter, and she often shared the quotes with her class, cultivating a positive learning atmosphere. Crafting bookmarks with inspirational quotes is a meaningful way to infuse daily motivation into your teacher’s life. Let’s dive into this creative project and inspire those who inspire us! 🥰📖
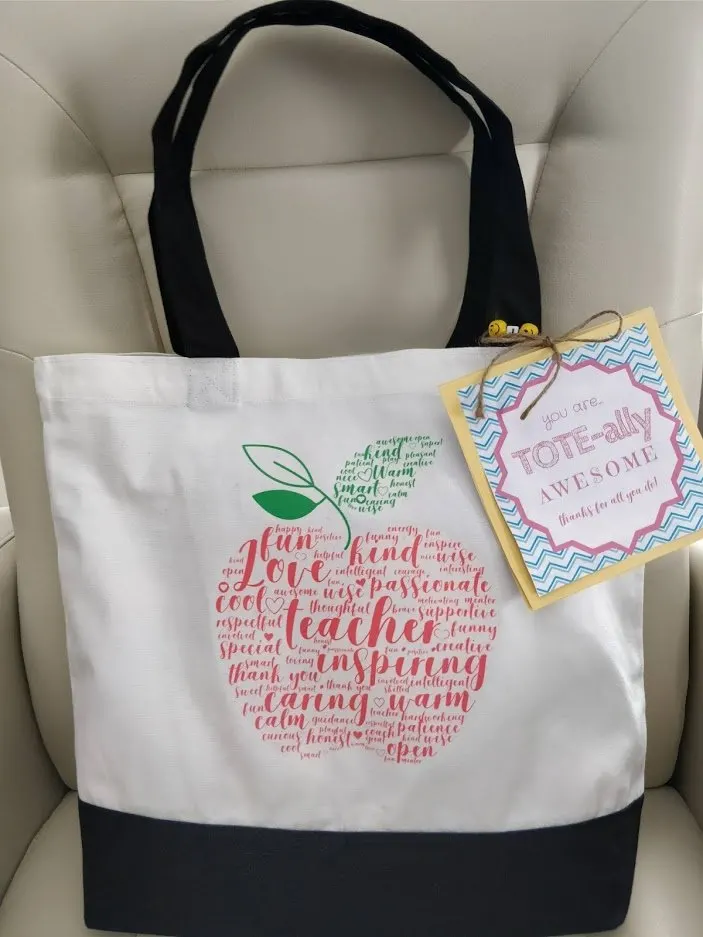
Craft Idea 6: Teacher Appreciation Tote Bag
Following our creative project of crafting inspirational bookmarks, let’s continue to spread the love with our sixth idea: a teacher appreciation tote bag. This practical and stylish craft not only serves a functional purpose but also showcases your heartfelt appreciation for all the hard work your teacher puts in.
Why a Tote Bag? 👜
Tote bags are fantastic gifts for teachers for several reasons:
- Utility: Teachers often carry books, supplies, or personal items to and from school daily. A personalized tote can make their commute a bit more enjoyable.
- Environmental Impact: By gifting a reusable tote, you promote sustainability and encourage eco-friendly practices, which is a nice bonus!
Materials You’ll Need**
Creating a custom tote bag isn’t complicated at all! Here’s what you’ll need to gather:
- A plain canvas or cloth tote bag (available at craft stores or online)
- Fabric paint or markers
- Stencils for lettering or designs (if you’re not confident in your freehand skills)
- Optional: Iron-on patches or embellishments (think fun quotes or symbols related to teaching)
Steps to Create Your Teacher Appreciation Tote Bag**
- Choose Your Bag: Start with a clean, plain tote bag. A light color works best to showcase your artwork.
- Design Your Message: Decide on a phrase or quote to express your appreciation, such as “Best Teacher Ever!” or “Teaching is a Work of Heart.”
- Prepare to Paint: If using stencils, position them on the tote bag and hold them in place. Otherwise, you can sketch your design lightly with a pencil to guide your painting.
- Get Creative: Using fabric paint or markers, fill in your message or design. Don’t hesitate to add personal touches, like doodles, stars, apples, or anything that signifies appreciation!
- Allow to Dry: Follow the paint instructions to ensure it dries completely. You might also want to set the paint with heat by lightly ironing it upside down.
- Optional Embellishments: Add any fun patches or additional decorations to make the bag even more personalized.
I remember once receiving a tote bag from my students adorned with motivational quotes and their doodles. It filled me with joy every time I used it, as I felt their love and support with each trip to the library or classroom. Crafting a teacher appreciation tote bag is a wonderful way to combine creativity with functionality. Let’s get crafty and show our teachers how much they mean to us! 🎉🌈

Craft Idea 7: Plant Pot with Teacher’s Name
Now that we’ve designed a stylish teacher appreciation tote bag, let’s dig into our seventh craft idea: a plant pot with the teacher’s name. This charming gift not only adds life to the classroom but also serves as a lasting token of appreciation.
Why a Plant Pot? 🌱
Incorporating nature into a classroom can enhance the learning environment. Here’s why a personalized plant pot is a wonderful choice:
- Air Quality: Plants help improve air quality, making the classroom a healthier space for teachers and students alike.
- Personal Connection: A pot featuring your teacher’s name or a thoughtful message shows that you care about their personal space and that you value their impact on your life.
Materials You’ll Need
Creating this thoughtful gift is simple and rewarding! Gather the following materials:
- A small ceramic or terracotta pot
- Acrylic paint or permanent markers
- Paintbrushes (if painting)
- Flowers or a small houseplant
- Optional: Sealant spray for protection
Steps to Create Your Personalized Plant Pot**
- Choose Your Pot: Select a small pot that’s just the right size for a plant. Terracotta pots are classic, but feel free to choose any style you believe your teacher would love.
- Prep the Pot: If painting, ensure the pot is clean and dry. You might want to apply a base coat if you’re using acrylic paint.
- Personalize It: Using paint or markers, write your teacher’s name on one side of the pot. For an extra touch, consider adding a short message or motivational quote related to teaching, such as “Growing Minds” or “Rooted in Knowledge”.
- Add a Design: Play around with colors and patterns! You could paint small flowers, doodles, or even chalkboard paint if you want the option to rewrite messages.
- Choose the Plant: Once your pot is decorated, fill it with a small houseplant, succulent, or even a few seeds. Choose something low-maintenance, as teachers may have busy schedules!
- Optional – Seal It: If you’ve used paint, consider applying a sealant to protect your artwork from weathering over time.
I fondly recall giving my art teacher a personalized plant pot filled with vibrant flowers. She placed it on her desk and said it brightened her day, reminding her of her students’ creativity. Creating a plant pot with your teacher’s name is a thoughtful and personal way to show your appreciation while bringing a bit of nature into the classroom. Let’s put our green thumbs to work! 🌼❤️

Craft Idea 8: DIY Teacher Award Ribbon
After the delightful experience of crafting a personalized plant pot for your teacher, let’s explore our eighth idea: a DIY teacher award ribbon. This fun and creative craft allows you to celebrate your teacher’s hard work in a unique way, and it’s sure to bring a smile to their face!
Why an Award Ribbon? 🏅
Creating an award ribbon serves as a playful yet heartfelt acknowledgment of your teacher’s dedication. Here’s why this craft stands out:
- Celebratory Gesture: Everyone loves a little recognition! An award ribbon presents your teacher as a winner, reinforcing their valuable role in your education.
- Customizable: You can easily personalize the ribbon with sincere compliments or specific achievements, making it special just for them.
Materials You’ll Need**
Gather these supplies to get started on your DIY award ribbon:
- Colored ribbon (in your teacher’s favorite colors)
- Scissors
- Craft glue or a hot glue gun
- Decorative materials (like stickers, markers, or glitter)
- Cardstock for the award tag
- A safety pin or alligator clip for wearing
Steps to Create Your DIY Teacher Award Ribbon**
- Decide the Size: Cut your ribbon into two long pieces (around 20 inches) and one shorter piece (around 4 inches) that will sit at the top.
- Create the Base: Lay the two long pieces on top of each other, positioning them in a ‘V’ shape. The shorter ribbon will be folded and glued on top to secure the form.
- Make the Award Tag: On a piece of cardstock, write your award title, such as “Best Teacher Ever” or “Teaching Superstar.” Feel free to add a little message expressing your thanks!
- Decorate the Ribbon: Use stickers, markers, or glitter to embellish the ribbon. Make it as colorful and eye-catching as possible!
- Attach the Award Tag: Glue the award tag to the center of the ribbon.
- Add the Safety Pin: Finally, attach a safety pin or alligator clip to the back so that your teacher can proudly wear or display their award!
I once surprised my math teacher with a DIY award ribbon after a particularly challenging but rewarding unit. She wore it with pride throughout the day, and I could see how much it meant to her. Crafting a DIY teacher award ribbon is a cheerful and creative way to honor your teacher’s impact. Let’s get started and make this award unique and special! 🎉🏆
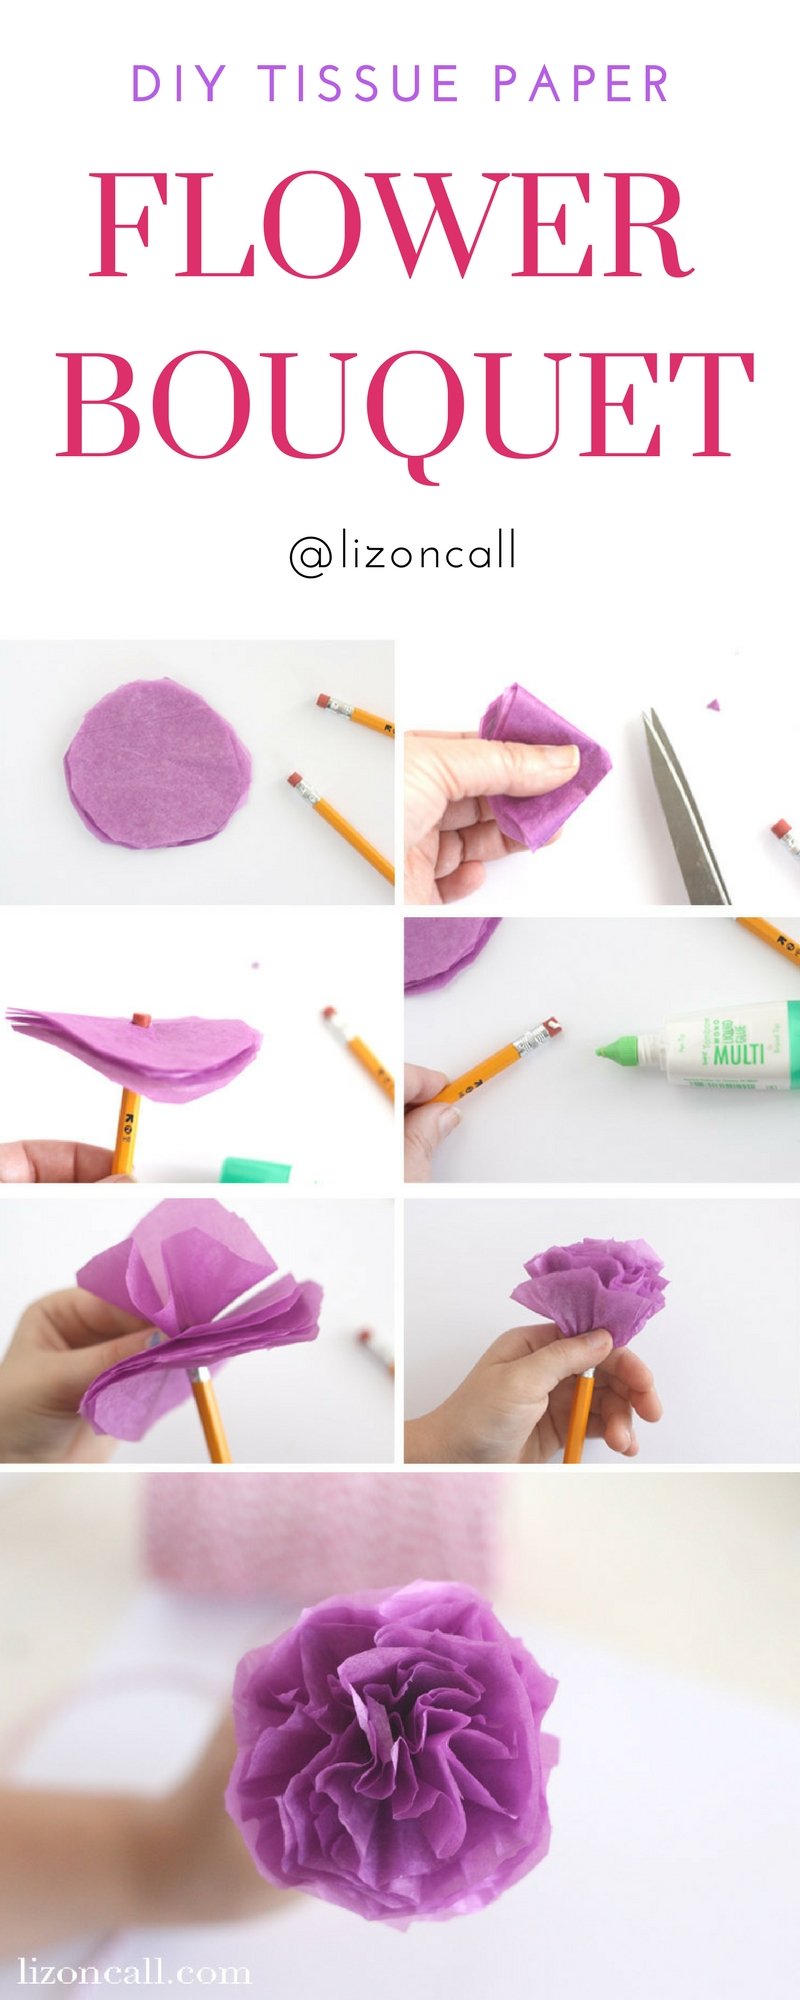
Craft Idea 9: Paper Flower Bouquet
Having crafted a charming DIY teacher award ribbon, let’s move on to our ninth craft idea: a paper flower bouquet. This beautiful and everlasting gift brings a splash of color into your teacher’s classroom and serves as a heartfelt gesture of gratitude.
Why a Paper Flower Bouquet? 🌸
Fresh flowers brighten any space, but they can wilt with time. A paper flower bouquet offers a lasting alternative that symbolizes your appreciation for your teacher’s time and efforts. Here’s what makes this craft special:
- Durability: Unlike real flowers, paper creations won’t wither away, allowing your teacher to enjoy them for years.
- Creative Expression: You can customize each flower to express different feelings or memories you’ve shared with your teacher.
Materials You’ll Need**
Creating a lovely paper flower bouquet is easy and fun! Gather the following materials:
- Colored paper (variety of colors for different flowers)
- Scissors
- Glue or tape
- Floral wire or wooden skewers (for the stems)
- Optional: Green tissue paper or wrapping paper for leaves
Steps to Create Your Paper Flower Bouquet**
- Choose Flower Designs: There are many flower styles to choose from—simple daisies, roses, or tulips. Decide on the types of flowers you’d like to make.
- Cut Flowers: Use colored paper to cut out flower shapes. If making roses, cut spirals; for daisies, cut out petals.
- Assemble Each Flower: For daisies, attach petals around a small cutout for the center. For roses, start rolling the spiral paper tightly and secure it with glue.
- Add Stems: Once your flowers are formed, attach them to floral wire or wooden skewers using the glue. If you’d like more robust stems, wrap them in green tape or tissue paper.
- Create Leaves: Cut out leaf shapes from green paper and attach them to the stems with glue.
- Arrange the Bouquet: Gather your flowers in a beautiful arrangement and finish with a ribbon around the stems or place them in a small vase.
I fondly recall gifting my favorite teacher a paper flower bouquet. She loved how personal and thoughtful the gift was, and it remained a centerpiece on her desk for the whole school year. Crafting a paper flower bouquet is a delightful and creative way to brighten your teacher’s day while showcasing your artistic side. Let’s get crafting and prepare a stunning bouquet! 🌼💖

Craft Idea 10: Memory Jar for Heartfelt Notes
As we wrap up our series of thoughtful craft ideas, let’s explore a particularly meaningful one: a memory jar filled with heartfelt notes. This craft is not only a lovely way to show your appreciation but also a lasting gift that your teacher can cherish and reflect upon throughout the school year.
Why a Memory Jar? 🏺
A memory jar serves as a container of positivity and gratitude, allowing your teacher to revisit fond memories and encouraging words anytime they need a little boost. Here’s why this idea stands out:
- Personal Keepsake: Each note can be a personal reminder of the impact your teacher has made, creating a heartfelt gift that truly resonates.
- Encouragement: When your teacher is having a tough day, they can pull a note from the jar and be reminded of their students’ appreciation and support.
Materials You’ll Need**
Creating a memory jar is simple and can be filled with love! Gather these materials:
- A clear glass jar or decorative container
- Colorful paper or cardstock for notes
- Pens or markers in various colors
- Ribbon or twine for decoration
- Optional: Stickers or decorations for the jar
Steps to Create Your Memory Jar**
- Prepare Your Jar: Start with a clean and dry jar. You can decorate the outside with stickers, paint, or ribbon to make it visually appealing.
- Cut Notes: Use colorful paper or cardstock to cut out small squares or rectangles for your notes. Aim for about 20-30 notes depending on how full you want the jar.
- Write Heartfelt Messages: Spend some time writing down your thoughts, memories, or even quotes that reflect your gratitude and admiration for your teacher. Each note can contain a specific moment, a thank you, or words of encouragement.
- Fill the Jar: Carefully fold or roll each note and place them into the jar. You can mix up the colors for a vibrant effect!
- Finish with a Bow: Tie a ribbon or twine around the top of the jar for that finishing touch.
I remember gifting a memory jar to a science teacher who had inspired my love for the subject. She shared that she would read a note whenever she needed motivation, which was incredibly rewarding to hear. Crafting a memory jar filled with heartfelt notes is a heartfelt way to express gratitude and appreciation. Let’s get started on this final craft idea that your teacher will treasure forever! 💕✨

XIII. Conclusion
As we reach the end of our crafting journey, it’s heartwarming to review the thoughtful ways you can appreciate your teachers. From handcrafted bookmarks to delightful memory jars, each idea provides a unique way to express your gratitude and acknowledges the significant role educators play in our lives.
The Importance of Appreciation
Taking the time to create something special for your teacher not only honors their hard work but also strengthens the teacher-student relationship. Remember, these crafts are more than just gifts; they are gestures of love and respect that show your support and recognition of the countless hours teachers dedicate to nurturing young minds.
- Building Connections: Each crafted item you give them can open up channels for deeper conversations, allowing you to connect on a more personal level.
- Creating Lasting Impact: Truly, a sincere gift can leave a lasting impression, making your teacher feel cherished and motivated throughout the school year.
Reflecting on Your Creativity
As you embark on creating these gifts, don’t hesitate to let your personality shine through your crafts. Sharing your thoughts and memories can make each item that much more meaningful. You might even consider including a personal anecdote or specific moment that illustrates how your teacher made a difference in your learning journey. I still remember how my teachers reacted to the little gifts I made for them. The reactions—ranging from tears to laughter—were priceless! Those moments of connection are often what make teaching truly rewarding. In conclusion, embracing your creativity to craft these thoughtful gifts reinforces the appreciation we all feel for educators. Let’s continue to celebrate and uplift our teachers, honoring their dedication with personal, heartfelt creations that they can treasure forever. Happy crafting! 🎉💖

