
Introduction
The power of creativity is truly limitless, especially when it comes to expressing gratitude and appreciation. Whether it’s for a teacher who’s poured their heart into education or simply to show a little kindness in your community, handmade gifts and thoughtful tokens of appreciation can leave a lasting impression. Nothing brightens someone’s day quite like a heartfelt gesture, wrapped in a bit of creativity and personal touch. When I think back to my own school days, I remember the joy I felt receiving a little handmade card from a student. It wasn’t just paper and ink – that card represented hours of effort, thoughtfulness, and a genuine desire to express gratitude. This is what makes handmade gifts so special: they’re crafted from the heart. In this blog, we explore an array of creative, personalized gifts that you can make for teachers, friends, or even yourself. Each crafted item holds the potential to spark joy and foster appreciation, showing that it’s truly the thought that counts. Here are some of the key areas we’ll delve into:
- Handmade Cards for a Personal Touch
- Teacher Appreciation Gifts
- Classroom Decorations
- Personalized Stationery
- Educational DIY Projects
- Relaxation Gifts for Teachers
- Green Thumb Gifts
- Upcycled Crafts
- Culinary Creations
What’s great about these projects is that they cater to various skill levels and interests. You can find simple yet stunning crafts or dive into more intricate creations that allow you to experiment and refine your artistic flair. Try your hand at making a pop-up thank you card for your child’s teacher, or perhaps a beautifully quilled paper thank you card to elevate your greeting. There’s no limit to the imagination! 🎨✂️ As you explore these ideas, don’t forget to personalize each gift. Adding a name, a special quote, or even a little doodle can make all the difference. Remember, the goal is to create something that resonates with the recipient and reflects your appreciation. While we’ve structured the blog in various gift categories to help you find your perfect fit, feel free to mix and match ideas. Perhaps a customized mug paired with homemade cookies in a jar would make for an unforgettable teacher appreciation gift! Let’s roll up our sleeves and dive into the wonderful world of handmade gifts, where every creation is a testament to gratitude, creativity, and the beauty of connection! 💌✨

Handmade Cards for a Personal Touch
There’s something incredibly delightful about receiving a handmade card, isn’t there? It’s more than just paper; it’s a treasure trove of emotions and effort, reflecting the giver’s care and thoughtfulness. Let’s dive into two exceptional ideas for handmade cards that will surely leave anyone feeling appreciated: the Pop-Up Thank You Card and the Quilled Paper Thank You Card.
Pop-Up Thank You Card
Creating a pop-up thank you card is like unleashing a mini explosion of joy when your recipient opens it! This clever design not only surprises but also showcases your creativity and effort. Here’s how to get started: Materials Needed:
- Cardstock paper (for durability)
- Scissors
- Craft knife
- Glue
- Markers or colored pencils
- Ruler
Step-by-Step Process:
- Prepare Your Base: Cut a piece of cardstock to your preferred card size (often 5” x 7”).
- Create the Pop-Up Element: On a separate piece of cardstock, draw your pop-up design—these could be flowers, stars, or even an inspirational quote. Cut out your design carefully using scissors or a craft knife.
- Build the Structure: Make two small slits on the base card to create tabs for your design to pop up through.
- Glue Everything Together: Secure your pop-up design to the tabs and write your heartfelt message inside the card.
Imagine the moment when the recipient opens this charming card and witnesses your creation spring to life! 🌟 This interactive element adds a memorable touch, ensuring that your gratitude shines.
Quilled Paper Thank You Card
Now, let’s delve into the art of quilling, a delightful technique that involves rolling, shaping, and gluing strips of paper to create intricate designs. A quilled paper thank you card radiates elegance and sophistication, making it perfect for anyone you want to impress. Materials Needed:
- Quilling strips (available at craft stores or easily made from colored paper)
- Quilling tool (or a toothpick works too)
- Glue
- Cardstock for the base
- Scissors
Creating Your Card:
- Prepare Your Base: Fold a piece of cardstock to create your card.
- Quill Your Design: Start rolling strips of paper using the quilling tool, creating various shapes like circles, teardrops, or spirals.
- Attach Your Art: Once you have a few pieces made, arrange them on your card to form a beautiful design, such as a bouquet or abstract art. Glue them down securely.
- Personalize It: Write a warm thank you message inside, complementing the beautiful exterior.
Quilled cards can truly stand out on any desk or mantelpiece. It’s a timeless craft that people often keep as cherished keepsakes, just like I still have a quilled card from a friend on my display shelf. Incorporating these handmade cards into your gift-giving repetoire allows you to communicate your emotions with a personal touch, enriching your connections with loved ones. Ready to explore more creative avenues? Let’s continue crafting joy and gratitude in our next section! 🎉
Teacher Appreciation Gifts
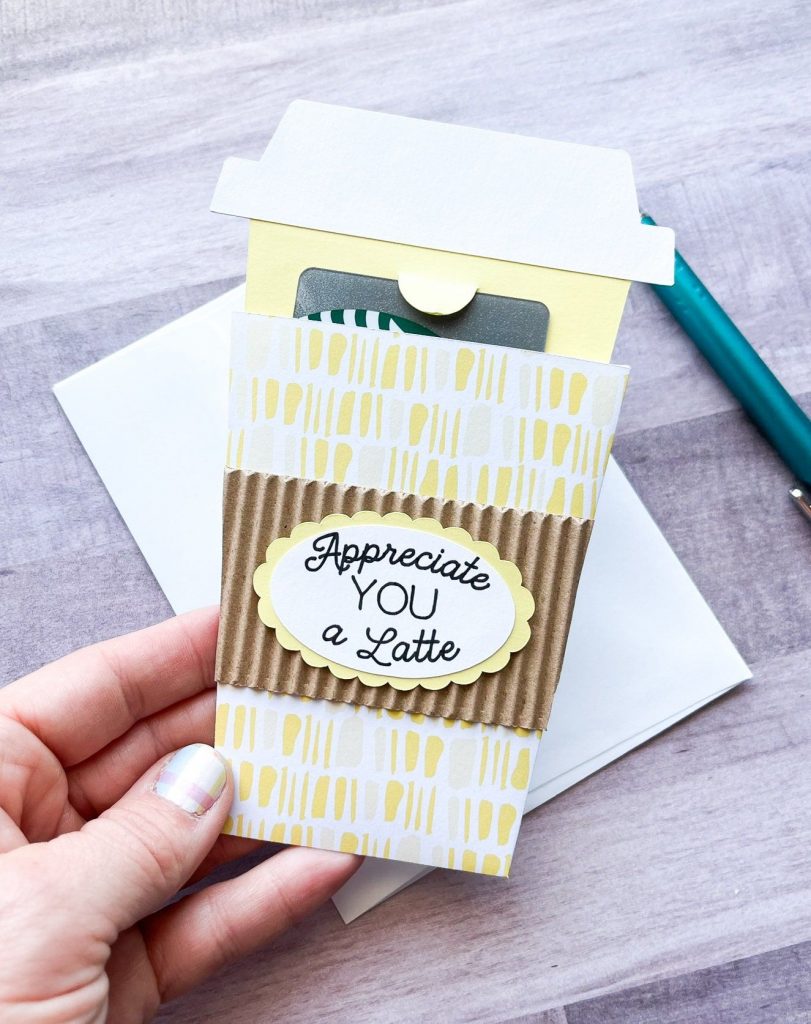
Transitioning from heartfelt cards to tangible expressions of gratitude, let’s explore two fantastic ideas for teacher appreciation gifts: the Customized Mug and the DIY Pencil Holder. These thoughtful gestures not only celebrate the hard work that teachers put in daily but also add a personal touch that makes a statement.
Customized Mug
A customized mug is a simple yet meaningful gift that a teacher can treasure long after the school year ends. After all, who doesn’t love sipping their coffee or tea from a mug that feels special? How to Customize a Mug:Materials Needed:
- Plain ceramic mug (white is best)
- Oil-based paint markers or sharpies
- Oven (for setting the design)
- Optional: Stencils or decals for added flair
Steps:
- Design Your Mug: Think about what your teacher loves. Maybe it’s an inspiring quote, their favorite subject matter, or even a funny inside joke that resonates. Use the paint markers to create your design on the mug.
- Set the Design: Once you’re satisfied with your masterpiece, place the mug in a cold oven. Turn it to 350°F (180°C) and let it bake for about 30 minutes. This helps set the paint, making it dishwasher-safe!
- Gift It with Love: Add a sweet touch by filling the mug with snacks, tea bags, or gift cards, and present it with a personal note thanking the teacher for their dedication.
When I gifted a customized mug to my favorite high school teacher, it brought such a warm smile to her face! It felt good to know that every time she used it, she’d remember her students fondly.
DIY Pencil Holder
Next up is the DIY pencil holder! This functional gift helps keep a teacher’s desk organized while also adding some personality to their workspace. Materials Needed:
- Empty tin can or small box (like a shoe box)
- Decorative paper, fabric, or paint
- Glue or tape
- Scissors and embellishments (like ribbon or stickers)
Steps:
- Prepare the Base: Clean and dry the tin can or box. If using a can, you can even sand down any sharp edges for safety.
- Decorate Your Holder: Use decorative paper or fabric to wrap around the can/box. Secure it with glue or tape. Get creative! You can paint it, add patterns, or even write the teacher’s name.
- Add Finishing Touches: Embellishments like ribbons, stickers, or washi tape can add flair. Fill the holder with pens, pencils, or markers, making it both beautiful and useful.
I once decorated a tin can for my art teacher, and she took it into the classroom right away. Watching her proudly display our handiwork was an unforgettable moment! These thoughtful gifts – a customized mug and a DIY pencil holder – embody the appreciation we often feel for our teachers. By adding a personal touch, you’re transforming simple items into cherished keepsakes. Ready to bloom some more creativity? Let’s uncover the next delightful way to show appreciation: classroom decorations! 🌼📚

Classroom Decorations
Continuing our journey of appreciation, let’s dive into the realm of classroom decorations. Creating a vibrant and welcoming environment for teachers and students boosts morale and learning. Two delightful ideas to brighten up classrooms are the Apple-Shaped Garland and the Teacher’s Day Banner. These crafts are not just visually appealing; they also carry thoughtful messages that resonate with the spirit of education.
Apple-Shaped Garland
Who can resist the charm of apple-themed decorations, especially in an educational setting? This Apple-Shaped Garland is fun to make and adds a personal touch to the classroom. Materials Needed:
- Red, green, and brown cardstock
- Scissors
- String or twine
- Glue or tape
- Hole punch (optional)
Crafting Steps:
- Create the Apples: Cut out apple shapes from the red cardstock and leaf shapes from the green cardstock. You can also cut out tiny brown rectangles for the stems.
- Assemble the Apple: Glue the stem and leaf onto each apple cutout. You might even let your students personalize them with messages or drawings on their apples; this adds a great interactive element!
- Stringing the Garland: Once your apples are ready, use a hole punch to make a small hole at the top of each apple. Thread the string or twine through each hole, spacing them out evenly.
- Hang it Up: Drape the garland across the classroom or at the doorway, giving it an inviting and cheerful atmosphere.
I remember making an apple garland with my classmates, and we chose to write little thank-you notes on the apples. That simple act elevated the idea from mere decoration to heartfelt appreciation. 🍏🍎
Teacher’s Day Banner
Next on the list is creating a Teacher’s Day Banner. This banner serves as a terrific centerpiece for classroom celebrations on Teacher’s Day or any day to honor educators. Materials Needed:
- Colorful paper or fabric
- Markers or paint
- String or ribbon
- Scissors
- Gluestick or tape
Creating Steps:
- Cut the Flags: First, cut pieces of paper or fabric into triangular or rectangular shapes for the banner. You can mix colors to make it vibrant!
- Write a Message: Use markers or paint to write something uplifting like “Thank You, Teachers!” or “We Appreciate You!” on each flag.
- Assemble the Banner: Attach each flag to a length of string or ribbon using glue or tape. Space them out evenly to balance the design.
- Display with Pride: Hang the banner in a prominent place in the classroom, where both teachers and students can see it.
When I helped make a banner for a Teacher’s Day event, it turned out to be a delightful surprise when our teacher walked in to see it hanging proudly. The look of appreciation on her face was priceless! ✨ These decorations serve a dual purpose: they provide a creative outlet for students while simultaneously promoting a positive and appreciative classroom ambiance. As we transition to our next topic, let’s continue celebrating creativity with personalized stationery to further express our gratitude! 🖊️📖
Personalized Stationery
Now that we’ve decked out classrooms with vibrant decorations, let’s explore the world of personalized stationery! Personalized items not only reflect thoughtfulness; they also offer practicality for teachers and students alike. In this section, we’ll focus on two appealing stationery items: the Hand-Decorated Notebook and the Embossed Bookmark. Both projects are not only easy to make but also serve as wonderful tokens of appreciation.
Hand-Decorated Notebook
A hand-decorated notebook is a perfect way to add flair to a teacher’s daily routine. Each time they jot down notes or lesson plans, they’ll be reminded of the appreciation from their students. Materials Needed:
- Blank hardcover notebook (available at many stores)
- Washi tape or colored duct tape
- Stickers or stamps
- Paint markers or gel pens
- Stencils (for those who prefer designs)
Steps to Create:
- Pick a Theme: Think about your teacher’s favorite colors, subjects, or hobbies. It could be floral, geometric, or even themed around books!
- Decorate the Cover: Use washi tape to outline the edges or create patterns. You can add stickers or stamps to bring more personality to the notebook.
- Personal Touches: Use paint markers or gel pens to write a meaningful message on the cover, such as “Notes from the Best Class” or “Inspiration Lives Here.”
- Present It Well: Wrap the notebook in a nice ribbon for an elegant touch and attach a small card with a thank-you note.
I’ll never forget the joy on my math teacher’s face when she received a decorated notebook from our class. She loved the colors and designs, making her classroom feel just a bit more personal and engaging. 📓✨
Embossed Bookmark
Alongside notebooks, an embossed bookmark adds elegance and functionality to any reading material. Every time a teacher opens their book, they’ll be reminded of their student’s regard. Materials Needed:
- Thick cardstock or blank bookmarks from craft stores
- Embossing powder
- Clear ink pad
- Heat gun or embossing tool (if unavailable, you can create texture using alternative methods)
- Decorative ribbons or markers for additional flair
How to Make It:
- Create Your Design: Write a quote or phrase on the bookmark using the clear ink pad. Popular options include inspirational quotes or even the teacher’s name!
- Apply Embossing Powder: Sprinkle the embossing powder over the wet ink and tap off the excess.
- Heat the Bookmark: Use the heat gun to melt the powder, giving it a shiny, raised finish. If you don’t have embossing supplies, consider using stickers or drawings instead.
- Personalize Further: Finish off by adding decorative ribbons or your teacher’s initials using markers.
I remember crafting a bookmark for my literature teacher with a quote about the beauty of reading. It turned out beautifully embossed, and she hung it on her desk as a symbol of her love for literature and our class. 📖🌟 Personalized stationery like hand-decorated notebooks and embossed bookmarks provide a dual benefit: they express heartfelt appreciation while also being practical. It’s an easy and creative way to show your gratitude! Now, let’s transition into the realm of educational DIY projects that blend fun and learning! 🎨✏️

Educational DIY Projects
As we continue our creative journey through personalized gifts and decoration, it’s time to dive into the world of educational DIY projects! These projects not only serve as thoughtful gifts for teachers but can also energize the classroom environment and facilitate learning. Let’s explore two fun and engaging DIY projects: Alphabet Magnets and a Math-Themed Puzzle. Both are simple to make and are sure to add a spark of joy and learning to any classroom!
Alphabet Magnets
Creating Alphabet Magnets is an entertaining and practical way to help young learners with their literacy skills. These magnets can adorn classroom whiteboards, giving children a fun way to practice letter recognition and spelling. Materials Needed:
- Wooden or foam letter cutouts (available at craft stores)
- Acrylic paint or craft markers
- Strong adhesive magnets
- Clear sealant (optional to protect the paint)
Steps to Create:
- Customize Your Letters: Start by painting or decorating the letter cutouts with bright colors. You can even let your students choose colors or patterns.
- Add Names or Sounds: Consider writing the phonetic sounds of each letter or even a word that starts with that letter on the magnet. For example, for “A,” you could add “Apple.”
- Attach the Magnets: Once the paint is dry, attach a strong adhesive magnet to the back of each letter.
- Display and Play: Encourage your teacher to use these letters for group activities or spelling games in the classroom.
I fondly remember making similar magnets in my childhood, and they instantly became the focal point during our spelling bee activities! Seeing the excitement on my classmates’ faces as they arranged letters into words was priceless. 🅰️🅱️
Math-Themed Puzzle
Next up is the Math-Themed Puzzle, a fantastic tool for making math concepts more engaging and enjoyable for students. This project not only encourages problem-solving but also strengthens the understanding of various math principles. Materials Needed:
- Cardboard (or a wooden base if you prefer sturdiness)
- Markers or paint
- Scissors or craft knife
- Ruler
- Math problems or equations to incorporate
Creating the Puzzle:
- Design Your Puzzle Pieces: Draw and cut out a puzzle shape from the cardboard. You can even draw shapes like squares, triangles, and circles to reflect different math topics.
- Incorporate Math Concepts: On each puzzle piece, write a different math problem or function, such as addition, subtraction, or simple equations.
- Add Color: Decorate the pieces with colors, numbers, or even illustrations that represent the math concepts.
- Challenge the Class: Present the puzzle in class, letting students work together to solve the problems as they fit the pieces together!
I remember making a math puzzle for our class, and it transformed math review sessions into an exciting team game. Watching my friends cheer when they fit the pieces together was a joy to behold! 🔢🧩 Educational DIY projects like alphabet magnets and math-themed puzzles inject fun into learning. They allow students and teachers to connect with the material creatively while nurturing essential skills. Now, let’s shift gears and explore some relaxation gifts for teachers that show appreciation for their hard work! 🌈😊
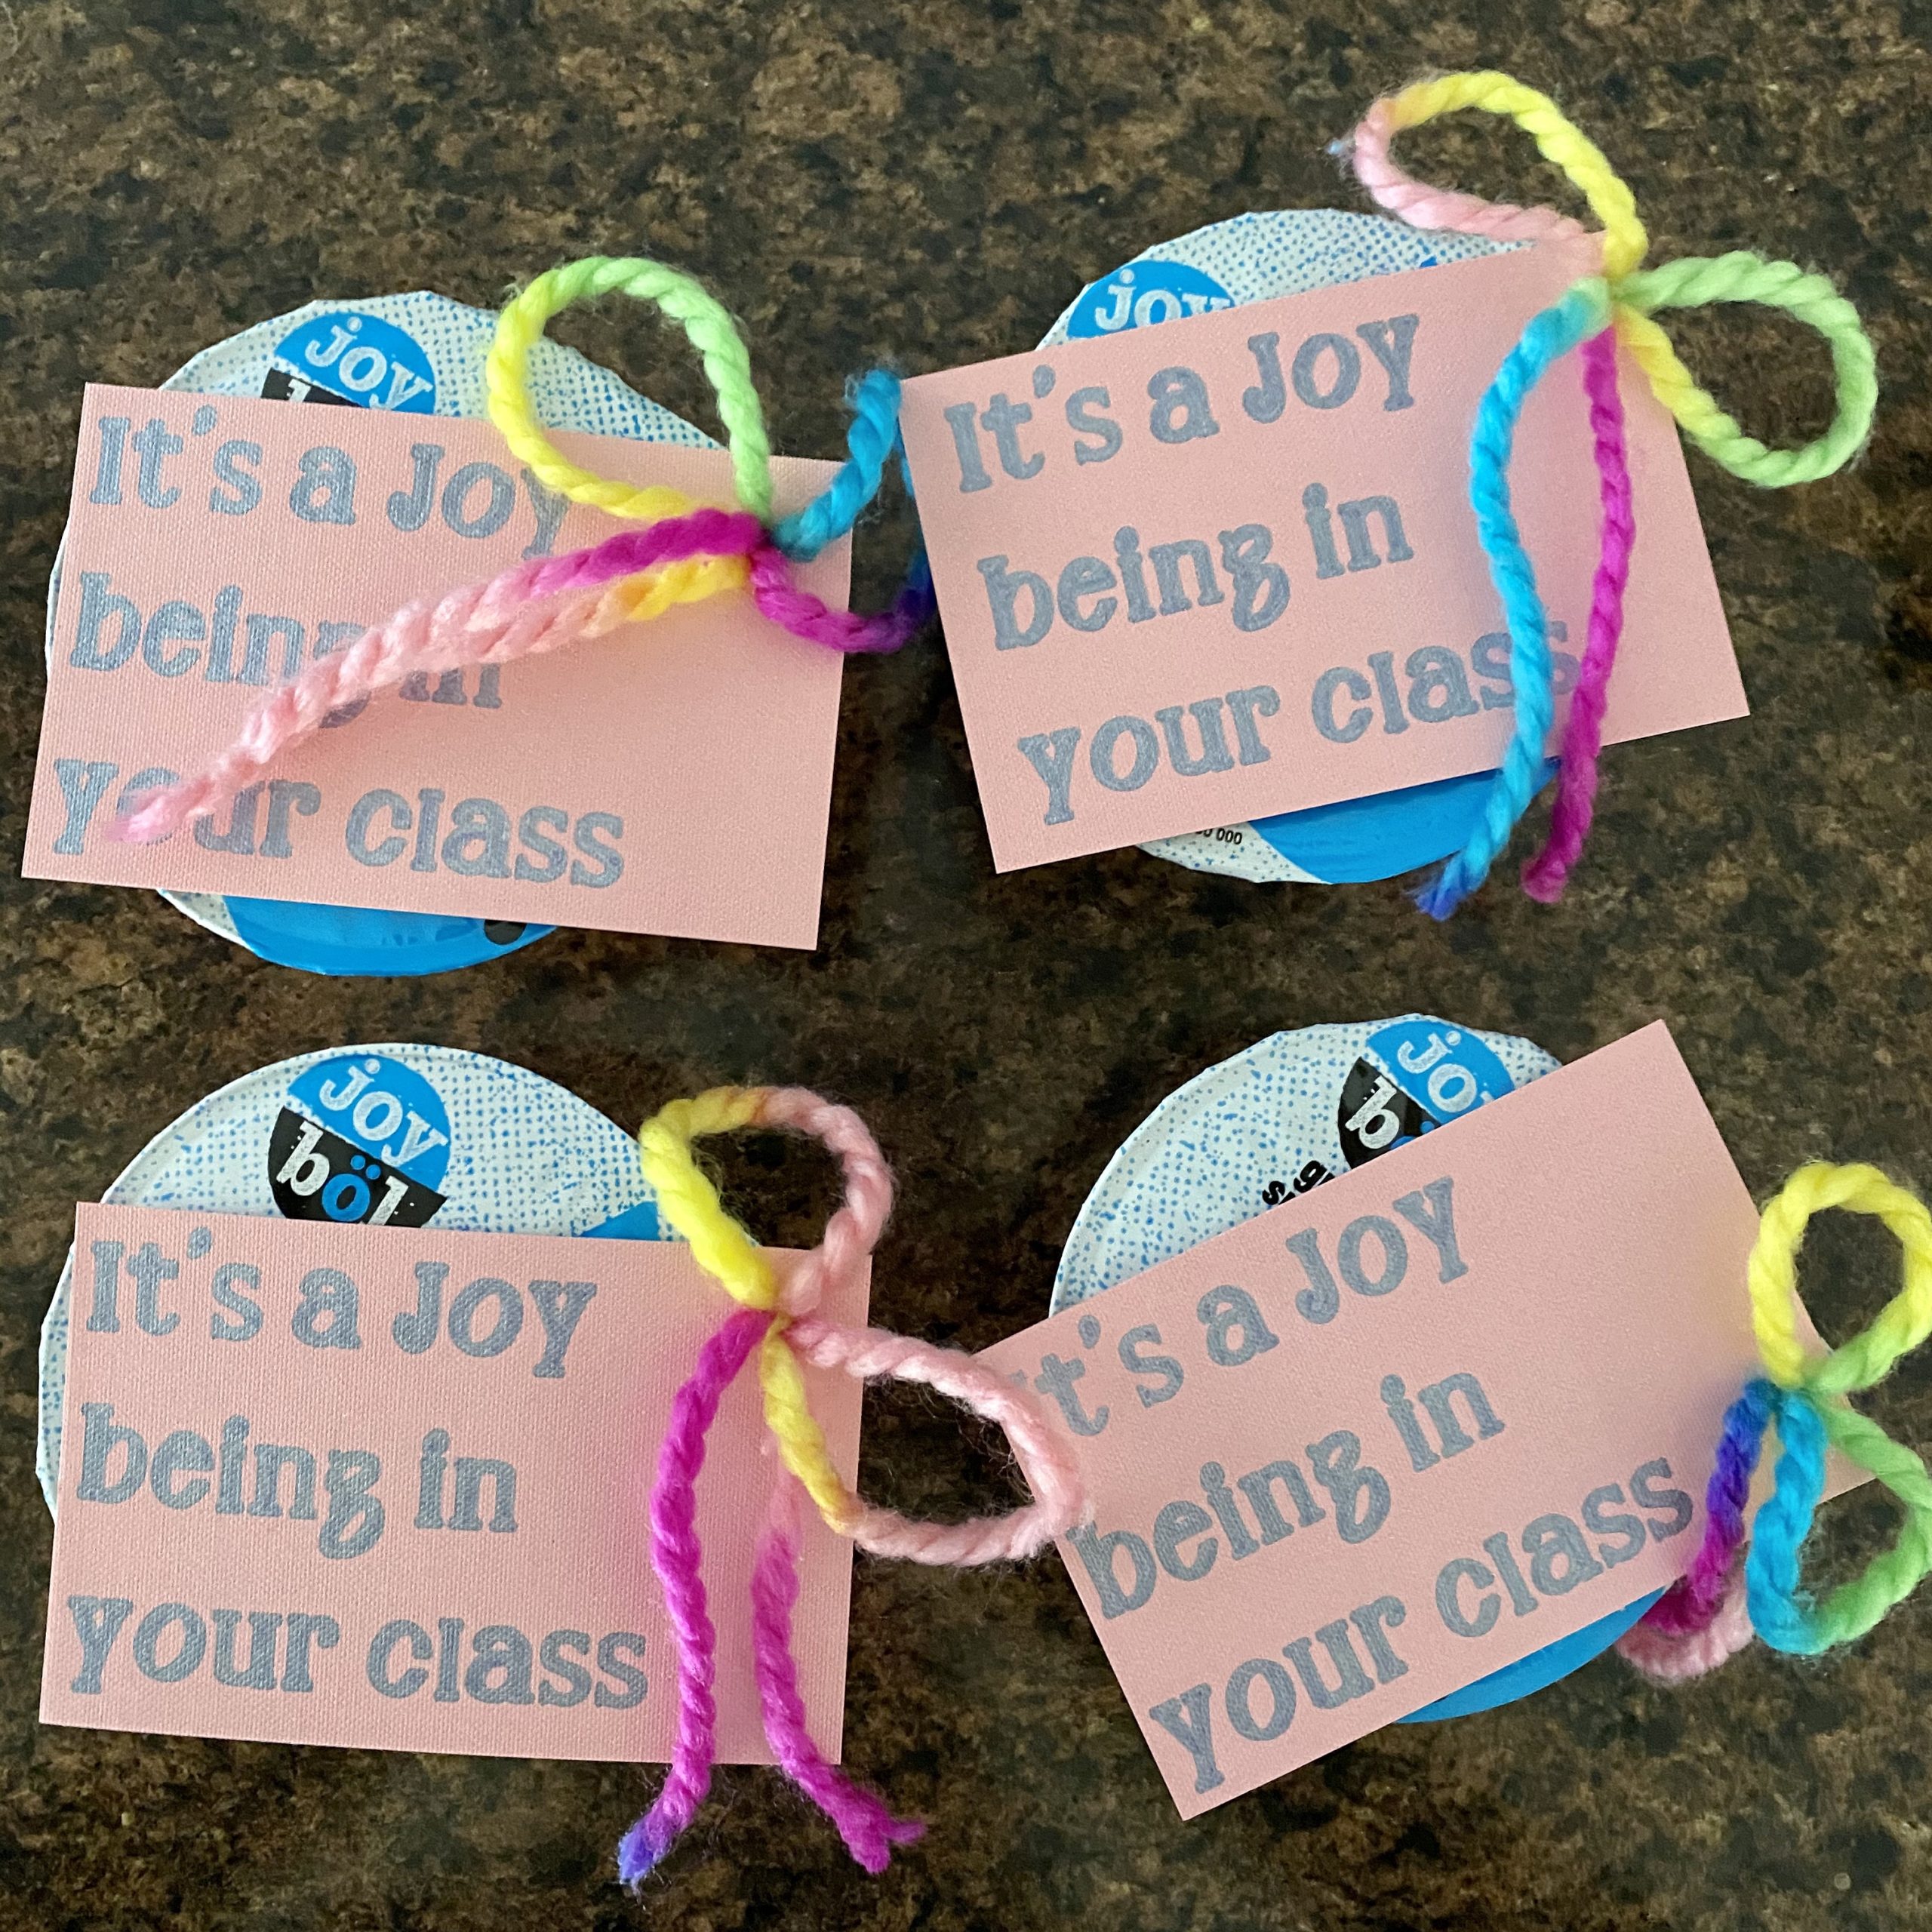
Relaxation Gifts for Teachers
After all the creative flair and educational projects we’ve explored, it’s essential to remember that teachers need relaxation just as much as any support or appreciation. With the hustle and bustle of managing classrooms and nurturing young minds, a little pampering can go a long way. Let’s delve into two fantastic relaxation gifts: DIY Bath Bombs and an Aromatherapy Eye Pillow. Both gifts offer a slice of tranquility that educators will surely appreciate!
DIY Bath Bombs
There’s something incredibly soothing about a warm bath, especially when enhanced with the fizz and fragrance of bath bombs. Making DIY Bath Bombs is not only fun but also a delightful way to express your appreciation for teachers, allowing them to indulge in self-care. Materials Needed:
- 1 cup baking soda
- 1/2 cup citric acid
- 1/2 cup Epsom salt
- 1/2 cup cornstarch
- 2.5 tablespoons essential oils (like lavender or eucalyptus)
- Food coloring (optional)
- Silicone molds (or molds of your choice)
Steps to Create:
- Mix Dry Ingredients: In a large bowl, combine baking soda, citric acid, Epsom salt, and cornstarch.
- Add Essential Oils: Add the essential oils and a few drops of food coloring if you’d like to make colorful bombs. Mix until combined.
- Form Your Bombs: Lightly spritz the mixture with water while mixing. The ideal consistency should hold together when squeezed. Press the mixture into your molds and let them set for 24 hours.
- Package Them Up: Once dry, pop out the bath bombs and package them in a decorative bag or box, adding a label that showcases the scents.
I made a batch of bath bombs for my favorite teacher in high school, and she loved the lavender scent. She shared that after a long day, soaking in the tub with a bath bomb was her little slice of heaven! 🛁✨
Aromatherapy Eye Pillow
An Aromatherapy Eye Pillow is another thoughtful gift that promotes relaxation. Ideal for moments when teachers need a break or want to meditate, this pillow can help reduce stress and soothe tired eyes. Materials Needed:
- Fabric (cotton works best)
- Dried lavender or chamomile (for aroma)
- Rice, flaxseeds, or a blend (for weight)
- Needle and thread or a sewing machine
- Optional: Essential oils (for extra scent)
Steps to Create:
- Prepare the Fabric: Cut two pieces of fabric to your desired pillow size (around 9″x4″ is a good standard).
- Sew Two Sides: Place the fabric pieces right sides together. Sew along three edges, leaving one side open.
- Fill the Pillow: Turn the pillow inside out and fill it with dried lavender or chamomile, along with rice or flaxseeds.
- Add Essential Oils: If you like, make the aroma stronger by adding a few drops of essential oils to the filling.
- Sew the Opening: Fold the raw edges inward and sew the last side shut.
I gifted an eye pillow to one of my college professors who often shared her stress management strategies with us. She cherished it, especially during those intense exam weeks. 🌼💤 Handcrafted gifts like DIY bath bombs and aromatherapy eye pillows are perfect ways to show teachers that their well-being matters. As we create a more supportive and relaxing environment for them, it’s a wonderful reminder of the positive impact they make daily. Next, let’s explore some green thumb gifts that celebrate the joys of gardening and nature! 🌻🌿
Green Thumb Gifts
Continuing our thoughtful journey of appreciation, let’s shift focus to green thumb gifts! Plants not only bring life and color to any space but also serve as a testament to growth and care—much like the nurturing that teachers provide their students. Two delightful and easy-to-create gifts in this category are a Mini Succulent Garden and a Decorative Plant Pot. These projects not only beautify any classroom or home but also symbolize appreciation for nature and sustainability.
Mini Succulent Garden
A Mini Succulent Garden is a charming gift that adds a touch of greenery to a teacher’s desk or home. Succulents are low-maintenance, making them perfect for those busy educators who may not have a green thumb. Materials Needed:
- A shallow container (like a terrarium, bowl, or rustic wood box)
- Various small succulent plants (easy to find at local nurseries)
- Potting soil
- Decorative stones or moss (for aesthetics)
- Optional: small figurines or decorations (like tiny garden gnomes or stones)
Steps to Create:
- Select Your Container: Choose a container that reflects your teacher’s style. Whether they prefer chic, modern, or rustic, you can find something that suits them well.
- Layer the Soil: Fill the bottom of the container with potting soil. Ensure to leave enough space to add the succulents without overcrowding.
- Plant Your Succulents: Carefully remove the succulents from their original pots and place them in the soil, arranging them in a way that looks pleasing.
- Add Aesthetic Touches: Sprinkle decorative stones or moss around the plants for a polished look. You can also add small figurines to give it a build-your-own scenery feel.
- Gift and Care Instructions: When you present the succulent garden, include some care instructions (e.g., sunlight requirements and watering tips) so your teacher knows how to maintain their new plants.
I remember gifting a mini succulent garden to my science teacher, who had always encouraged our explorations in biology. She adored it and constantly shared stories about how her plants were thriving in her classroom! 🌱💚
Decorative Plant Pot
Next, let’s craft a Decorative Plant Pot that can house any plant, making it an ideal gift. Adding a personalized touch to a pot not only brightens up a space but also reminds teachers of their students’ creativity. Materials Needed:
- Plain terracotta or ceramic pots
- Acrylic paint or paint markers
- Paintbrushes (if using paint)
- Clear sealant spray (for weatherproofing)
- Stencils or stamps (optional for added design)
Creating Your Pot:
- Prepare the Pot: Start with a clean and dry pot. If you’re using terracotta, you might want to sand it lightly for better paint adherence.
- Design Your Masterpiece: Use acrylic paint or paint markers to create designs or write messages. You could include encouraging phrases like “You Grow, Girl!” or “Rooting for You!”
- Add Personal Touches: Consider allowing your students to collaborate on decorating the pot, perhaps with their handprints or unique drawings.
- Seal and Present: Once the paint is dry, use a clear sealant spray to protect your art from the elements. Add a beautiful plant to the pot before gifting it to make it extra special!
During one of my art classes, we decorated pots as a project, and our teacher used it as a center piece in her classroom. Every student who entered was captivated by the colorful display—it was a constant reminder of our creativity! 🎨🌼 These green thumb gifts, the mini succulent garden and the decorative plant pot, not only showcase appreciation for teachers but also highlight the beauty of nurturing both plants and personal connections. Now, let’s explore some upcycled crafts that further showcase creativity and sustainability! 🌍♻️

Upcycled Crafts
As we wrap up our exploration of heartfelt gifts and vibrant green thumb projects, let’s dive into the world of upcycled crafts! These eco-friendly creations not only celebrate creativity but also help reduce waste while giving new life to everyday items. Two fabulous projects you can easily create are Recycled Paper Flowers and a Tin Can Desk Organizer. Both of these crafts are functional and decorative, making them perfectly suitable gifts for teachers.
Recycled Paper Flowers
Recycled paper flowers are a beautiful way to brighten someone’s day and can be made from materials you probably already have around the house. Using old magazines, wrapping paper, or even scrap paper, you can craft lasting blooms that require no water and never wilt! Materials Needed:
- Old magazines, scrap paper, or wrapping paper
- Scissors
- Glue or tape
- Floral wire (or sticks) for the stems
- Optional: buttons or beads for embellishments
Steps to Create:
- Cut the Petals: Start by cutting different-sized petal shapes from your recycled paper. You can create a variety of flower types, like daisies or roses, for a colorful assortment.
- Layer and Glue: Take several petal cutouts and layer them on top of each other, securing them with glue or tape in the center.
- Prepare the Stems: Attach your floral wire or sticks to the bottom of the flower by wrapping them or gluing them together.
- Add Finishing Touches: If you’d like, embellish your flowers with buttons or beads in the center, adding a personal detail.
I once organized a paper flower-making session in my art club, and we ended up crafting an entire bouquet to gift our favorite teacher! She displayed it proudly on her desk, and it sparked joy every time she looked at it. 🌸♻️
Tin Can Desk Organizer
A Tin Can Desk Organizer is another fantastic way to repurpose items you may otherwise toss out. This project not only keeps desks tidy but also adds a personal style element to any workspace. Materials Needed:
- Empty tin cans (soup cans work great)
- Decorative paper, fabric, or paint
- Glue or tape
- Scissors
- Optional: washi tape, stickers, or other embellishments
Steps to Create:
- Wash and Prepare: Clean the empty tin cans and remove any labels. Make sure there are no sharp edges by sanding them down if necessary.
- Decorate: Wrap the cans in decorative paper or fabric, or paint them in fun colors. You can create patterns, write the teacher’s name, or even include motivational quotes.
- Assemble the Organizer: You can leave them as individual cans or glue several together to form a caddy. Arrange them by size, or align them for a neat structure.
- Embellish: Use washi tape, stickers, or other embellishments to add creativity and style to the organizer.
I had a friend who made this desk organizer during a rainy weekend, and she got so creative with the designs! She filled it with pens and highlighters and gave it to her art teacher, who used it in front of her classroom. The bright colors and creative patterns really lit up the space! 🌈✏️ Upcycled crafts like recycled paper flowers and tin can desk organizers capture the spirit of creativity and sustainability. They celebrate the idea that with a little imagination, we can turn everyday items into beautiful, functional pieces of art. Now, let’s prepare to dive into some culinary creations that sweeten our appreciation even further! 🍪🎉

Culinary Creations
As we conclude our journey through thoughtful handmade gifts, creative upcycled crafts, and ways to celebrate educators, let’s indulge in the wonderful world of culinary creations. Food has a unique ability to bring joy and comfort, making it a perfect gift to show appreciation for teachers. Today, we’ll explore two delightful culinary projects: Homemade Cookies in a Jar and Hand-Decorated Cupcakes. Both options are not only delicious but also provide a heartfelt way to express gratitude!
Homemade Cookies in a Jar
Creating Homemade Cookies in a Jar is a fun and visually appealing way to give a portion of a baking experience. The recipient receives a jar filled with dry ingredients, and they can bake fresh cookies by simply adding a few wet ingredients. Materials Needed:
- Clean, empty mason jar or any clear jar with a lid
- Ingredients for your favorite cookie recipe (dry ingredients like flour, sugar, chocolate chips, oats, etc.)
- A decorative ribbon or string
- A printed recipe tag
- Optional: small cookie cutters or decorative labels
Steps to Create:
- Layer the Ingredients: Start by layering the dry ingredients in the jar, starting with the flour and moving down to the chocolate chips or any ingredients that can add color and texture. Be sure to pack each layer down tightly for a beautiful display!
- Craft the Recipe Tag: Attach a tag that includes the recipe instructions. Don’t forget to add what wet ingredients are needed (like eggs, butter, and vanilla).
- Decorate It Up: Tie a ribbon around the jar and add any additional decorations like a cute cookie cutter attached to the ribbon, or stick on a fun label.
- Gift It with Love: Present your jar of cookie ingredients with a big smile. Your teacher can enjoy baking the cookies at their convenience, bringing a bit of sweetness to their day.
I remember giving a jar of cookies to my favorite math teacher. She was thrilled not only by the gift but also by the whole experience of baking with her family later! 🍪🎉
Hand-Decorated Cupcakes
Another delightful gift idea is offering Hand-Decorated Cupcakes. These delicious treats can be personalized to reflect your teacher’s preferences, making them a perfect indulgence. Materials Needed:
- Pre-baked cupcakes (store-bought or homemade)
- Buttercream frosting (various colors)
- Piping bags with different nozzles
- Edible decorations (like sprinkles, edible glitter, or themed toppers)
Steps to Create:
- Frost Your Cupcakes: Using a piping bag, frost the cupcakes with beautiful swirls or spikes. You can have fun experimenting with different colors and designs!
- Get Creative with Decorations: Add edible decorations like sprinkles, chocolate drizzle, or themed toppers that express gratitude or relate to the subjects they love. For example, add math symbols for a mathematics teacher.
- Package Them Up: Place the decorated cupcakes in a cupcake box or tiered stand for presentation. Perhaps include a thank-you note.
During a classroom celebration, our class presented our teacher with hand-decorated cupcakes. Seeing her enjoy not only the treat but also the love and creativity poured into them made the moment truly special! 🧁❤️ Culinary creations like homemade cookies in a jar and hand-decorated cupcakes serve as delicious gifts that delight the senses. They reflect the joy of sharing food and celebrate the connections we create with our educators. With this final section, you’ve got a complete array of thoughtful ways to show appreciation! It’s time to spread kindness and creativity to the teachers who inspire us every day! 🍽️🌟