
Crafting offers a wonderful way to express creativity and bring a personal touch to your home. Whether you’re upcycling materials you already have or diving into a new hobby, there’s a craft for everyone. In this article, you’ll find inspiration in various crafting categories, such as paper, fabric, recycled materials, home décor, jewelry making, painting, and clay creations. Each section will explore different projects that you can easily make, even if you’re a beginner. Here’s a look at why each crafting avenue is worth your time and how it can add value to your life.
The Joy of Getting Hands-On
Crafting is not just about the end product; it’s about enjoying the process. The simple act of shaping and creating is therapeutic. When I first delved into crafting, I found it to be an excellent way to de-stress after a long day. The best part? I discovered that each project brought a sense of accomplishment and joy that I hadn’t experienced in quite some time. Many people turn to crafts for relaxation and mindfulness. Here’s why you might want to join this community:
- Sense of Accomplishment: Even the smallest projects can bring immense satisfaction. The feeling of creating something from scratch is unmatched!
- Mindfulness: Engaging in crafts encourages you to focus on the task at hand, allowing you to clear your mind of daily stresses.
- Learning New Skills: Every craft introduces you to different materials, techniques, and tools, broadening your creative toolbox.
- Connecting With Others: Sharing your projects with friends and family, or joining crafting groups, can lead to wonderful relationships and shared experiences.
Versatility of Materials
The world of crafting is versatile, and you can embark on projects using a wide range of materials. Think of all the items you already have around the house! From paper scraps to fabric remnants, there’s no need to spend heaps of money on supplies. Here are some materials you might consider:
- Paper: Recyclables such as newspapers, magazines, and gift wraps can be transformed into beautiful works of art.
- Fabric: Old clothes or fabric remnants can become elegant, functional items.
- Recycled Items: Glass jars, tin cans, and even plastic bottles can be upcycled into stunning home décor or functional pieces.
- Nature Materials: Leaves, twigs, and stones can be combined with various crafts to bring the outdoors in.
Crafting for Home & Heart
Crafting goes beyond making just pretty objects—it can enhance your living space and touch your heart. Each handmade piece can hold special meaning or memories. For example, consider creating customized picture frames to highlight moments that matter the most or crafting DIY fabric coasters that showcase your unique taste around the home. Engaging in crafting not only beautifies your space but also acts as a reminder of your experiences and passions. Have you ever made something that felt like an extension of yourself? When I fashioned my first macramé wall hanging, it adorned my living room like a badge of honor, reminding me of the dedication and love I put into it.
More to Explore
In the sections ahead, you will find several crafting suggestions to inspire you. Each project is categorized for easy navigation and includes tips that cater to various skill levels. You don’t have to be a seasoned crafter to find joy in these tasks! In conclusion, crafting is more than just a hobby; it’s a gateway to express your creativity, find relaxation, and beautify your surroundings. So gather your materials, roll up your sleeves, and let’s dive deeper into the enchanting world of crafts, where each project brings a piece of joy, connection, and discovery. Happy crafting! 🎨✨
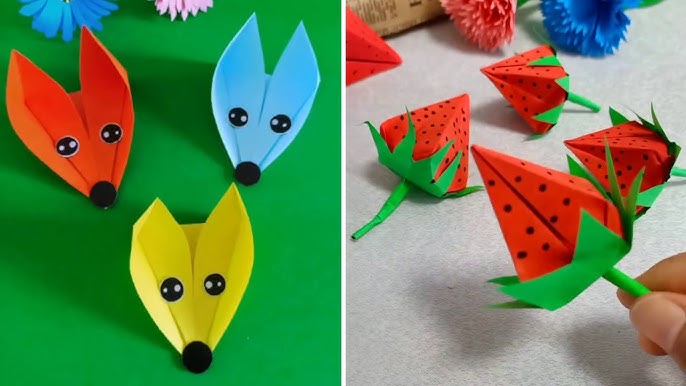
Crafting offers a delightful journey into creativity, and one of the most accessible and rewarding categories is paper crafts. Using just a few basic supplies, you can transform simple sheets of paper into stunning pieces of art that are perfect for gifts, decorations, or simply a way to unwind. Let’s dive into two popular paper crafting techniques: origami and paper quilling.
Origami Creations
Origami, the traditional Japanese art of paper folding, is an activity that never fails to amaze. There’s something incredibly satisfying about taking a flat piece of paper and bringing it to life through a series of precise folds. What I love most about origami is how it encourages mindfulness; each fold requires concentration and patience, making it a perfect way to detach from daily distractions. Have you ever tried making origami? If not, here are a few easy projects to start with:
- Origami Cranes: This is a popular starter project. They symbolize peace and hope, and they look beautiful displayed together. You can make a wish and fold 1,000 cranes to grant it!
- Paper Flowers: Folding paper into flowers is not only fun but also creates lovely décor for your space. They’re perfect for brightening up a room or as unique gifts.
- Origami Boxes: These are immensely practical. You can create decorative containers for small items or use them for gift-giving.
To make origami more engaging, consider participating in local workshops or finding online tutorials. I remember joining a community class where we learned to make intricate models like dragons and stars. It was a fantastic way to meet new people and enhance my skills!
Paper Quilling Projects
Another mesmerizing paper craft is paper quilling, which involves rolling, shaping, and gluing strips of paper to create intricate designs. This craft offers endless possibilities for creativity, and it allows you to experiment with colors, shapes, and patterns. If you’re looking for a new hobby that combines artistic flair with detail-oriented work, quilling might just be perfect for you! Here are a few ideas for your paper quilling adventures:
- Greeting Cards: Head-turning cards for birthdays or other occasions can be easily made with quilling. Create flowers, intricate borders, or personalize them with the recipient’s initials.
- Wall Art: Take your quilling a step further by crafting scenes or abstract forms, which can be framed as art pieces and hung on your walls.
- Decorative Paper Cutouts: Use quilling techniques to make delicate designs and incorporate them into scrapbooking, or as embellishments on notebooks and journals.
When I first started quilling, I was amazed at how versatile it was. A simple quilling tool can turn a flat strip of paper into stunning scrolls and shapes. There’s something deeply satisfying about creating a design that starts as nothing but paper!
Getting Started with Paper Crafts
To get started with these paper crafts, here’s a short list of recommended tools and materials: For Origami:
- Origami paper (available in various colors and patterns)
- A flat, smooth surface to fold
- Optional: a bone folder to make crisp folds
For Quilling:
- Quilling paper strips (make sure they are of good quality)
- A quilling tool or slotted tool
- Scissors and glue
- Tweezers for precision
As you immerse yourself in the world of origami and quilling, don’t forget to have fun and embrace the learning process! Your creations don’t need to be perfect; the joy is in the journey of crafting them. In the upcoming sections, we’ll explore fabric crafts that can further ignite your creativity and provide you with another avenue to express your artistic self. Let’s keep the momentum going and see what fabric has to offer! 🎨📄✨

Transitioning from the world of paper crafts, let’s explore the vibrant realm of fabric crafts! Fabric offers a unique texture and warmth that can catapult your creativity into new heights. Whether you’re embarking on a new project or looking to repurpose old materials, fabric crafts are both fun and versatile. Today, we’ll focus on two delightful fabric projects: no-sew fabric flowers and DIY fabric coasters.
No-Sew Fabric Flowers
Creating no-sew fabric flowers is a quick and delightful way to breathe life into your home décor. These charming flowers can be used as embellishments for gifts, hair accessories, or simply as decorative pieces around your space. The best part? You don’t need any special sewing skills to make stunning blooms! When I first tried making these flowers, I was amazed at how simple and satisfying they were. Here is a step-by-step guide to help you get started: Materials Needed:
- Fabric scraps (cotton, felt, or any fabric you love)
- Scissors
- Hot glue gun or fabric glue
- Buttons or beads for the center (optional)
- Flower templates (optional, but helpful for beginners)
Steps:
- Cut Your Fabric: Start by cutting your fabric into circles. You can vary the sizes to create flowers with layers. An assortment of colors can add depth and interest.
- Create Petals: For each circle, fold it in half and then in half again to create a petal shape. If you want a more intricate design, you can cut scalloped edges or notches along the sides.
- Glue the Layers: Stack several petal shapes on top of one another, gluing them together at the base with your hot glue.
- Add a Center: If you choose, glue a button or bead in the center to finish off your flower.
- Display: You can glue your fabric flowers onto hair bands, wire stems, or embellish gift packaging.
The beauty of these flowers is that you can customize them according to your taste and needs. You might even organize a crafting party with friends and create an entire bouquet in an afternoon! 🌸
DIY Fabric Coasters
Another crafty project that adds character to your home is making DIY fabric coasters. Not only are they functional, but they also allow you to showcase your personal style. With a few simple materials, you can protect your surfaces while adding a pop of color to your décor. When I first created fabric coasters, I used old jeans and some bright fabric scraps, and let me tell you—everyone was asking for their own set! Materials Needed:
- Fabric (use cotton for absorbency or any fabric you prefer)
- Thin felt or quilt batting (for cushioning)
- Scissors
- Fabric glue or a sewing machine (if you’re comfortable sewing)
- Measuring ruler
Steps:
- Cut Your Fabric: Decide on your coaster size; a good measurement is around 4×4 inches. Cut two squares of your fabric and one square of felt.
- Layering: Place one square of fabric on the table, followed by the felt, and then the second square of fabric on top, right sides together.
- Glue or Sew: If you’re using glue, spread a thin layer around the edges and press down to seal. If you’re sewing, leave a small opening on one side for turning.
- Turn Right-Side Out: Once glued or sewn securely, turn the coaster right-side out, pushing out the corners.
- Finish Up: If you sewed the coaster, you can tuck the opening and sew it closed.
- Personalize: Decorate with fabric paint or add some patches for a unique touch.
These coasters make superb gifts for housewarmings or to uplift your own living space. You can even make them in holiday themes or color schemes that fit the seasons. Just imagine sipping on your favorite drink with a beautiful coaster underneath! By trying these fabric crafts, you’ll harness new skills and create unique pieces that surround you with warmth and charm. Next, let’s continue to explore the creative possibilities that recycled crafts can bring to our crafting journey! 🧶✨

Moving on from the world of fabric crafts, we now enter the exciting domain of recycled crafts! Embracing sustainability while exploring your creative side is incredibly rewarding. Recycled crafts not only help reduce waste but also breathe new life into items that might otherwise end up in the trash. Today, we’ll focus on two fun and functional projects: upcycled glass jars and tin can planters.
Upcycled Glass Jars
Glass jars are one of the most versatile materials for crafting, and they are often readily available in your home. By upcycling glass jars, you can create stunning decorations, storage solutions, or even practical gifts. I remember the first time I transformed an old spaghetti sauce jar into a beautiful candle holder; it became a showstopper at our dinner parties! Let’s Dive into Some Creative Ideas:
- Storage Containers: Use jars to organize your kitchen, craft supplies, or toiletries. Paint the outside with chalk paint to create a rustic look and label them with twine or stickers for easy identification.
- Candle Holders: Place tealight candles or fairy lights inside jars to create charming centerpieces. You can decorate the jars with jute twine, ribbons, or lace for a more personalized touch.
- Planters: Glass jars can be perfect for small plants like succulents or herbs. Just add some pebbles at the bottom for drainage and soil, and you’ve got a lovely indoor garden.
Steps to Create Your Own Upcycled Jar Project:
- Clean the Jars: Remove labels and thoroughly wash the jars to eliminate any residue.
- Paint or Decorate: Decide on your design. You can use spray paint, washi tape, or other craft supplies.
- Add Your Items: Fill your glass jar with the desired contents, whether it’s kitchen items, plants, or candles.
- Display: Find a lovely spot in your home to showcase your creation!
Upcycling glass jars is not only eco-friendly but can also spark creativity and innovation in your home. The best part is that each jar can reflect your personal style and creativity!
Tin Can Planters
Now, let’s turn our attention to tin can planters—a fantastic way to integrate gardening into your crafts while also reusing materials. Those empty tin cans that accumulate in your pantry can become charming, rustic planters for your favorite plants. I’ve personally created several of these planters for my balcony, and they always receive compliments from guests. Here’s How You Can Get Started: Materials Needed:
- Clean, empty tin cans (soup cans, coffee cans, etc.)
- Hammer and nail or a drill (for drainage holes)
- Paint or decorative paper (optional)
- Potting soil
- Plants or seeds of your choice
Steps:
- Prepare the Cans: Start by thoroughly cleaning the tin cans. Remove any labels, and ensure they’re dry.
- Create Drainage Holes: Use a hammer and nail or drill to make several holes in the bottom of the can for water drainage. This step is crucial to prevent root rot.
- Paint or Decorate (Optional): If you want to spruce up the look, paint the outside of the can or wrap it in decorative paper or fabric.
- Add Soil: Fill the can with potting soil, leaving about an inch of space from the top.
- Plant: Add your desired plants or seeds, and water them lightly to help them settle in.
- Display: Place your tin can planters on windowsills, balconies, or even hang them using twine for a vertical garden look.
These tin can planters not only add greenery to your space but also showcase your craftsmanship and eco-conscious approach. Plus, they’re an excellent project for kids—teaching them about gardening and recycling at the same time! In conclusion, combining creativity with sustainability through recycled crafts is a fulfilling endeavor. From upcycling glass jars to creating tin can planters, these projects are not just a fun way to spend your time—they’re also a positive contribution to our environment. Up next, we’ll explore some fabulous home décor crafts that will elevate your living space! 🌿✨
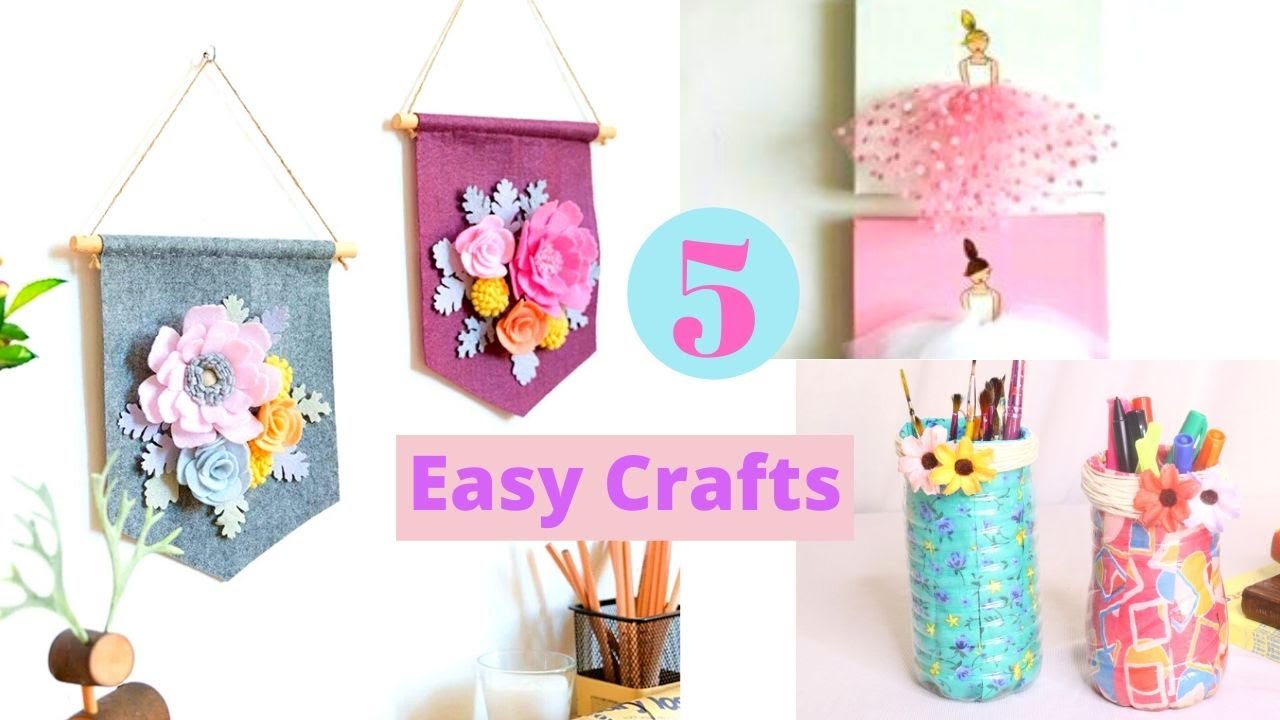
Continuing our crafting journey, let’s immerse ourselves in the world of home décor crafts! Creating unique pieces to decorate your space not only enhances the aesthetics of your home but also allows your personality to shine through. Today, we’ll explore two popular projects: macramé wall hangings and customized picture frames that can truly elevate your living environment.
Macramé Wall Hanging
Macramé has made a striking comeback in recent years, transforming simple macramé cord into stunning wall art. This ancient craft involves knotting yarn or cord to create beautiful patterns and designs. The first time I tried making a macramé wall hanging, I was amazed at how therapeutic the process was. It felt like a meditative exercise while allowing me to create something truly beautiful for my living space. Getting Started with Macramé: Materials Needed:
- Macramé cord or yarn (choose a color that matches your décor)
- A wooden dowel or branch (as a base)
- Scissors
- Measuring tape
Steps:
- Cut Your Cord: Measure and cut lengths of cord. For a basic wall hanging, you might want to start with 6-8 pieces, each around 3-4 feet long.
- Attach to Dowel: Use a simple knotting technique (like the lark’s head knot) to attach your cords to the dowel. You can have fun playing with different lengths and placements.
- Choose Your Knots: Familiarize yourself with basic macramé knots such as square knots, half hitch knots, and spiral knots. Combine these to create unique patterns.
- Design: As you work, let your creativity flow! You can create fringes, layers, or intricate patterns.
- Finishing Touches: Once you’re happy with your design, trim the ends to create a neat finish or leave them long for a bohemian vibe.
- Display: Hang your macramé piece on a wall—trust me, it becomes an instant conversation starter!
Macramé wall hangings are not only decorative but also practical; you can add small wooden beads or shells to further enhance the design. You can easily spend an afternoon crafting and end up with a statement piece that enhances your home.
Customized Picture Frame
Now let’s shift gears to another delightful home décor project: customized picture frames. Frames can highlight your favorite memories and add a personal touch to your surroundings. I’ve made several customized frames for family photos, and each one is a lovely reminder of the moments we’ve shared. Materials Needed:
- Plain wooden or cardboard picture frames
- Acrylic paints or spray paint
- Decorative embellishments (washi tape, stickers, stencils, fabric scraps)
- Glue, hot glue gun, or Mod Podge
- Scissors
Steps:
- Choose Your Frame: Start with a basic frame that suits the size of your photos. It can be found at craft stores for minimal investment.
- Paint the Base: Consider painting the frame with your chosen color. Allow it to dry completely before moving on to the next step.
- Decorate: Let your creativity run wild! You can:
- Apply decorative paper or fabric to the frame edges using glue.
- Use washi tape to create patterns or borders.
- Add embellishments like buttons, flowers, or even shells collected from beach trips.
- Insert Your Picture: Place your favorite photo in the frame, securing it well.
- Display: Find the perfect spot in your home to showcase your customized frame. You can create a gallery wall by combining several frames of different sizes and designs.
Customized picture frames not only add character to your home but provide an opportunity to showcase beautiful memories in an aesthetically pleasing way. Each frame can tell a story or evoke emotion, making your living space even more personal. Crafting home décor pieces like macramé wall hangings and customized picture frames is a brilliant way to bring your style and personality into your environment while spending quality time exploring your creative side. Next, we’ll delve into the captivating world of jewelry-making, where you can create beautiful accessories to complement your style! 🌼🖼️✨

Stepping into the enchanting realm of jewelry making opens up a whole new world of creativity and self-expression. Creating beautiful accessories can be a fulfilling way to adorn yourself, share your style, and even gift loved ones with unique pieces they’ll treasure forever. Today, we’re diving into two exciting projects: beaded bracelets and wire-wrapped pendants. Let’s get started!
Beaded Bracelets
Beaded bracelets are an excellent introduction to jewelry making. They’re simple to create and allow you to express your personality through colors, styles, and patterns. I still remember the day I crafted my first beaded bracelet; it was a burst of joy to wear a piece I made myself! Getting Started with Beaded Bracelets: Materials Needed:
- Beads of your choice (think about color, shape, and size)
- Stretch cord or elastic thread
- Scissors
- Optional: bead threader or crimper
Steps:
- Choose Your Design: Before you start stringing beads, lay out your design on a flat surface. This way, you can experiment with arrangements until you find something that feels right.
- Measure Your Wrist: Cut a length of stretch cord that’s about 2-3 inches longer than your desired bracelet length. This extra length will allow for tying knots later.
- String the Beads: Begin sliding your chosen beads onto the cord, ensuring the design flows smoothly. Mix and match different types of beads for varied textures, or choose a monochromatic theme for a sleek look.
- Secure the Ends: Once you’ve added all your beads, tie a knot securely. To ensure it’s strong, you can tie a double knot and add a small dab of glue to keep it in place.
- Trim and Finish: Trim any excess cord, and your beaded bracelet is ready to wear!
The beauty of beaded bracelets is their versatility. You can create sets for different occasions, like bright and fun colors for summer or muted tones for autumn. You can even involve friends or family in a crafting day and create matching bracelets together! 🎨💖
Wire Wrapped Pendants
Next up is a more advanced project: wire-wrapped pendants. This technique allows you to transform stones, glass beads, or found objects into stunning jewelry pieces. Every wire-wrapped pendant tells a story, whether it’s made from a cherished stone or a unique piece you discovered on your travels. My first wire-wrapped pendant was a small sea glass piece I found at the beach; I still wear it proudly! Getting Started with Wire Wrapped Pendants: Materials Needed:
- Wire (26-30 gauge for wrapping)
- A focal bead or stone
- Wire cutters
- Round-nose pliers
- Flat-nose pliers
- Optional: additional beads for embellishment
Steps:
- Select Your Focal Piece: Choose a bead or stone that will be the centerpiece of your pendant.
- Cut Your Wire: Cut a length of wire about 24-36 inches long. If you’re a beginner, this will give you plenty of wire to work with.
- Create the Base Loop: Thread the wire through the bead, leaving a long tail. Use round-nose pliers to create a loop at the top, which will act as the pendant’s hanging point.
- Wrap the Wire: Start wrapping the wire around the bead, moving down toward the bottom. Be creative! You can create an intricate pattern, or keep it simple by wrapping tightly.
- Finish Off: Once you’re satisfied with your wire wraps, cut off any excess wire with your wire cutters. Use flat-nose pliers to tuck in any sharp ends securely.
- Attach to a Chain: Finally, thread your wire-wrapped pendant onto a necklace chain or cord, and it’s ready to wear!
Wire-wrapped pendants can be excellent gifts for friends or family, showcasing not only your craftsmanship but also elements and materials that have meaning to both of you. Each piece you create will carry a personal story, making them truly unique. Jewelry making allows you to dive into a creative world where you can create unique pieces, express your individuality, and even bond with others over shared interests. Beaded bracelets and wire-wrapped pendants are just two ways to celebrate this craft. Up next, we’ll explore painting projects that will inspire your artistic side even further! 💎✨
Transitioning from the delightful realm of jewelry making, we now step into the colorful world of painting projects! Painting isn’t just a means of expression; it’s a way to explore your creativity, reduce stress, and create beautiful artworks that can brighten up any space. Today, we’ll dive into two engaging painting projects: canvas art and rock painting, both perfect for crafters of all skill levels. Let’s get those brushes ready!
Canvas Art
Creating canvas art is an excellent way to bring your creative visions to life. Whether you want to paint something abstract, a landscape, or even a portrait, the canvas serves as a blank slate for your imagination. I remember my first time painting on canvas; the thrill of seeing my ideas come to life was incredibly rewarding! Getting Started with Canvas Art: Materials Needed:
- Canvas (pre-stretched or canvas boards)
- Acrylic paint or watercolor paint
- Paintbrushes (various sizes)
- Palette for mixing colors
- Water container (for rinsing brushes)
- Optional: palette knives, sponges, or stencils for added effects
Steps:
- Choose Your Inspiration: Start by thinking about what you’d like to paint. Browse through art books, Pinterest, or even your own photography for inspiration.
- Sketch Your Design: If you prefer, lightly sketch your design on the canvas with a pencil. This step helps guide your painting, especially for more detailed works.
- Mix Your Colors: Use your palette to mix colors. Don’t be afraid to experiment; crafting your shades can bring harmony or contrast to your painting.
- Start Painting: Begin with larger areas and work your way to finer details. Remember, it’s okay to layer colors; they can create depth in your artwork.
- Add Your Touches: Once you’re happy with your painting, consider adding outlines, texture, or glazing techniques to enhance your piece.
- Let it Dry: Allow the artwork to dry thoroughly before hanging or displaying it.
Canvas art allows you to create pieces that reflect your style and personality. You could even host a paint night with friends, each working on their own canvas, sharing laughs and ideas while showcasing your creativity! 🎨✨
Rock Painting
Rock painting is a fun and charming form of art that’s been gaining popularity recently, and for good reason! It’s both relaxing and offers a unique way to express yourself. Whether you’re painting whimsical designs for your garden or inspirational rocks to share with others, it’s a project that can be enjoyed by all ages. I’ve painted several rocks to hide around my neighborhood, and it’s brought small moments of joy to those who’ve found them! Getting Started with Rock Painting: Materials Needed:
- Smooth, clean rocks (you can find these at craft stores or outdoors)
- Acrylic paint or paint pens
- Paintbrushes (fine-tipped for details)
- Sealer (spray or brush-on) to protect your finished artwork
- Water container (for rinsing brushes)
- Optional: markers for outlining
Steps:
- Collect Rocks: Look for rocks that are smooth and flat, which will be easier to paint on. Clean them thoroughly to remove any dirt.
- Plan Your Design: Decide on the theme or design you want for your rock. It could be a simple pattern, quotes for inspiration, or fun characters.
- Base Coat: If your design requires it, start by applying a base coat of paint to cover the rock entirely. Let this layer dry.
- Begin Painting: Use your brushes to paint your design. Don’t hesitate to mix colors and use techniques like sponging or dotting for creativity.
- Add Details: Once the base is dry, use fine brushes or paint pens to add intricate details. This is where you can really bring your artwork to life!
- Seal Your Creation: Once everything is dry, use a spray or brush-on sealer to protect your art from the elements if you plan to place them outside.
- Display or Hide: You can either display your rock as part of your home décor or join local communities that promote “rock hiding” for others to find as a surprise!
Rock painting is not just about art; it’s also a wonderful way to spread kindness and joy in your community. Both canvas art and rock painting allow you to unleash your creativity while creating beautiful, unique pieces that add a personal touch to your home or surroundings. So gather your supplies and let the colors fly! Up next, we’ll delve into the tactile world of clay creations, where you can mold and shape stunning pieces of art. 🖌️🌈✨

As we transition from the colorful world of painting, let’s dive into the hands-on and incredibly versatile domain of clay creations! Working with clay allows for artistic freedom and innovation, leading to the development of unique, personalized items that can be both functional and decorative. Today, we’ll explore two fantastic clay projects: polymer clay earrings and clay pot wind chimes.
Polymer Clay Earrings
Polymer clay earrings have become hugely popular in the crafting community, and for good reason! They’re lightweight, customizable, and allow you to express your style without the hefty price tag of store-bought earrings. I remember the first pair I made—I was delighted to wear something truly one-of-a-kind that sparked compliments everywhere I went! Getting Started with Polymer Clay Earrings: Materials Needed:
- Polymer clay (multiple colors)
- Rolling pin or acrylic roller
- Cookie cutters or shape templates
- Craft knife or blade
- Earring hooks and jump rings
- Oven (for curing the clay)
- Paintbrush (for applying varnish, optional)
- Sandpaper (optional for smoothing edges)
Steps:
- Choose Your Colors: Select the colors of polymer clay you want to work with. You can mix colors to customize shades if you want a unique hue.
- Condition the Clay: Start by kneading the clay until it’s soft and pliable. This helps it mix evenly and makes it easier to shape.
- Roll and Cut Shapes: Using a rolling pin, flatten the clay to your desired thickness (about 1/8 inch is a good rule of thumb). Use cookie cutters or templates to cut out your earring shapes.
- Add Details: You can embellish your shapes further by adding textures, painting details, or inlaying pieces of a different color.
- Create the Holes: Don’t forget to make holes at the top of each earring piece for the jump rings, which will attach them to the hooks.
- Bake the Clay: Follow the instructions on your clay packaging for baking times and temperatures. Allow each piece to cool after baking; they become much more durable once cured.
- Assemble Your Earrings: Attach the earring hooks using the jump rings, ensuring everything is securely connected.
- Finishing Touches: If you want a glossy finish, you can apply a layer of varnish after baking for extra shine.
Polymer clay earrings are a fantastic way to reflect your personal style. You can make matching sets or create individual pieces to mix and match with various outfits. Plus, they make wonderful gifts for friends and family! 🎨💕
Clay Pot Wind Chimes
Now, let’s explore a delightful project that combines artistry with the charm of nature: clay pot wind chimes. These lovely decorations not only catch the eye but also add soothing sounds to your outdoor space. I made my first clay pot wind chime during a summer afternoon with close friends, and it became a project that brightened our garden as well as our spirits. Getting Started with Clay Pot Wind Chimes: Materials Needed:
- Small clay pots (terracotta works beautifully)
- Twine, fishing line, or strong string
- Beads (wood, glass, or even metal)
- Metal or chime pieces (you could use keys, bells, or cutlery for sound)
- Drill or a craft knife (for making holes)
- Paint or varnish (optional, for decorating the pots)
Steps:
- Prepare Your Pots: Start by drilling a small hole at the bottom of each clay pot. You want the holes to be big enough for your twine or string but not so big that they can’t hold the pot securely.
- Decorate Your Pots: You can paint or decorate your pots as desired before assembling. Use weather-resistant paint for outdoor durability.
- Cut Your String: Determine how long you want your wind chimes to hang. Cut varying lengths of twine or string to suspend your pots at different levels for visual interest.
- String the Pots: Thread the string through the hole in the bottom of each clay pot, tying knots inside to secure them.
- Add Beads and Chimes: To create sound and visual appeal, add beads between the pots or attach small bells or metal pieces that will create chimes when the wind blows.
- Hang Your Wind Chime: Tie a longer piece of string at the top to suspend your wind chime from a hook, tree branch, or any quiet place in your garden.
Creating clay pot wind chimes not only brings a delightful sound of tinkling to your space but also showcases your creativity. This project can involve family and friends, making it a joy-filled activity that can be enjoyed by all ages. Both polymer clay earrings and clay pot wind chimes exemplify the beautiful potential of crafting with clay. Each project offers a blend of artistry and personal expression, allowing you to create unique pieces that resonate with your style and surroundings. Next, we’ll wrap up our crafting journey by reflecting on how these various projects can enrich your life and inspire others! 🌼🎶✨