
Introduction
When it comes to crafting, whether you are a seasoned enthusiast or just beginning to explore your creative side, having the right tools and supplies is essential. Imagine sitting down with a vision in your head but feeling frustrated because you can’t find the supplies you need. Nothing is more disheartening than an interrupted flow of creativity due to a lack of materials. This is where a well-stocked crafting area and the right equipment can make all the difference! Crafting isn’t just about putting things together; it’s about experiencing joy, relaxation, and self-expression. That’s the magic of it! Crafting can be therapeutic—it allows you to escape the busyness of daily life while producing beautiful pieces of art. For me, the first time I created my own greeting cards from scratch, I felt an overwhelming sense of accomplishment. In this journey to achieve crafting excellence, equipping yourself with essential tools and supplies is the first and most crucial step. Below, you will find a curated list of must-have items that will elevate your crafting game and help you unleash your full creative potential.
Understanding Your Crafting Needs
Every crafter is unique, and so are their crafting needs. What type of projects are you most passionate about? Here are some common crafting categories:
- Paper Crafting: From card-making to scrapbooking, having the right paper and embellishments is key.
- Textile Crafts: Quilting and sewing require specific tools like sewing machines and fabric scissors.
- Artistic Endeavors: Whether it’s painting or drawing, quality paints and brushes can significantly impact the final result.
Identifying which of these categories resonates with you can streamline your shopping process.
The Importance of Quality Tools
Investing in quality tools might seem like a significant upfront cost, but if you think about it, they can act as a long-term investment. Well-made tools will not only last longer but will also deliver better results, making your crafting experience much more enjoyable. For example, high-quality scissors glide effortlessly through paper, while a sturdy paper trimmer offers precision and accuracy.
Embracing Organization
Let’s face it—crafting can get messy, especially when you’re deep in the zone! However, having an organized workspace enhances creativity. Using clear storage bins and labeling systems will save you time and prevent unnecessary frustration. Remember, the key to crafting joy is not just having the right materials but also a well-organized space to use them. Get ready to dive into the essentials that will bring your creative ideas to life, as we explore the must-have tools and supplies every crafter should consider! 🎨✨
Essential Tools for Crafting
In any creative endeavor, having the right tools at your disposal can make a world of difference. As you embark on your crafting journey, let’s dive deeper into two essential categories we can’t overlook: cutting tools and adhesives. Both of these are foundational to many crafting projects, and understanding their importance will ensure your creations come out just the way you envision them.
Cutting Tools
Proper cutting tools are vital in achieving clean edges and precise shapes in your projects. Whether you’re working with paper, fabric, or other materials, having a reliable cutting tool can enhance your crafting experience. Types of Cutting Tools You Should Consider:
- Craft Knife: A versatile tool, perfect for intricate cuts and detailed work. When I first started using a craft knife for creating layered paper designs, I was amazed at how much cleaner my edges looked compared to scissors!
- Scissors: Invest in a couple of good-quality pairs—one for paper and another for fabric. A good pair of precision scissors can make the difference between a professional-looking project and a messy one.
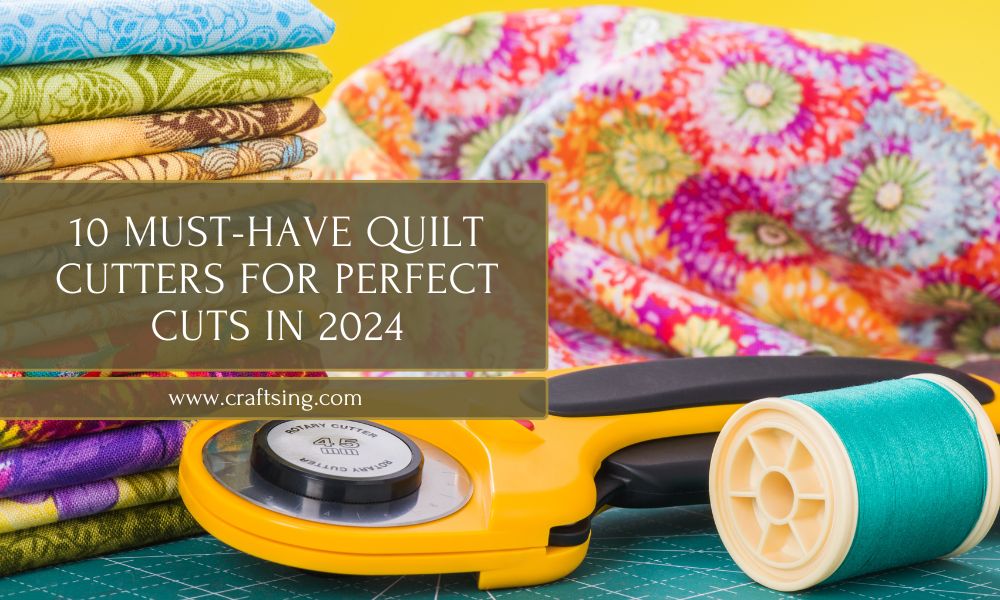
- Rotary Cutter: If you’re into quilting or fabric crafts, a rotary cutter paired with a cutting mat can save you tons of time. I remember the first quilt I attempted; using a rotary cutter made cutting fabric strips feel effortless!
- Paper Trimmer: This is essential for anyone into card-making or scrapbooking. A guillotine-style or rotary paper trimmer allows for straight cuts, which is something I struggled with until I invested in one.
Tips for Maintaining Your Cutting Tools:
- Regularly sharpen craft knives and scissors.
- Clean the blades to keep them free from adhesive residue.
- Store them safely to avoid damaging the edges.
Adhesives
Now that your materials are cut to perfection, it’s time to bring it all together with adhesives. Choosing the right adhesive can be just as critical as the cutting tools you use. Common Types of Adhesives and Their Uses:
- Glue Sticks: Great for simple paper projects; glue sticks are an easy and mess-free option. They’re perfect for kids’ crafts, too! I often use them when making quick scrapbook pages.
- Liquid Glue: Offers strong adhesion, especially for heavier materials. Just remember that a little goes a long way! I’ve accidentally overused it once, and it turned my project into a messy puddle.
- Double-Sided Tape: Ideal for clean finishes without the drying time of liquid glue. I love having it on hand for card-making—it’s quick, effective, and keeps everything where it should be!
- Hot Glue Gun: Excellent for 3D projects and when you need a quick bond. The heat melts the glue, enabling quick repairs. Just watch those fingers! I’ve had a few close calls with hot glue and my fingertips.
Storage and Organization:
- Keep adhesives in a designated caddy or drawer to avoid searching when you’re in a creative frenzy.
- Label your adhesives, as some may look alike but serve entirely different purposes.
Having the right cutting tools and adhesives lays a solid foundation for any crafting project. With these tools by your side, your creative ideas will come to life with precision and ease. So, let’s gather the essentials and get crafting! 🎨✂️✨

Must-Have Paper Crafting Supplies
Now that you’re equipped with essential cutting tools and adhesives, it’s time to talk about the heart and soul of many crafting projects: paper. When diving into the world of paper crafting, having quality supplies can elevate your creations from ordinary to extraordinary. Two staples you’ll want to stock up on are cardstock and patterned paper. Let’s break down their importance and how to best use them!
Cardstock
Cardstock is more than just a thicker type of paper; it’s vibrant, sturdy, and incredibly versatile. Having a good selection of cardstock can be a game-changer in your crafting arsenal. Why Use Cardstock?
- Durability: Unlike regular printer paper, cardstock holds its shape well, making it perfect for projects like cards, scrapbooks, and even 3D models.
- Variety of Colors: Cardstock comes in a rainbow of colors, allowing you to choose shades that perfectly fit your project. When I was creating invitations for my best friend’s wedding, using a deep navy cardstock made the designs feel elegant and sophisticated.
- Weight Options: Cardstock typically ranges from 65 lb to 110 lb or more. Depending on your needs, lighter weights are great for layering, while heavier weights are perfect for robust projects.
Cardstock Tips:
- Invest in a few basic colors like white, black, and neutrals, along with some fun seasonal colors for versatility.
- Store your cardstock flat to prevent warping or curling.
- Use a paper trimmer for clean cuts and precisely measured pieces.
Patterned Paper
Next to cardstock, patterned paper is a must-have that can add character and flair to your projects. The world of patterned paper is vast, filled with endless designs ranging from whimsical motifs to sophisticated prints. The Allure of Patterned Paper:
- Creativity Unleashed: With so many designs available, patterned paper can inspire your creativity. I remember flipping through stacks of patterned paper at my local craft store, and suddenly I had ideas flowing for my next scrapbook!
- Layering and Backgrounds: Patterned paper can serve as a beautiful backdrop for your main elements. Use it for card bases, scrapbook pages, or as details in mixed media projects.
- Complementing Cardstock: Combine solid cardstock with your patterned papers for striking contrasts. This layered approach often makes projects visually appealing.
Choosing Patterned Paper:
- Look for themes that resonate with your crafting projects—think holidays, seasons, or personal interests.
- Opt for double-sided patterned paper if you enjoy variety—it gives you more options in a single sheet!
- Store these in a way that keeps them flat and protected from dust and bending.
By stocking up on quality cardstock and an array of patterned paper, you’ll be setting yourself up for creative success. These supplies not only provide the foundation for your projects but also empower you to let your creativity shine. So, let’s grab that cardstock and those beautiful patterned sheets, and get started on something amazing! 🖌️📄✨
Top Quality Paints and Brushes
Now that we’ve explored the essential paper crafting supplies, let’s shift our focus to another vital area of crafting: paints and brushes. Whether you’re creating mixed media projects, enhancing greeting cards with beautiful artwork, or even painting canvases, using high-quality paints and brushes can take your creative endeavors to new heights. Let’s dive into two popular choices: acrylic paints and watercolor brushes.
Acrylic Paints
Acrylic paints are a favorite among crafters for their versatility and vibrant colors. These fast-drying paints can be used on a variety of surfaces, making them perfect for everything from canvas and wood to fabric and paper. Why Choose Acrylic Paints?
- Quick Drying Time: One of the standout features of acrylic paints is their fast drying time. This allows you to layer colors quickly and move on to the next step of your project without lengthy waiting periods. I remember working on a series of painted flower pots for a garden party; I loved how I could paint several layers in one afternoon!
- Easy to Clean Up: Acrylics are water-soluble before they dry, making for easy cleanup with just soap and water. This aspect makes them a fantastic choice for beginners or for crafting with kids.
- Vibrant Colors and Coverage: Acrylic paints are known for their bold hues and excellent coverage. A little goes a long way! Whenever I want to create a bright, eye-catching card, I always reach for my acrylic paints. They allow me to blend and create stunning color gradients.
Tips for Using Acrylic Paints:
- Experiment with different brands to find the ones that work best for your style. Some are thicker, while others are more fluid.
- Use a palette for mixing colors and creating new shades.
- Protect surfaces with newspaper or craft mats, as acrylic can stain.
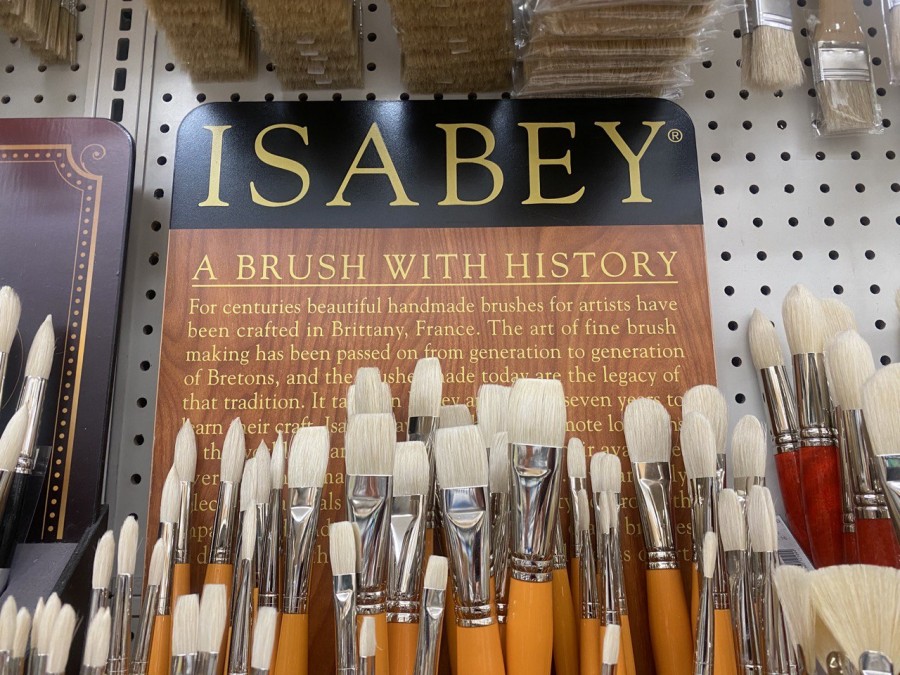
Watercolor Brushes
Next up are watercolor brushes, essential tools for anyone venturing into the world of watercolor painting. These brushes are designed specifically to hold and distribute watercolors effectively, making them an essential part of your painting toolkit. Benefits of Using Watercolor Brushes:
- Soft Bristles for Fluidity: Watercolor brushes have soft bristles designed to hold water and disperse paint smoothly. This quality allows for gentle washes as well as fine details. When I first experimented with watercolors, it was a game-changer to use brushes designed for this medium—my work transformed from muddled blobs to delicate landscapes in no time!
- Variety of Shapes and Sizes: Watercolor brushes come in various shapes (round, flat, angled) and sizes, each serving a different purpose. For example, a round brush is perfect for detailed work, while a flat brush is excellent for washes.
- Create Different Textures: With the right technique, your watercolor brushes can produce beautiful textures and effects, from soft blends to striking lines.
Tips for Using Watercolor Brushes:
- Always clean your brushes thoroughly after use to maintain their shape and longevity.
- Experiment with wet-on-wet and wet-on-dry techniques to explore different effects.
- Invest in a few quality brushes rather than a large number of inexpensive ones—your paintings will thank you!
Arming yourself with high-quality acrylic paints and watercolor brushes will elevate your crafting experience and expand the horizons of your creativity. With these tools in hand, you’re ready to embark on a colorful journey, full of artistic exploration! Let’s get painting and make something beautiful together! 🎨🖌️✨
Versatile Embellishments and Decorative Elements
Having explored top-quality paints and brushes, we now enter the world of embellishments and decorative elements—those finishing touches that can transform your projects from good to absolutely stunning. Whether you’re working on scrapbook pages, homemade cards, or unique gifts, embellishments such as ribbons, trims, stickers, and stamps can elevate your creative work and breathe life into your designs. Let’s dive into two essential categories: ribbons and trims, and stickers and stamps!
Ribbons and Trims
Ribbons and trims are versatile embellishments that come in a multitude of styles, colors, and textures. They can immediately add a touch of elegance or whimsy to your projects, depending on how you use them. Why Use Ribbons and Trims?
- Variety of Styles: From satin to burlap, and sheer to grosgrain, there’s a ribbon or trim for every occasion. I fondly remember crafting personalized gift baskets for friends, and wrapping them in beautiful satin ribbons made them feel special and curated!
- Perfect for Finishing Touches: Adding a simple ribbon bow can elevate a plain card or a scrapbook page, giving it that extra flair. You could also use trims along the edges of a photo album, which makes for an eye-catching detail.
- Easy to Work With: Ribbons can be easily cut, glued, or sewn onto various surfaces, making them a crafting staple. Just remember to use sharp scissors to avoid fraying edges.
Tips for Incorporating Ribbons and Trims:
- Store different types of ribbons on spools or in clear bins for easy access.
- Experiment with various types of bows and knots to see what works best for your project.
- Don’t hesitate to layer different textures and colors for a more dynamic look.
Stickers and Stamps
Stickers and stamps are fantastic ways to personalize your projects and add unique designs without much fuss. They are perfect for crafters who like instant gratification—the click of a button or a press of a stamp can easily lay down a beautiful motif! The Appeal of Stickers and Stamps:
- Instant Decor: Stickers come in countless themes, shapes, and designs. When I was putting together a scrapbook for our family vacation, whimsical travel-themed stickers made it easy to highlight special moments without overwhelming the pages.
- Stamps for Custom Designs: Stamps allow for repetition of designs and the ability to create a cohesive style throughout your project. Using a date stamp on my planners has become a go-to technique of mine—it’s simple yet adds a dash of charm.
- Versatility Across Crafts: Both stickers and stamps can be used on multiple types of projects—cards, scrapbooks, home decor, and more. You can combine them with other embellishments for a mixed-media effect!
Tips for Using Stickers and Stamps:
- Sort your stickers by theme or color for easier access when you’re in the creative zone.
- Keep clear acrylic blocks or stamping platforms handy to ensure accurate placement when using stamps.
- Experiment with different inks for your stamps to achieve varied effects; distress inks, for instance, can give an aged look that feels vintage.
With ribbons, trims, stickers, and stamps at your disposal, you have the power to unlock a world of creative possibilities. These embellishments are not just decorations; they add depth, texture, and personalization, transforming your projects into heartfelt expressions of art. So, gather your favorites and let’s get embellishing! 🌈🎀✨

Specialized Tools for Specific Crafts
With ribbons, trims, stickers, and stamps ready to add unique touches to your projects, it’s time to delve into specialized tools that can significantly enhance your crafting experience. These tools are tailored for specific crafts, allowing for greater versatility and precision in your creative endeavors. Let’s explore two must-have specialized tools: the embossing heat tool and the sewing machine.
Embossing Heat Tool
An embossing heat tool is a magical device for adding texture and flair to your paper crafts. Whether you’re a seasoned crafter or just starting, this tool can elevate your projects in no time. Why You Need an Embossing Heat Tool:
- Creates Stunning Effects: This tool works by melting embossing powder, causing it to adhere to your project and form a raised, glossy design. I’ll never forget the first time I tried heat embossing on a card; I watched in awe as the powder transformed into a beautiful, shiny layer that added such elegance.
- Versatile Uses: You can use it for greeting cards, scrapbook pages, or any project that needs a little extra visual interest. The ability to create personalized sentiments by embossing can make your handmade items feel truly special.
- Quick and Easy: Unlike traditional methods that require a lengthy process, the embossing heat tool works quickly. With just a few seconds of heat, you can achieve remarkable results.
Tips for Using an Embossing Heat Tool:
- Always work on a heat-resistant surface to prevent damage.
- Keep the tool moving slightly to avoid burning the paper.
- Experiment with different colors and types of embossing powders for various effects—glittery powders can create eye-catching designs!
Sewing Machine
For crafters who love textiles or creating 3D projects, a sewing machine is an invaluable investment. Whether you’re making quilts, altering clothes, or stitching paper, the possibilities are endless! Why Invest in a Sewing Machine?
- Efficiency and Speed: A sewing machine can save you significant time compared to hand stitching. I remember sewing a quilt by hand for my niece, which took me weeks! Since buying a sewing machine, I’ve been able to complete similar projects in just days.
- Precision Stitching: With a machine, your stitches are more consistent and precise. This precision is especially important in quilting or garment-making, where accuracy can make or break the final product.
- Versatile Applications: Beyond fabric, sewing machines can also stitch through paper, making them perfect for card-making or unique mixed-media projects. Imagine creating a card that features sewn elements—it adds a delightful texture!
Tips for Using a Sewing Machine:
- Invest in a quality machine that suits your crafting needs and skill level. Don’t hesitate to explore entry-level options if you’re new.
- Practice on scrap fabric to get comfortable with the machine before working on your main project.
- Explore various stitches and attachments to discover what you love—different feet can offer incredible versatility for your crafts!
As you venture into specialized crafting, incorporating tools like the embossing heat tool and sewing machine can open a new creative dimension. These tools not only simplify processes but also allow you to produce stunning results that reflect your creativity and passion. So, let’s get making—whether it’s heating up some embossing powder or stitching up a unique project, the crafting world is at your fingertips! 🧵✨🎨

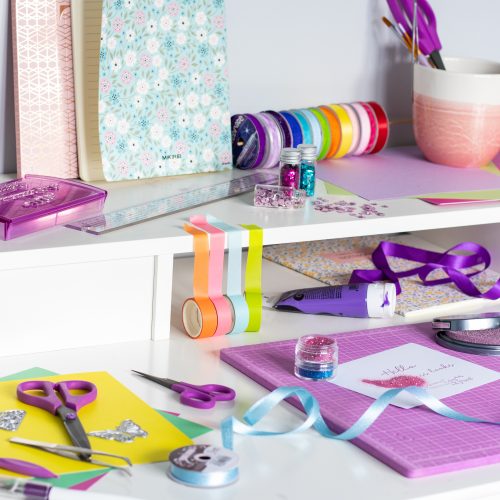
Organizational Supplies for Crafting Area
Now that you have a treasure trove of specialized tools like the embossing heat tool and sewing machine, let’s talk about how to keep your crafting area neat and efficient. An organized space not only enhances your creativity but also helps you save time hunting for supplies. Two essential categories to consider are storage bins and labeling tools. Let’s explore how these can make a dramatic difference in your crafting experience!
Storage Bins
Every crafter knows that supplies can quickly accumulate, transforming your once-friendly workspace into a chaotic mess. This is where storage bins come into play. Having the right storage solutions is essential in creating an orderly and inspiring crafting environment. Benefits of Using Storage Bins:
- Variety of Options: From clear plastic bins for visibility to decorative boxes that perfectly suit your style, there’s something for everyone! I recently transitioned to using clear bins for my fabric stash, and it’s been a game-changer—seeing all my colors at a glance makes choosing fabric so much quicker.
- Stackable Designs: Opting for stackable bins can maximize vertical space, especially in smaller crafting areas. For example, using a combination of bins and shelves allowed me to create a mini craft corner in my apartment without taking up too much real estate.
- Protection from Damage: Proper storage keeps dust away from your materials, safeguarding them from damage. I learned this the hard way when my lovely ribbons became tangled and frayed because they were left out in the open.
Tips for Organizing with Storage Bins:
- Categorize supplies into bins—one for paints, another for paper, etc.
- Use different sizes for different materials to best utilize the space.
- Consider labeling the bins for quick identification.
Labeling Tools
Once you have your storage bins in place, the next step is to implement a reliable labeling system. Labels are key when it comes to quickly finding what you need without any stress. Why Labeling Tools Are Essential:
- Promotes Efficiency: Knowing exactly where everything is means you can dive right into your projects without wasting time. I still remember the frustration of searching for my embossing powders, only to find they were buried under a pile of unrelated supplies!
- Customized Solutions: You can get creative with your labels. Fancy fonts, colors, and materials can make categorizing fun! I’ve found that using colored labels not only organizes my supplies but also adds a pop of color to my shelves.
- Adaptability: As your crafting interests evolve, labels make it easy to update and rearrange your storage solutions. You can always modify or remove old labels and create new ones, so your organization method remains current.
Tips for Effective Labeling:
- Use a label maker for clean and professional-looking labels.
- Consider color-coding labels for different categories or types of supplies.
- Place labels on the front of storage bins to make locating items easy and accessible.
By investing in quality storage bins and effective labeling tools, your crafting area can truly transform into a well-organized oasis of creativity. An organized space not only allows for more efficient crafting, but it also elevates your crafting experience as a whole. Get ready to unleash your creative potential—let’s tidy up and make crafting more enjoyable! 🌟📦🖊️
Importance of Quality Cutting Mats and Rulers
As we sprinkle some organizational magic into your crafting area with storage bins and labeling tools, let’s shift our focus to fundamental tools that contribute to precision in your projects: cutting mats and rulers. These two essentials are often overlooked, but they play a crucial role in ensuring clean cuts, accurate measurements, and overall quality in your crafting endeavors. Let’s dive into the significance of self-healing cutting mats and precision rulers!
Self-Healing Cutting Mats
A self-healing cutting mat is your best friend when it comes to protecting both your work surfaces and your cutting tools. These mats are designed to withstand the wear and tear of rotary blades, craft knives, and other cutting instruments without leaving permanent marks or grooves. Why Self-Healing Cutting Mats are Essential:
- Durability: The self-healing feature means that small cuts and scratches will close up, reducing the risk of damaging your blades or ruining future projects. I started using a self-healing mat a couple of years ago, and it has significantly extended the life of my craft knives—no more worrying about dull blades due to tiny imperfections!
- Measurement Guides: Most cutting mats come printed with grid lines and measurement marks. This addition allows for accurate cutting and measuring, which is crucial for projects that require precision. When creating fabric squares for a quilt, the grid lines helped me cut consistently sized pieces without any guesswork.
- Protect Your Surfaces: Using a cutting mat protects your tables and countertops from deep cuts or scratches, which is especially important if you have a beloved crafting space at home that you want to keep pristine.
Tips for Using Self-Healing Cutting Mats:
- Regularly clean your mats with mild soap and water to remove debris and adhere to your cutting tools.
- Store your mat flat when not in use to maintain its shape and functionality.
- Choose a mat that’s big enough to accommodate your largest project—having ample workspace can make a significant difference in your crafting experience.
Precision Rulers
When it comes to cutting straight lines or measuring accurately, a precision ruler is indispensable. These rulers ensure that every cut, fold, and layout is executed with care. Benefits of Using Precision Rulers:
- Accuracy: A good quality ruler allows you to achieve precise measurements and straight cuts. I’ve had my fair share of wonky lines before I made the shift to using a metal ruler with measurements etched into the surface—what a game-changer!
- Material Versatility: Many precision rulers are designed to handle various materials, from paper and cardstock to fabric and even heavier materials like plastic. This versatility means you can use them across various types of projects.
- Non-Slip Features: Some precision rulers come with non-slip backing, preventing movement while cutting. This feature is essential, especially when dealing with slippery materials that might shift unexpectedly during your work.
Tips for Using Precision Rulers:
- Always measure twice and cut once! It’s a simple rule that pays off in accuracy.
- Use a craft knife or rotary cutter when cutting, as they work well with straight edges for clean lines.
- Keep your ruler clean and free of adhesive residue for maximum effectiveness.
Incorporating quality self-healing cutting mats and precision rulers into your crafting toolkit enhances accuracy and efficiency in your work. With each project, these tools will help you achieve professional-looking results with ease. So let’s equip ourselves with the right cutting tools and embark on our crafting adventures with confidence! ✂️📏🌟

Innovative Technology in Crafting Supplies
As we continue to enhance our crafting toolkit with quality cutting mats and precision rulers, it’s time to embrace innovative technology that’s taking the crafting world by storm. Today, I want to share my excitement about two game-changing advancements: 3D printing pens and electronic cutting machines. These tools not only expand your creative possibilities but also streamline your crafting processes. Let’s dive in!
3D Printing Pens
Imagine a pen that allows you to create three-dimensional designs with the flick of your wrist. 3D printing pens bring your sketches into the real world, allowing for a level of creativity that feels like conjuring magic! Why You Should Try 3D Printing Pens:
- Immediate Creativity: With a 3D printing pen, you can draw freely in space without the constraints of 2D platforms. I remember the first time I tried one; I started by sketching a simple flower and ended up creating an entire bouquet! The ability to see my designs come to life in real-time was exhilarating.
- Versatility in Projects: 3D printing pens are perfect for various crafts, from enhancing scrapbook pages to creating home décor or even toys. They can also be used for repairs, offering a unique way to fix broken items by simply “drawing” them back into shape.
- User-Friendly: Most 3D printing pens are designed for ease of use, making them accessible for crafters of all skill levels. Whether you’re a kid exploring creativity or an adult looking to channel artistic expression, these pens are user-friendly.
Tips for Using 3D Printing Pens:
- Practice on a non-stick surface until you get the hang of controlling the flow of the filament.
- Don’t rush the drawing; take your time to build up layers for the desired depth and form.
- Experiment with different filaments as they come in various colors and materials to enhance your creations.
Electronic Cutting Machines
Next up are electronic cutting machines, which are revolutionizing how we craft. These powerful tools bring precision and efficiency to various projects, from card making to intricate vinyl designs. Why Electronic Cutting Machines Are a Must-Have:
- Endless Design Possibilities: With a simple click, you can cut intricate designs or shapes with incredible precision. I was amazed by how easily I could do complex projects like custom decals or layered cake toppers that would have taken hours to cut by hand!
- Customization Options: Many electronic cutting machines come with software that allows you to create or import your own designs. This feature opens the door for endless customization, and I often use it to create personalized cards or gifts that wow my family and friends.
- Efficiency and Time-Saving: These machines remove the tedious process of manual cutting. I recall spending an entire evening cutting out shapes for a school project by hand—now, I can finish it in minutes with my electronic cutter.
Tips for Using Electronic Cutting Machines:
- Familiarize yourself with the software, as it’s the key to unlocking your creativity and using the machine to its full potential.
- Invest in high-quality blades and mats for optimal performance.
- Experiment with different materials—most machines can cut paper, vinyl, fabric, and even thin wood!
Leveraging innovative tools like 3D printing pens and electronic cutting machines can truly enhance your crafting experience. These technologies offer new avenues for creativity, making crafting not just easier but also more exciting. So let’s embrace these advancements, and let our imagination run wild! 🖊️💻✨
Conclusion
As we wrap up our exploration of the wonderful world of crafting tools and supplies, it’s clear that having the right resources at your fingertips can make a significant difference in your creative journey. From essential tools to innovative technologies, each item plays a unique role in helping you express your artistic instincts and transform your ideas into stunning creations.
Recap of Essential Tools
Throughout this journey, we’ve examined a variety of tools that are crucial for crafters:
- Cutting Tools & Adhesives: These are fundamental for creating clean cuts and secure bonds in your projects. Having the right scissors, knives, and glues sets the stage for success.
- Must-Have Supplies: Stocking up on cardstock and patterned paper gives your projects the foundation they need, providing versatility and visual appeal.
- Top Quality Paints and Brushes: Investing in high-quality painting supplies enables you to achieve professional results, allowing your creativity to truly shine.
- Embellishments: Ribbons, trims, stickers, and stamps add that extra flair and personality to your projects, making them uniquely yours!
- Specialized Tools: Tools like embossing heat tools and sewing machines allow you to bring detailed and textured elements to your crafts, enriching your artistic expression.
- Organizational Supplies: Storage bins and labeling tools help you maintain an organized workspace, enhancing your efficiency and keeping your creative energy flowing.
- Innovative Technology: With 3D printing pens and electronic cutting machines, the sky’s the limit! These tools introduce exciting new possibilities and streamline the crafting process.
Embrace Your Creative Journey
Crafting is more than just a hobby; it’s an avenue for self-expression, relaxation, and connection. Whether you’re creating handmade gifts for loved ones or personal projects that reflect your style, the tools and supplies you choose can enhance your experience. I still vividly remember the joy I felt while crafting my first handmade card using a cutting machine; it sparked a passion that ignited my entire creative journey! Embrace the tools that resonate with you, invest in quality supplies, and don’t hesitate to experiment with new techniques. Remember, crafting is a personal journey, and the most important thing is to enjoy the process. Every creation, regardless of its complexity, is a step toward honing your skills and discovering your unique artistic voice.
Final Thoughts
So, gather your tools and supplies, find that perfect crafting corner, and let your creativity flow! The world of crafting is vibrant and full of possibilities, waiting for you to explore. Whatever your project may be, just remember that you have everything you need to create something beautiful. Happy crafting, and may your creative journey be an inspiring and fulfilling one! 🎨✂️✨