
Introduction
Importance of Movies
Movies are more than just entertainment; they serve as a powerful medium for storytelling that transcends cultural and geographical boundaries. They allow us to explore diverse perspectives, emotions, and experiences, all from the comfort of our own seats. Think about your last movie experience: perhaps it made you laugh, cry, or even reflect on your own life. That’s the magic of cinema! Here are a few reasons why movies hold such importance in our lives:
- Cultural Reflection: Films often mirror societal issues, values, and trends. For instance, the rise of documentaries like “13th” or films like “Parasite” showcases critical discussions on race and class struggles.
- Emotional Connection: Movies tap into our emotions. A well-crafted scene can make you feel vulnerable, safe, excited, or even nostalgic. Just remember that tear-jerking moment in “The Pursuit of Happyness”? It’s hard not to resonate with the struggles of Chris Gardner.
- Inspiration: Many films motivate us to pursue our dreams or stand up for our beliefs. Movies like “Rocky” and “A Beautiful Mind” remind us of resilience in the face of adversity.
- Community Building: Watching movies together makes for shared experiences that can strengthen friendships and family bonds. Who doesn’t enjoy discussing plot twists and favorite characters after a good film?
Movies not only entertain, but they also hold deep-seated value in shaping our thoughts, sparking conversations, and even influencing the world around us.
Evolution of Movie Making
The evolution of movie making is a fascinating journey that reflects advancements in technology, artistry, and storytelling. Understanding this evolution enhances our appreciation for contemporary cinema.
- Silent Era (1890s-1920s): Movies began as short, silent films. Directors like D.W. Griffith pioneered techniques such as close-ups and cross-cutting. The very first “feature-length” film, “The Story of the Kelly Gang” (1906), showcased the potential of storytelling through visual means.
- Talkies and Technicolor (1927-1950s): The 1927 release of “The Jazz Singer” marked the dawn of sound films. With the introduction of synchronized dialogue, films like “Gone with the Wind” utilized Technicolor brilliantly, enriching the visual experience we love today.
- The Golden Age of Hollywood (1930s-1960s): Studios controlled nearly every aspect of film production, from casting to marketing. Stars like Audrey Hepburn and Marlon Brando became household names. The artistry of films during this period set the stage for long-lasting cinematic styles.
- New Hollywood and Independents (1960s-1990s): A wave of creativity swept through as directors were given more freedom. Films like “Psycho” and “Easy Rider” broke conventional rules. Independent cinema rose in prominence, showcasing unique voices and stories.
- Digital Revolution (2000s-Present): Advances in technology have transformed the filmmaking process. CGI, digital cameras, and editing software allow filmmakers to push boundaries. Movies like “Avatar” use technology to create immersive worlds that captivate audiences globally.
Each era not only introduced novel techniques but also reflected changing societal norms. The stories we see on screen have shifted from fairy tales to gritty realism, showcasing diverse narratives that resonate with different audiences. As you delve into this ever-evolving landscape of film, keep in mind how each movie you watch is a continuation of this rich history, blending art and technology to tell compelling stories. The evolution of movie making is not just a timeline; it’s a tapestry woven with creativity, cultural shifts, and human emotion, awaiting your next viewing experience! 🍿✨
Pre-Production
Scriptwriting Process
The pre-production phase is where the magic of movie making truly begins, setting the foundation for everything that follows. At the core of this stage is the scriptwriting process, which transforms ideas into a structured narrative ready for the screen. Writing a compelling script is akin to crafting a novel, but with a keen focus on visual storytelling. Let’s walk through some essential elements of the scriptwriting process:
- Concept Development: It all starts with an idea! Whether inspired by a personal experience, a historical event, or even a dream, the key is to nurture that initial spark into a compelling narrative.
- Outline Creation: Before diving into the script, many writers create an outline. This includes the major plot points, character arcs, and key scenes. Think of it as a roadmap that guides the journey of your story.
- First Draft: Once you have a solid outline, it’s time to write the first draft! Don’t worry about perfection; focus on getting your thoughts on paper. Many successful filmmakers mention that their first drafts often look nothing like the final product.
- Feedback and Revisions: Sharing your script with trusted peers can provide invaluable insights. Constructive criticism helps refine dialogue, pacing, and character development. Embrace revisions—the more you improve the draft, the stronger your story becomes!
- Finalizing the Script: After several rounds of feedback and redrafting, you’ll arrive at the final version. This polished script serves as the blueprint for the entire production process.
I remember, back when I was penning my first short film, I was overwhelmed by drafts and edits. Each round of feedback brought new perspectives, and it was the encouragement from fellow writers that pushed me to persist. By the time I hit ‘final draft’, I felt an immense sense of achievement!
Casting and Auditions
With the script in hand, it’s time to breathe life into your characters through casting. This stage is crucial since the right performers can elevate the story and resonate with the audience. Casting often begins with a casting call, where actors are invited to audition for specific roles. Here’s how the casting and auditions process typically unfolds:
- Casting Director: A casting director plays a pivotal role in this phase. They bring expertise in finding talented actors and can help refine your vision for each character.
- Breakdown of Characters: From your script, create character breakdowns that outline the traits, motivations, and age ranges for each role. This clarity aids in targeting the right actors.
- Audition Process: Actors typically submit headshots and resumes, followed by auditions. These can include cold reads (reading lines without preparation), monologues, or even chemistry tests between potential co-stars.
- Callbacks: Once initial auditions are complete, the top candidates are called back for further testing. This is crucial for assessing how actors interact and embody their roles.
- Final Casting: Making the final decision can be tough! Often, directors select actors based on not just their talent but also their ability to encapsulate the essence of the character.
Reflecting on my experience, attending auditions can feel like a whirlwind. The energy in the room is palpable, filled with anticipation and creativity. It’s the moment where you witness various interpretations of your character and gain a deeper appreciation for the craft of acting. With the casting completed and actors selected, the production team can begin forming the vision for bringing the script to life. The collaborative nature of filmmaking truly shines here, as scriptwriters, directors, and actors come together, each bringing their own unique contributions to the art. ✨🎬 As you move from pre-production to the next stages, you may find that these initial steps have set the tone for everything that follows. The groundwork laid during pre-production is nothing short of essential in crafting a film that resonates with audiences around the world.
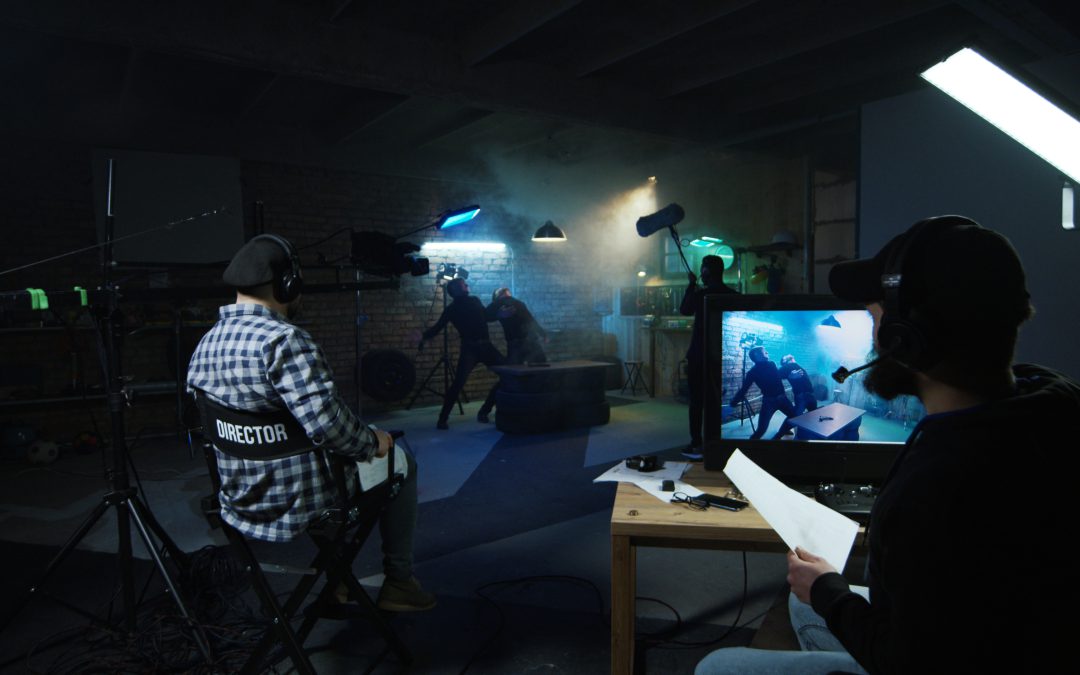
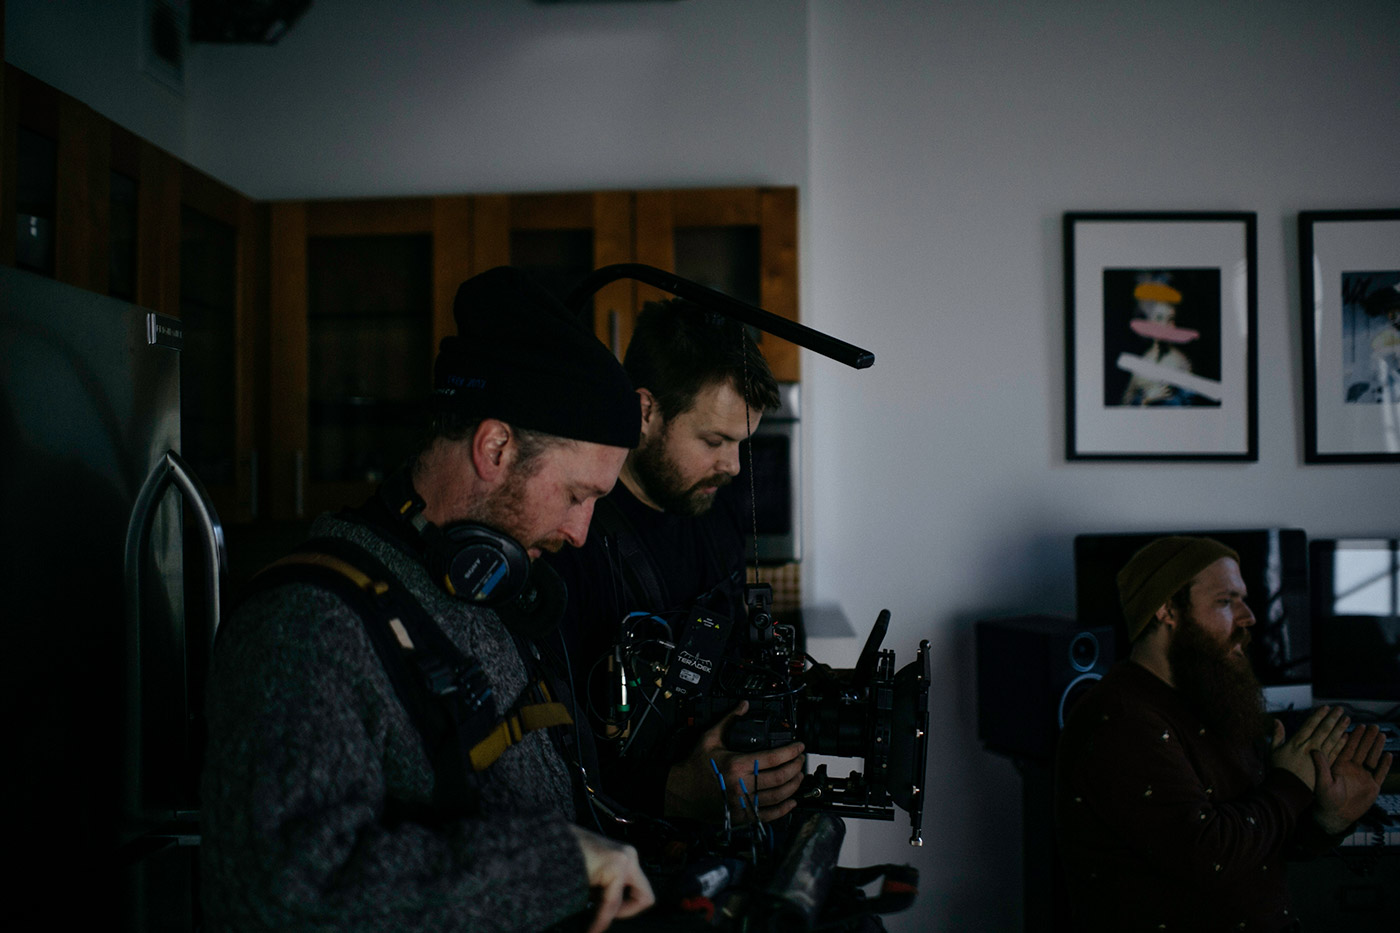
Production
Setting up Shots
Once pre-production comes to a close, it’s time to dive headfirst into the thrilling world of production. This is the stage where everything you’ve meticulously planned comes to life on the screen. One of the most critical aspects of this phase is setting up shots, which determines how your story will visually unfold. Setting up shots isn’t merely about pointing a camera in the right direction. It involves a series of creative and technical decisions that can significantly affect the audience’s perception. Here’s what you need to consider:
- Shot Composition: This involves deciding how elements in the frame interact with one another. You’ll consider the Rule of Thirds, where you imagine splitting the screen into thirds vertically and horizontally, placing key elements at the points of intersection. For example:
- A horizon at the top third can evoke a sense of vastness.
- A character’s eye positioned along these lines draws the viewer into their perspective.
- Camera Angles: The angle from which you shoot can drastically alter the meaning of a scene. A low angle can make a character appear powerful, while a high angle can depict them as vulnerable. Think about how the angle influences the audience’s connection with the characters.
- Lighting: Proper lighting sets the mood. For instance, soft lighting can create intimacy, while harsh lighting may evoke tension. Using tools like reflectors and diffusers can help achieve the desired effect.
- Blocking: This refers to the movement of actors within each scene. Careful choreography ensures that action flows seamlessly. Imagine a diner scene—how actors move in relation to the camera and one another transforms a subjectively mundane moment into a captivating piece of cinema.
The excitement of setting up shots always reminds me of a small project I worked on—an improvised short film with friends. Our location was a charming café, but with limited resources. By carefully choosing our angles and rightly utilizing natural lighting, we transformed an ordinary setting into a vibrant world, bursting with emotion!
Directing Actors
As the shots come together, the next step is directing the actors, a role that blends leadership, creativity, and communication. It’s about guiding performances that capture the essence of your characters and resonate with the audience. Here are some key tips for successfully directing actors:
- Establish Trust: Building rapport with your actors is paramount. A comfortable environment fosters creativity. Take the time to chat with them about their characters and share your vision. This can lead to an open dialogue that enriches their performances.
- Clear Direction: While actors bring their unique interpretations to a role, providing clear direction enables them to align with your vision. During rehearsals, offer specific notes about what you’re looking for—be it emotional depth, subtlety, or intensity. Remember to balance critique with encouragement.
- Encouraging Improvisation: Sometimes the best moments come from unexpected performances. Allowing actors the freedom to improvise can yield natural results. I recall a scene in a short film where an actor ad-libbed a line, adding humor and depth that we hadn’t anticipated. That creative spark turned out to be one of the highlights of the piece!
- Visualize the Scene Together: As you guide your actors through the shooting process, provide context for each scene. Let them know how their actions impact the broader narrative and why it’s essential. This helps them connect more profoundly with their characters and enhances their performance.
Directing actors requires a blend of intuition and technical knowledge. It’s your job to harness their unique talents while ensuring that they remain aligned with the film’s overall vision. Every line delivered, every expression captured, helps sculpt the story into something truly magical. As you move forward in production, the energy on set is palpable. The collaboration between crew and cast brings forth creativity that transforms mere words on a page into cinematic art. Keep in mind that every moment captured, every interaction designed, contributes to a story that will soon reach audiences around the world! 🎥🌟

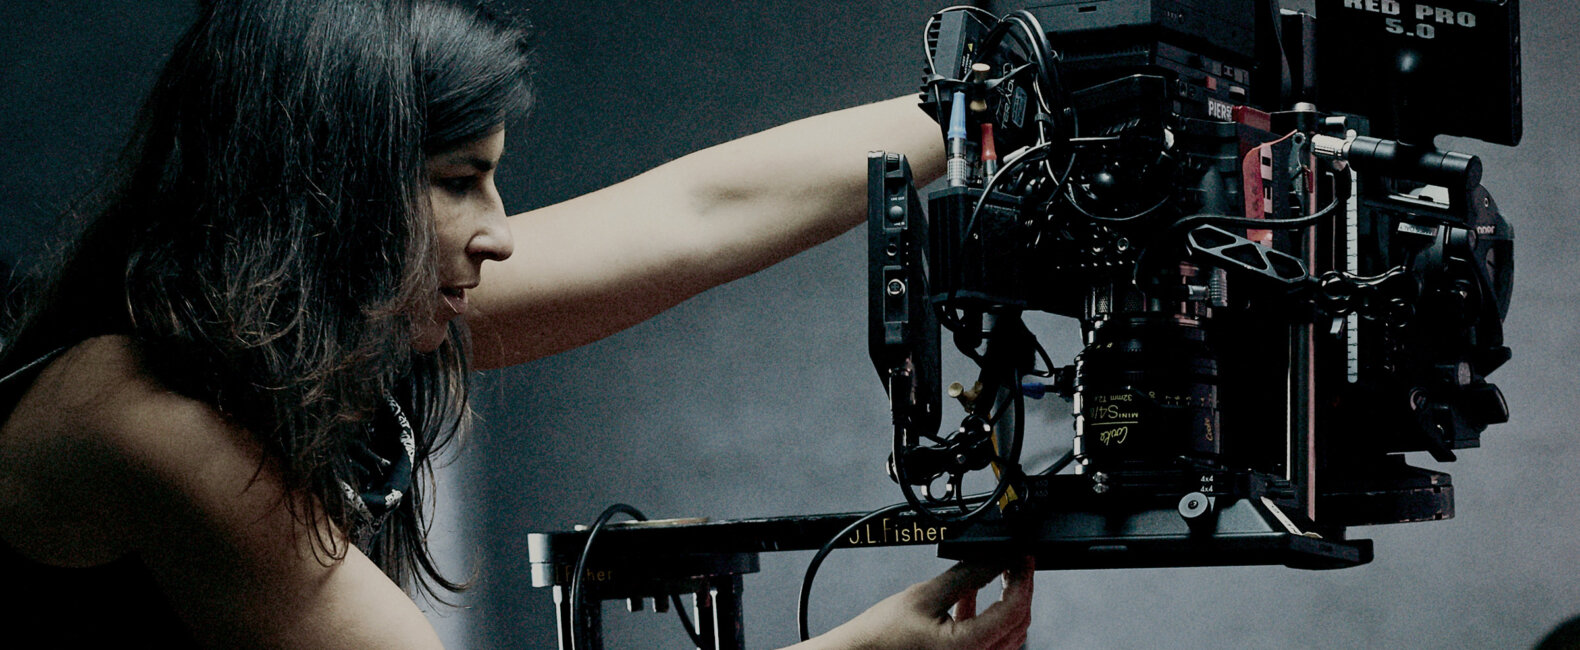
Cinematography
Lighting Techniques
As production continues, we dive into one of the most captivating aspects of filmmaking: cinematography. This is where your vision truly begins to shine, and a key component of cinematography is lighting. The way you light a scene can completely alter the mood, tone, and emotional depth of your film. Let’s explore some essential lighting techniques that can transform your shots:
- Three-Point Lighting: This classic technique consists of three light sources: the key light, fill light, and backlight.
- Key Light: The main light source, usually positioned at a 45-degree angle from the subject to create dimension.
- Fill Light: This softer light reduces shadows created by the key light. It’s typically placed opposite the key light.
- Backlight: Positioned behind the subject, it creates a halo effect and separates the subject from the background, adding depth.
- Natural Lighting: Utilizing natural light can bring authenticity and warmth to your scenes. Think of a scene shot at golden hour (just before sunset) where the light is soft and warm, creating visually stunning moments. If you’re shooting outdoors, try to plan scenes around the position of the sun.
- High vs. Low Key Lighting: High-key lighting results in bright, even illumination, often associated with light-hearted comedies or family films. Conversely, low-key lighting creates stark contrasts and dramatic shadows, perfect for thrillers or horror films. A recent project of mine, set in a dimly lit room with low-key lighting, enhanced the tension and suspense superbly!
- Practical Lights: Incorporating practical lights—like lamps and candlelight—adds realism to your scenes. They merge naturally into the story and can be styled in ways that contribute to the film’s aesthetic.
Lighting is an art form in itself, and understanding how to manipulate it effectively can enhance the overall visual storytelling. It’s worth spending time experimenting with different setups and migrations!
Camera Movements
Once your lighting is set, it’s time to consider camera movements, another fundamental aspect of cinematography that adds excitement and dynamism to your film. How you move the camera can evoke various emotions and guide the viewer’s gaze through the story. Here are some notable camera movements to keep in mind:
- Static Shots: Sometimes the simplest shots are the most powerful. A stationary camera can create a sense of security and calm, giving audiences time to absorb the action. Think of poignant conversations in films that hold a static frame while the characters’ emotions unfold.
- Pan and Tilt: Panning involves moving the camera horizontally from side to side, while tilting moves it vertically. Both can help reveal information about the environment or follow action. For instance, a slow pan following a character can create suspense as they approach an unknown danger.
- Dolly and Tracking Shots: A dolly shot moves the camera smoothly towards or away from a subject, creating an immersive experience. Tracking shots follow characters through a scene, as seen in the famous continuous shot in “Birdman.” The fluid movement pulls viewers into the action, making them feel part of the narrative.
- Handheld Shots: These create a raw, documentary-like feel, often used to accentuate chaos or urgency. For example, intense action scenes or emotional moments benefit from the shaky dynamics of handheld movements to amplify tension and authenticity.
- Crane Shots: Using cranes can elevate your camera, capturing sweeping views or adding grandeur to a scene. Imagine a beloved cityscape appearing beautifully in the background as the protagonist has a moment of realization.
Reflecting on my work in student films, I vividly recall experimenting with different camera movements to tell a story more effectively. One particular scene utilized a tracking shot, following a character through a busy market. The movement not only made the viewer feel immersed in the setting but also mirrored the character’s whirlwind emotions. Cinematography is about more than just lighting and camera work; it requires a keen sense of storytelling. By mastering these elements, you can craft scenes that evoke powerful emotions and create a visual feast for your audience. As you explore this captivating world, remember that each decision you make contributes to the larger tale you’re telling. 🌟🎥
Sound Design
Recording Dialogue
As we progress into the realm of sound design, you’re about to discover just how crucial audio is in filmmaking. Sound isn’t merely an afterthought; it complements the visuals and immerses the audience in the story. One of the fundamental elements of sound design is recording dialogue, which requires precision and creativity. Recording dialogue is not as simple as placing a microphone and letting the actors speak. Here are some essential considerations to ensure you capture crisp and clear dialogue:
- Location Selection: Choosing the right location for recording can make all the difference. Noisy environments, like busy streets or large open spaces, can capture unwanted background sounds. Whenever possible, opt for quieter spaces.
- Microphone Placement: The type of microphone you use can vary based on the scene. A shotgun microphone is excellent for focused sound pickup, while lavalier mics are great for capturing dialogue without intrusive equipment in the frame. Be mindful of how close you position the mic to the actor’s mouth, as this can affect clarity.
- Sound Check: Before diving into shooting, always conduct sound checks. This process involves testing the audio levels and adjusting them to ensure consistent quality throughout the shoot. It’s essential to identify any unexpected noises during this check to mitigate issues later.
- Room Tone: Recording room tone—ambient sound in the filming location—adds richness and continuity. It might seem inconspicuous, but it gives editors a foundation to blend scenes smoothly, enhancing the overall audio experience.
I remember during a film project where we encountered unexpected background noise from a nearby construction site. We had to reschedule our shoot, but it ultimately led to a quieter, more controlled environment, allowing for better dialogue capture. The extra effort paid off in the final cut!
Creating Sound Effects
Once the dialogue is recorded, the adventure continues with creating sound effects, widely known as “foley.” Sound effects breathe life into a film, immersing the audience and making scenarios feel more real and relatable. Here are key aspects to consider when creating sound effects:
- Foley Art: Foley is the reproduction of everyday sound effects that are added after filming, designed to enhance the auditory experience. Common sounds include footsteps, clothing rustling, and doors creaking. Skilled foley artists incorporate everyday items to achieve realistic sounds; for instance, they might crunch lettuce to replicate the sound of footsteps on gravel.
- Library Sounds: Sound libraries offer a plethora of pre-recorded sound effects. While these can save time, it’s essential to choose sounds that match the mood and tone of your film. Paying attention to the quality and origin of these effects will keep your production sounding polished.
- Layering Sounds: Sometimes, a single sound effect doesn’t suffice. Layering multiple sounds can add depth and complexity. For example, the sound of a bustling market may require layering conversations, animal sounds, and traffic noise. This approach creates a fuller, richer atmosphere that envelops the audience.
- Dialogue Integration: When placing sound effects alongside recorded dialogue, ensure they complement each other. Poor integration can lead to confusion or distraction. It’s crucial to balance sound levels so that dialogue remains clear while sound effects enhance rather than overpower.
Reflecting back on a community film project, we had an action scene that felt lackluster initially. By deliberately layering sound effects—from slicing through the air to footsteps crunching on gravel—we brought the scene to life. The transformation was astonishing, elevating the tension and excitement right before our eyes! As you delve into sound design, remember that audio serves as a bridge between visuals and emotions. Each meticulously crafted sound—whether it’s dialogue or effects—contributes to storytelling, allowing your audience to engage their senses fully. It’s this attention to detail that will elevate your work from good to truly unforgettable! 🎶🎬

Editing
Cutting and Spacing
As we transition into the editing phase of filmmaking, we enter the realm of refining and shaping your story into its final form. Editing is where the magic really happens, allowing the filmmaker to weave together narrative threads, control pacing, and enhance emotional impact. One major part of this process is cutting and spacing, which ensures your film flows seamlessly. Cutting involves deciding which shots make it into the final cut and where transitions occur. Here are some key points to keep in mind:
- Establishing Rhythm: The rhythm of editing can significantly affect how your audience experiences the film. Fast cuts can create excitement, while slower cuts may evoke a more contemplative atmosphere. Consider the scene—action sequences often benefit from rapid cuts, while emotional moments might need more breathing room.
- Continuity Editing: This technique ensures that the story flows logically from one shot to the next. It involves maintaining consistent angles, positions, and actions to minimize confusion. Always watch for continuity errors, like a coffee cup disappearing between cuts—it can distract the viewer!
- Cutting for Impact: Think about where you want to place emotional emphasis. A well-timed cut can amplify the emotional impact of a moment. For instance, cutting away from a character at a tense moment to reveal their surroundings can enhance suspense and keep the audience engaged.
- Spacing: This refers to how long each shot lingers on the screen. Avoid cramming too many shots into a short scene. Give each moment enough time to resonate, allowing the audience to absorb what’s happening. It’s all about finding that sweet spot between action and reflection.
I remember editing a short film project where my editor and I faced the challenge of a cluttered timeline filled with great scenes but poor pacing. After some tough decisions, we cut out several beautiful shots that, while exquisite, didn’t serve the overall flow of the story. The result was a streamlined narrative that maintained tension and kept viewers on the edge of their seats.
Adding Visual Effects
Once the cutting and spacing of your film are fine-tuned, it’s time to delve into the exciting world of visual effects (VFX). These effects can elevate your film’s storytelling by adding elements that aren’t practicable to capture on camera, transforming the ordinary into the extraordinary. Consider these aspects when adding visual effects:
- Practical vs. Digital Effects: While digital effects have become prevalent in today’s filmmaking, consider utilizing practical effects when possible. These include in-camera tricks that are physically performed on set. Think of explosions, physical models, or puppetry—practical effects often look more convincing and can enhance actor performances by providing tangible elements to interact with.
- Green Screen: A classic tool in VFX, green screens allow for backgrounds or elements to be added later during post-production. However, it’s crucial to have proper lighting and a smooth keying process to avoid unsightly artifacts in the final product. Test your shots to ensure your actors blend seamlessly with their new surroundings.
- Compositing: This process involves layering multiple images together to create a single, cohesive shot. It can be used to blend live-action footage with digital enhancements, such as adding fantastical elements or creating entirely new environments.
- Motion Graphics: Adding titles, lower-thirds, and animated elements can help convey crucial information and enhance visual storytelling. Just ensure these graphics align with the film’s tone—heavy action sequences may benefit from bold and energetic graphics, while a romantic drama might require subtler overlays.
During one of my film projects, I had the chance to collaborate with a VFX artist who worked wonders with compositing. We had a scene taking place in a fantastical underwater world. The blend of live-action footage with digital artistry created a delightful experience for the audience, adding a layer of visual depth that made the narrative all the more enchanting. As editing wraps up, it’s important to remember that this process, while tedious at times, is one of the most rewarding stages of filmmaking. The decisions you make—how you cut, space, and add visual effects—will shape your film and determine how it resonates with audiences. Take the time to nurture your editing craft, and your final product will speak volumes! 🎞️🌌

Post-Production
Color Grading
After the exhilarating journey of editing, we transition into post-production—where everything comes together to create a polished film. One of the most crucial aspects of this stage is color grading. This process enhances the visual aesthetic of your film, setting the mood and evoking emotions that words often cannot. Color grading transforms the raw footage into a visually captivating narrative. Here’s what to consider when diving into color grading:
- Setting the Mood: Each color can evoke specific feelings. For instance, warm tones (reds, oranges) can create an intimate or passionate atmosphere, while cool tones (blues, greens) may evoke calmness or detachment. Depending on the themes of your film, establish a color palette that aligns with the story.
- Consistency: When grading, aim for consistency across scenes. The audience shouldn’t feel disoriented by abrupt color changes. Using color grading software, like DaVinci Resolve or Adobe Premiere Pro, helps you maintain a cohesive look throughout the film.
- Highlighting Key Elements: Color can also guide the viewer’s attention. You can focus on a character’s emotions by enhancing their skin tones or de-emphasizing the background. For example, in a dramatic scene, you might increase the contrast on the character to draw viewers’ eyes more naturally towards them.
- Experimentation: Color grading allows for creativity. Don’t hesitate to try different looks and effects. Playing around with different settings can lead to stunning and unexpected results that enrich your overall vision. During one project, we experimented with a vintage look using sepia tones; the effect not only added nostalgia but also deepened the narrative’s emotional impact.
Color grading often takes time, so be patient throughout the process. Once you’ve found the right hues and tones, you’re just a step away from achieving that gripping visual storytelling you’ve envisioned.
Finalizing Soundtrack
As we wrap up post-production, the final step is to perfect the soundtrack. Soundtracks are the unsung heroes of emotion, guiding the audience’s response and accentuating the overall experience of the film. Here’s a guide to help you finalize your soundtrack effectively:
- Choosing the Right Music: The score and soundtrack you select should resonate with the film’s themes and emotional arcs. Consider whether an orchestral score, a contemporary song, or a simple piano melody fits better. Remember to consider licensing if you’re using pre-existing tracks!
- Sound Mixing: Mixing involves balancing dialogue, sound effects, and music. Each element should complement, not overpower, the others. Pay attention to levels; make sure the dialogue is always clear against the backdrop of music and sound effects. Use tools like EQ (equalization) to adjust levels, ensuring that each audio component shines without drowning the others out.
- Fitting the Flow: Music should enhance the flow of scenes. For instance, building tension with gradual crescendos during key moments can leave a lasting impact. I’ve experienced firsthand how a well-timed piece can elevate a scene—from a heart-pounding chase sequence to an emotional reunion. The right music can transform viewers, placing them squarely in the moment.
- Final Listening Sessions: Before locking your soundtrack, hold a few listening sessions with trusted peers. Fresh ears can address any unevenness or tweaks that might enhance the audio experience. Encourage honest feedback; some sounds might work splendidly in isolation but may not fit seamlessly in the full context.
During one short film project, the collaborative process of choosing the right soundtrack was a highlight for our team. After experimenting with various genres, we landed on a haunting piece of instrumental music that matched our film’s darker tones. It not only complemented the visuals but also created an emotional resonance that our audience deeply felt. As post-production draws to a close, remember that each step—from color grading to finalizing the soundtrack—plays a vital role in crafting the story you aim to share. The careful attention to these details will elevate your film and leave a lasting impression on your audience. So, embrace the creativity and depth these final touches provide, and get ready for the exciting world of marketing and distribution! 🎬🎶

Marketing and Distribution
Creating Movie Trailers
Now that you’ve crafted a compelling film, it’s time to step into the realm of marketing and distribution. This phase is crucial for ensuring your movie reaches its intended audience and gains visibility. One of the key components of marketing is creating a captivating movie trailer. A well-made trailer can entice viewers, build anticipation, and ultimately boost ticket sales. Here are some essential tips for creating effective movie trailers:
- Hook Them Early: The opening seconds of a trailer are vital. You have a brief window to grab attention. Start with an intriguing shot or a captivating line of dialogue that draws the viewer in. For instance, the chilling first lines of a horror film can set an unsettling tone right away!
- Build Suspense: A good trailer creates curiosity without revealing too much. Gradually unveil the storyline by showcasing dramatic moments but avoid giving away key plot twists. Leave the audience wanting more! I recall a trailer I worked on where we used quick cuts of intense actions and powerful dialogues, placing hooks that teased the storyline without spoiling it.
- Sound and Music: Utilizing the right soundtrack can enhance the emotional impact. A powerful score can elevate suspense or warmth, guiding audience feelings throughout the trailer. Always ensure that audio levels are balanced so that both dialogue and music complement each other well.
- Highlight Key Characters: Introduce main characters to establish connections with the audience. Brief snippets of their interactions and motivations can foster a sense of investment in their journey. Consider working with the actors to find compelling moments that feel authentic and relatable.
- Call to Action: Don’t forget to include essential information at the end of your trailer, such as release dates, website links, and social media handles. Make it easy for viewers to know when and where they can see your film!
Creating a movie trailer is an art form in itself. It’s your film’s first impression and serves as a gateway for audiences to engage with your work.
Film Festivals and Screenings
Alongside trailers, film festivals and screenings play a critical role in the distribution process. They are fantastic platforms to showcase your film, gain exposure, and even attract potential distributors. Here’s how to navigate film festivals effectively:
- Choosing the Right Festivals: Research festivals that align with your film’s genre and themes. Renowned festivals like Sundance, Cannes, and Toronto International Film Festival can catapult your film’s visibility, while niche festivals can help you connect with a dedicated audience.
- Submitting Your Film: Each festival has specific submission guidelines. Ensure your film meets the requirements and pays attention to deadlines. Prepare a compelling synopsis, promotional materials, and any required additional content. I fondly remember submitting my first short film to a local festival; the anticipation felt like a roller coaster ride!
- Networking Opportunities: Festivals offer invaluable networking opportunities. Attend screenings, panels, and events to meet industry professionals, fellow filmmakers, and film enthusiasts. Engage in discussions, share your experiences, and learn from others. Building relationships can open doors for future collaborations or distribution opportunities.
- Post-Screening Q&A: After screening your film, participating in Q&A sessions can be a rewarding experience. Sharing insights about your filmmaking process allows you to connect with the audience on a deeper level, making them feel invested in your work.
- Utilizing Social Media: Leverage your film’s social media presence. Share behind-the-scenes content, festival updates, and audience reactions. Engaging with fans can foster excitement and create a community that supports your film.
Once you navigate the festival circuit successfully, you can explore distribution methods, like traditional theatrical release, streaming services, or online platforms. Each option has its pros and cons, and selecting the right path for your film depends on your goals and target audience. Embarking on marketing and distribution may feel daunting, but with the right strategies and an engaging trailer, you can make a significant impact. Celebrating your film in festivals and screenings opens up new avenues, from audience engagement to potential distribution deals. Your film deserves to be seen, so take these steps confidently, and watch your hard work come to fruition! 🎬🌟