
Introduction
Understanding Urban Aurora Photography
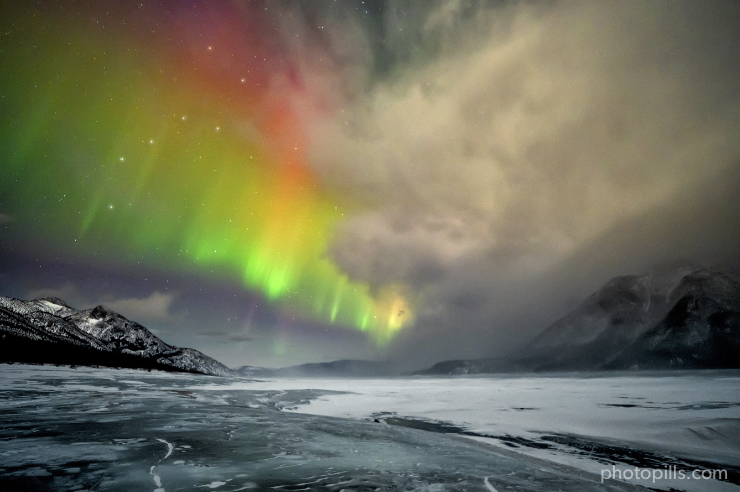
Urban Aurora Photography is an innovative and breathtaking form of photography that blends the mesmerizing qualities of auroras with the vibrant energy of urban landscapes. Picture this: a dazzling aurora dancing across the night sky, reflected in the glass skyscrapers of a bustling city. This unique combination creates stunning visuals that captivate not only the photographer but also the viewers. The essence of Urban Aurora Photography lies in its ability to capture nature’s wonder within the confines of man-made environments. It invites photographers to explore how urban structures interact with natural phenomena, creating a harmonious balance between the two. Whether it’s the shimmering greens and purples of the aurora borealis illuminating a city park or the soft glow of city lights complementing the natural display overhead, each photograph tells a story that speaks to our connection with both nature and urban life. Have you ever attempted to photograph an aurora? The surreal experience of watching these lights move across the sky is unforgettable. It’s never ordinary; it’s a moment that demands a great deal of patience and anticipation. Imagine wandering through your city at night, scouting the perfect backdrop against a vivid dance of colors. This marriage of nature and city offers endless creative possibilities, giving photographers a chance to express themselves uniquely.
Importance of Capturing Urban Environments
Capturing urban environments, especially in tandem with natural beauty, carries significant importance for several reasons:
- Storytelling: Every urban landscape has its unique narrative. When an aurora is juxtaposed with the silhouettes of buildings, it narrates a story of nature reclaiming its space amidst urbanization, reminding us of the beauty that exists even in bustling locations.
- Cultural Reflection: Urban photography often reflects cultural dynamics. By incorporating auroras, you explore how different cultures experience natural beauty within their urban settings. For instance, cities like Reykjavik, where auroras frequently dance in the winter sky, have developed a rich culture surrounding this phenomenon, blending it with city life.
- Environmental Awareness: Highlighting auroras in urban areas can also serve as a reminder of our planet’s fragility. It prompts discussions on climate change, light pollution, and the preservation of natural wonders amid urban development.
- Inspiring Others: Stunning images of urban auroras can inspire a sense of adventure and encourage others to explore photography in their own cities. It invites budding photographers to step outside their comfort zones, providing the thrill of chasing the perfect shot.
- Showcasing Urban Beauty: Many perceive urban areas as concrete jungles devoid of beauty. Pairing an aurora with urban architecture offers a fresh perspective, showcasing the aesthetic appeal of cities through unexpected natural displays.
When I ventured to photograph auroras against the backdrop of my city—Chicago—I found myself in awe of the shimmering green streaks cascading over the skyline’s iconic buildings. The thrill of capturing that moment was indescribable. It was a reminder of how, even in urban life, we can tap into the extraordinary aspects of our world. Urban Aurora Photography is not merely about capturing a beautiful scene; it’s about documenting the interaction of nature and urban existence. Whether you’re peeking through a cityscape under the northern lights or capturing the aurora stretching over a bridge, you’re preserving moments that blend human achievement with Earth’s raw beauty. Each click of the shutter forms a bridge between two worlds—the urban and the natural—where moments of serenity and chaos coexist beautifully. In the following sections, you will learn about the right equipment and techniques necessary for creating stunning Urban Aurora photographs. Let’s dive in!
Choosing the Right Equipment
Types of Cameras for Urban Photography
Now that you have a deeper understanding of Urban Aurora Photography, it’s essential to equip yourself with the right tools to capture these magical moments. Choosing the appropriate camera can make all the difference, especially when you’re out hunting for elusive auroras against urban backdrops. When it comes to cameras, you have several options. Here are the most common types you might consider:
- DSLR Cameras:
- These are popular among professional photographers for their versatility and image quality. They allow for interchangeable lenses and manual controls, crucial for adjusting settings in low-light conditions.
- Example: A Canon EOS 5D Mark IV or a Nikon D850 would be great choices.
- Mirrorless Cameras:
- These cameras are lightweight and compact while still delivering high-quality images comparable to DSLRs. They also have advanced features, such as real-time exposure previews.
- Example: The Sony Alpha a7 III is an excellent model favored by many urban photographers.
- Point-and-Shoot Cameras:
- If you prefer something simpler, a good quality point-and-shoot can still yield impressive results. They are very portable and easy to use, making them great for spontaneous photography.
- Example: A Sony RX100 series camera is compact but packs a punch in terms of image quality.
- Smartphones:
- Don’t underestimate the power of a smartphone! With advanced camera technologies, many smartphones can achieve beautiful results, especially if you’re comfortable with editing apps.
- Example: Recent models like the iPhone 14 Pro or Samsung Galaxy S23 come with excellent night modes.
When selecting your camera, consider factors like low-light performance, sensor size, and ease of use, especially for those late-night aurora outings. Remember, the best camera is the one you have with you, so choose something that fits your lifestyle.
Essential Lenses and Accessories
Once you’ve settled on a camera, the next step is to choose the right lenses and accessories that will enhance your Urban Aurora Photography experience. Here are some essentials you shouldn’t overlook:
Lenses:
- Wide-Angle Lens:
- A wide-angle lens is a must-have for urban landscapes. It helps capture the entire scene, including stunning auroras overhead and the captivating cityscape below.
- Example: A 16-35mm f/2.8 lens allows for creativity in composition, letting you include more foreground or sky.
- Fast Prime Lens:
- For low-light conditions and more control over depth of field, a fast prime lens (such as 35mm or 50mm f/1.8) is ideal. These lenses excel in capturing sharp images with beautiful bokeh.
- Example: A 50mm f/1.8 lens is great for isolating elements in the urban landscape while maintaining clarity.
Accessories:
- Tripod:
- A sturdy tripod is indispensable for long exposure shots, crucial in low-light urban aurora photography. It stabilizes your camera and prevents any blur due to camera shake.
- Example: A lightweight carbon fiber tripod allows for easy transportation during those late-night shoots.
- Remote Shutter Release:
- Using a remote shutter helps eliminate camera shake when capturing long exposures, allowing you to set up your shot without having to touch the camera.
- Filters:
- Polarizing filters can help reduce glare from water or glass buildings, providing a clearer view of both the city and the aurora.
- Neutral density (ND) filters can also be useful for achieving longer exposures during brighter nights.
- Extra Batteries and Memory Cards:
- Don’t forget to bring extra batteries, as cold nights can drain energy quickly. Additionally, having spare memory cards ensures you won’t run out of space when the perfect shot presents itself!
- Smartphone Apps:
- Utilize apps that track aurora activity and weather forecasts (e.g., My Aurora Forecast, Aurora Alerts) to stay updated on the best times to shoot.
Combining the right camera gear with your unique vision will undoubtedly improve your Urban Aurora Photography experience. The key is to experiment; don’t hesitate to try different lenses and settings until you find what works best for your style. As you gear up for your next photography adventure, imagine the breathtaking visuals you’re about to create! In our next section, we’ll explore how to plan for the perfect shot, covering everything from location scouting to the best times to shoot. Stay tuned!
Planning for the Perfect Shot
Scout Locations and Timing
Once you’ve armed yourself with the right equipment, it’s time to turn your focus to planning for the perfect shot. Proper planning sets the stage for capturing Urban Auroras, where timing and location can dramatically affect the outcome of your images. Scout Locations:
- Research Your City:
- Before heading out, familiarize yourself with potential locations. Are there parks with unobstructed views of the skyline? What about rooftops or bridges? Each city offers different vantage points that can enhance your shots.
- Online maps and photography-related websites often have user-generated lists of popular spots for stunning urban photography.
- Visit During Daylight:
- I’ve always found it helpful to scout locations during the day. This way, you can observe the surrounding elements—venues, streetlights, and landmarks—that could enhance or detract from your night photography.
- Take note of how these locations look in the golden hour and how shadows might play out after sunset.
- Consider Accessibility:
- Ensure that your locations are safe and accessible, particularly if you’ll be out late at night. Some locations in urban settings may not be ideal after dark, so check out the neighborhood vibe.
- Look for options where you can quickly retreat if the weather changes or if other unforeseen challenges arise.
Timing:
- Check Aurora Forecasts:
- Utilize apps or websites that provide aurora forecasts. Knowing when the auroras will be most active will help you optimize your time and energy. I often check these sources days in advance to avoid disappointment.
- It’s also essential to keep an eye on other factors, such as the moon phase which can affect visibility. A new moon provides darker skies, making auroras more prominent.
- Plan for the Golden and Blue Hours:
- Golden hour (the hour after sunrise and before sunset) and blue hour (the hour before sunrise and after sunset) are fantastic times to shoot urban landscapes with a natural glow. The backdrop of the city during these times can add richness to your photos.
- Arriving early can afford you a stunning pre-aurora shot just before the night sky illuminates, showcasing both city lights and the first glimpses of the aurora.
- Monitor Weather Conditions:
- Stay vigilant with weather forecasts. Clear skies are essential for a successful shoot, as cloud cover can obscure the auroras. If the weather isn’t ideal, have a backup plan for alternative locations or shooting times.
Utilizing Natural and Artificial Light
Once you’re at the right location at the right time, you’ll want to pay careful attention to how both natural and artificial light play into your composition. Natural Light:
- Leverage the Aurora’s Glow:
- The aurora itself is the star of the show, casting beautiful colors against the backdrop of your city. Make sure to experiment with your camera settings to capture the dynamic range of light. Start with a slow shutter speed and adjust your ISO accordingly to prevent noise.
- Consider shooting in RAW format. This gives you greater flexibility in post-processing to bring out the colors of the aurora without losing detail.
- Combine with Natural Features:
- Look for trees, hills, or water bodies that can frame your shot. Natural features can anchor your composition and add depth to the images.
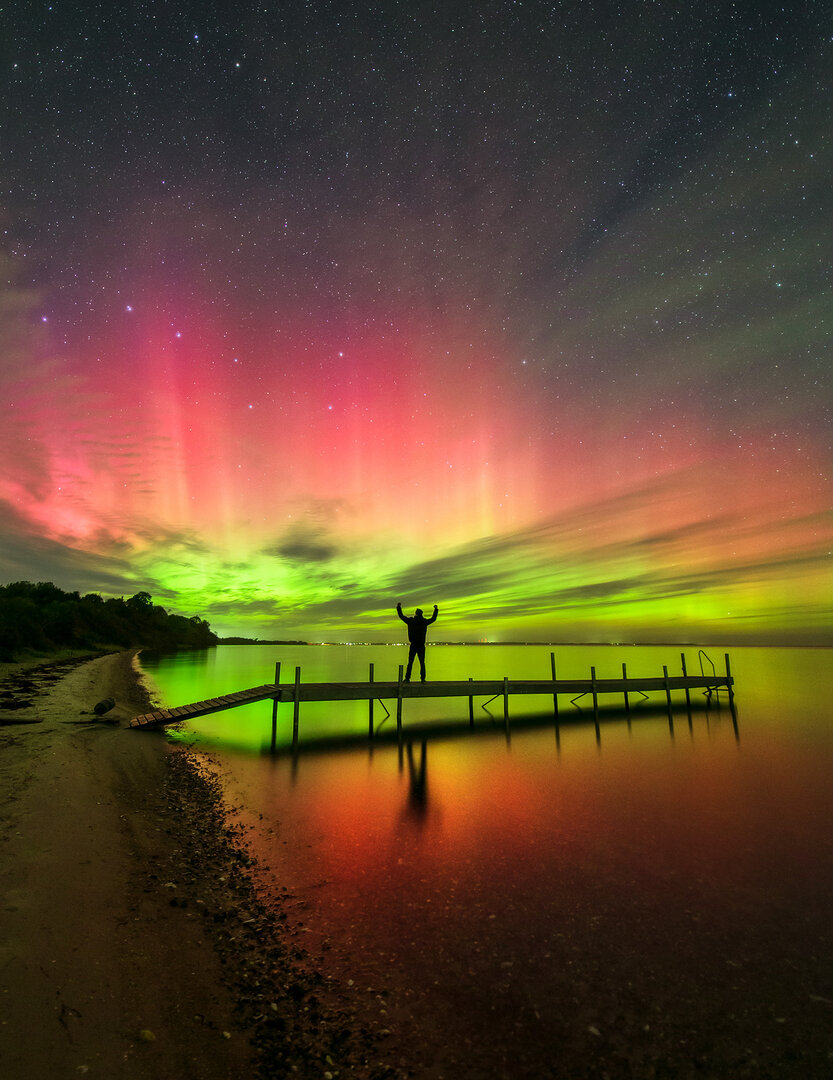
- I often include reflections in water when shooting near lakes or rivers; they amplify the beauty of the aurora while adding dramatic effects.
Artificial Light:
- Incorporate City Lights:
- Urban environments provide a plethora of artificial lighting sources—streetlights, glowing signs, and headlights. Utilize these to enhance your composition, as they can create dramatic contrasts with the colors of the aurora.
- Adjust your exposure settings to capture the lighting in a balanced way. You don’t want the city lights to overpower the ethereal glow of the aurora.
- Experiment with Light Trails:
- If you’re shooting near busy roads, consider using long exposure techniques to create light trails from moving vehicles. This can add a sense of motion to your images, juxtaposing the static nature of the aurora.
- Remember, you’ll want your shutter speed to be long enough to capture the trails without leaving car lights overexposed.
By thoughtfully scouting your locations and harnessing the interplay between natural and artificial light, you position yourself for photography success. Every shot is an opportunity to tell a story, combining the ethereal beauty of auroras with the rich tapestry of urban life. The next section will explore the vital components of composition, where you can fine-tune your framing techniques and artistic choices. Let’s continue exploring!
Composition Techniques
Rule of Thirds and Leading Lines
As you prepare your shots against the stunning urban backdrop adorned by the aurora, composition becomes crucial in creating impactful images. Understanding fundamental composition techniques will help you elevate your photography from merely good to truly captivating. Rule of Thirds: One of the most common guidelines in photography is the Rule of Thirds. This technique involves dividing your frame into a 3×3 grid, which creates nine equal sections. The goal is to place key elements of your image along these grid lines or at their intersections.
- How it works:
- Imagine that you’re breaking your viewfinder into three equal vertical sections and three equal horizontal sections. Statistics show that images composed using the Rule of Thirds not only look better but also draw the viewer’s eye effectively across the photograph.
- Aurora Application:
- When photographing an aurora, try positioning the lights in one of the vertical sections while balancing the city skyline along the horizontal lines. This draws attention to the natural display while maintaining a strong connection with the urban landscape.
- Personal Anecdote:
- The first time I captured an aurora over a river in the city, I placed the aurora off to one side according to the Rule of Thirds. The resulting photo felt more dynamic, leading the viewer’s eye toward the city’s reflections in the water, creating a harmonious balance.
Leading Lines: Leading lines are another powerful compositional tool. These lines within your image guide the viewer’s gaze towards the main subject of your photograph.
- Finding Leading Lines:
- Look for roads, bridges, rivers, or even architectural lines that draw the eye into your scene. Incorporating these lines can create a sense of depth and perspective.
- Example:
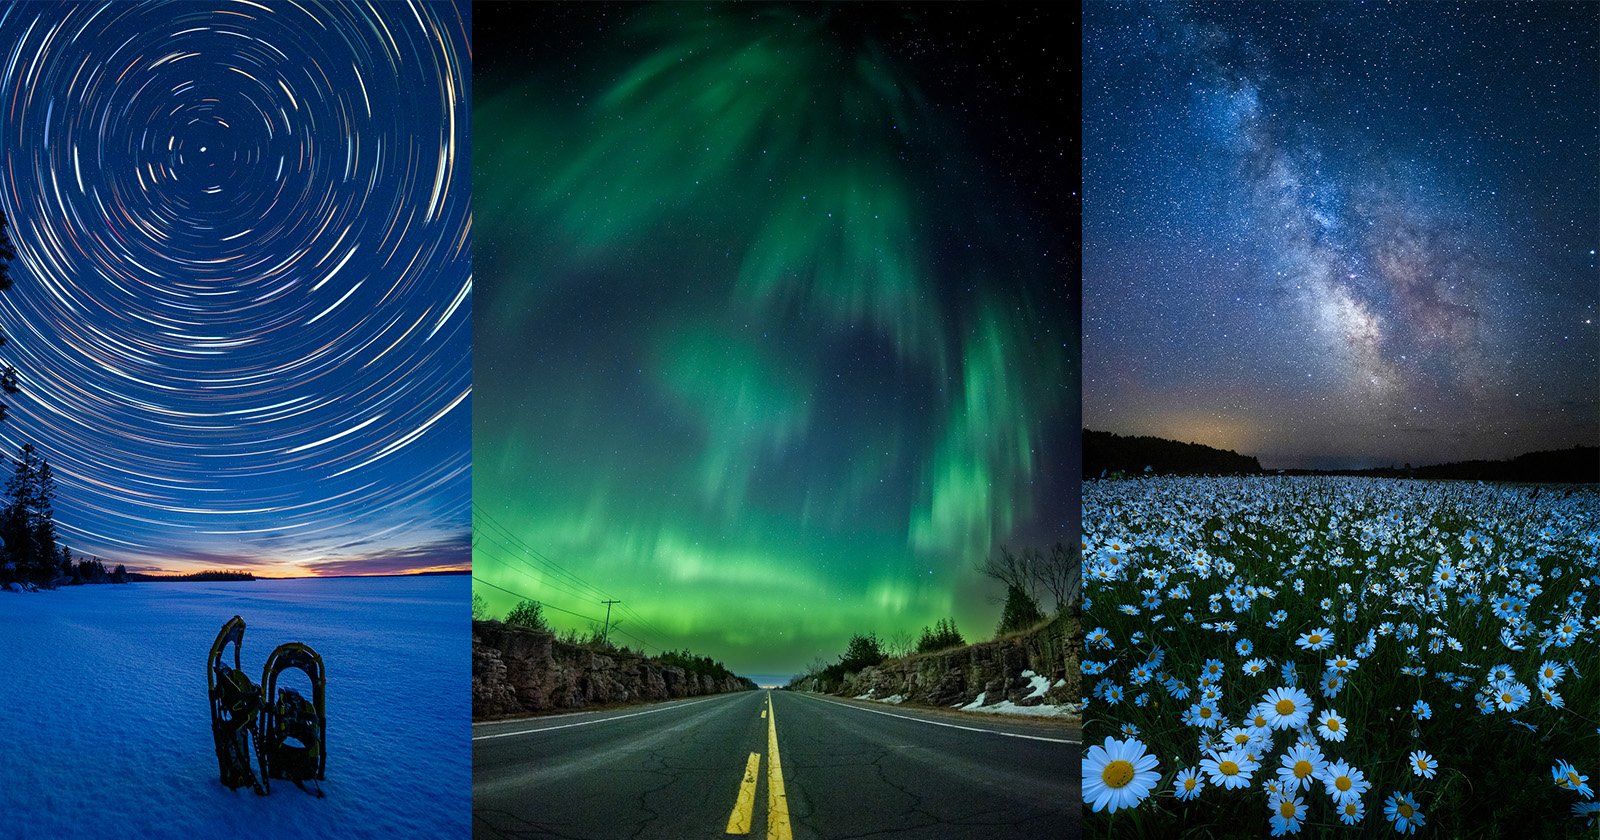
- Picture a long, winding road that leads straight towards the aurora illuminating the night sky. By placing the road in the foreground, the viewer’s eye is naturally drawn into the composition, enhancing the overall effect.
- Using Leading Lines with Cityscapes:
- Aligning the lines of buildings or pathways can provide a strong anchor while emphasizing the grandeur of the aurora overhead.
Framing and Depth of Field
Apart from the Rule of Thirds and Leading Lines, mastering framing and depth of field can transform your urban aurora photographs into masterpieces. Framing: Framing involves using elements within your scene to create a “frame” around your subject. This technique draws attention to the focal point, offering context and increasing the overall aesthetic appeal.
- Natural Frames:
- Trees, archways, and balconies can act as natural frames. When I was shooting an aurora above a historic building, I used the building’s archway to frame my shot. This not only created depth but also added storytelling elements that defined the photo.
- Urban Frames:
- Look for windows, doorways, or even railway tracks that lead your eye toward the aurora. By incorporating these elements creatively, you’ll add layers of interest to your compositions.
Depth of Field: Depth of field (DoF) refers to the range of distance within a photo that appears sharp and in focus. A shallow depth of field (blurred background) draws attention to your main subject, while a deep depth of field keeps everything in focus.
- Shallow Depth of Field:
- If you’re focusing on a specific element in the foreground—like a streetlight or a structure included in the scene—use a wider aperture (like f/2.8 or lower). This technique creates beautiful bokeh effects, making your subject pop against the aurora.
- Deep Depth of Field:
- If you prefer to capture both foreground and background sharply, especially in landscape shots including the whole city and aurora, use a smaller aperture (like f/8 or f/11). This way, every element in your composition sharpens together, making for a more encompassing view.
Utilizing these composition techniques will not only strengthen your urban aurora photography but also help convey the story you want to tell. As you bring these elements together—balancing the Rule of Thirds, harnessing leading lines, creatively framing your subjects, and controlling depth of field—you’ll find your images becoming richer and more evocative. In the following section, we will dive into the exciting world of editing and enhancing your urban aurora photos, so get ready to take your skills to the next level!
Editing and Enhancing Urban Aurora Photos
Software and Tools for Post-Processing
After capturing those breathtaking urban aurora photos, the next step is to enhance them through editing and post-processing. This stage allows you to fine-tune your images, bringing out the vibrant colors of the aurora while maintaining the beauty of the urban landscape. Popular Editing Software:
- Adobe Lightroom:
- This is one of the most popular tools among photographers. It offers a user-friendly interface and powerful features for organizing your photos and making adjustments.
- You can easily adjust the exposure, contrast, and saturation, which are crucial for urban aurora shots. Plus, the masking tool allows you to selectively enhance areas of your image.
- Adobe Photoshop:
- For more advanced editing, Photoshop is a fantastic option. It allows for detailed adjustments and retouching that can elevate your images significantly.
- Layering options enable you to combine different exposures, enhancing the dynamic range of your photo—a particularly useful method for capturing the depth of both auroras and city lights.
- Capture One:
- Capture One is an excellent alternative, often praised for its color grading capabilities. It offers fine control over colors, which can be beneficial when you want to showcase the vivid hues of an aurora against a city backdrop.
- The tethering feature for studio shoots can also be handy if you’re working in a controlled environment.
- Moblie Apps:
- If you’re editing on the go, apps like Snapseed or VSCO offer powerful editing tools that can cater to quick adjustments without the need for a laptop.
- Astronomy-specific apps:
- For aurora-specific adjustments, consider apps like Aurora HDR which focuses on creating stunning high dynamic range images.
Each of these tools comes with its strengths, so choosing the right one often depends on your photography style and personal preferences. Personal Tip: When I initially started with editing, I gravitated toward Lightroom for its simplicity. However, once I got comfortable, I delved into Photoshop for extensive image manipulation. This combination has transformed how I present my work!
Achieving the Ideal Urban Aesthetic
Now that you have the software, the next step is focusing on achieving that ideal urban aesthetic in your photos. This process involves balancing the natural beauty of the aurora with urban elements to create a visually intriguing composition. Color Grading:
- When editing, consider enhancing the hues of the aurora. Play with the color sliders to bring out the greens, purples, and reds typical of these phenomena.
- A subtle boost to the vibrancy can make urban lights pop without overwhelming the entire image. As a rule of thumb, always aim for a natural look that highlights but doesn’t distort the original colors.
Contrast and Clarity:
- Increasing contrast can help separate your subject from the background, especially when you’re working with city lights and the aurora together.
- Use clarity adjustments to define subjects better. A slight boost can give your images the crispness they need to stand out, particularly in urban settings.
Sharpening and Noise Reduction:
- In low-light photography, noise can be an issue. Use noise reduction tools available in your software, particularly in the shadows, where you’ll often see grain.
- Conversely, apply sharpening to enhance details like the skyline and architectural elements, ensuring they remain clearly defined without pulling attention from the aurora.
Crop and Composition:
- After editing, don’t hesitate to crop your image. It’s a great way to refine the composition, ensuring that it adheres to principles like the Rule of Thirds and aligns with your artistic vision. Experiment with different crops to see what resonates best.
Personal Anecdote:
- I recall a time when I edited an aurora shot taken over New York City. I started by enhancing the city lights, then I shifted my focus to refining the aurora’s colors. The result was an image that balanced against the urban skyline remarkably, and it became one of my favorite pieces!
In post-processing, always remember to maintain a balance. You want to enhance your urban aurora photos while remaining true to the scene you captured. The goal is to create an image that draws the viewer in, compelling them to explore the marriage of nature and urban life present in your shot. As you refine your skills in editing and enhancing your photography, keep experimenting and learning! In our next section, we’ll tackle the essential yet often overlooked ethical considerations when it comes to urban photography. Get ready to dive into navigating privacy and property rights effectively!
Overcoming Challenges in Urban Aurora Photography
Dealing with Crowds and Distractions
As thrilling as Urban Aurora Photography can be, it comes with its own set of challenges—one of the most significant being crowds and distractions. Urban settings are often bustling with life, and capturing the ethereal quality of the aurora amidst the hustle can feel overwhelming. Embrace the Crowds:
- Plan Your Timing:
- One way to manage crowds is to head out during times when people are less likely to be around. Late-night hours or early mornings can be particularly effective for getting those unobstructed shots of the aurora.
- Scout Popular Locations:
- Knowing where other photographers and crowds gather can help you find your sweet spot. For example, while many flock to popular viewpoints, sometimes a short walk away can yield stunning perspectives without the distraction of onlookers.
- A photo I took in downtown Toronto showed the CN Tower beneath a vibrant aurora—but I found my spot a block away from the main tourist areas, allowing for a peaceful environment to set up my shots.
- Utilize Distance:
- You can also establish distance from subjects. Utilize longer focal lengths or zoom lenses to capture the auroras without the interference of foreground subjects. This can help ensure the auroras stand out against the urban skyline without distractions.
Communicate with Fellow Photographers:
- I often find that fellow photographers can be your best allies! If you’re in a crowded area, chatting with other photographers can lead to shared tips on angles and locations. You’ll find that collaboration often opens doors for unique shooting opportunities.
Finding Angles:
- Be creative with your compositional approach. Instead of focusing on the most popular landmarks, seek out less obvious compositions of lesser-known elements that frame your scene. These unique angles often become standout images in their own right.
Weather Conditions and Unforeseen Obstacles
Weather is another unpredictable element that can dramatically affect your urban aurora photography experience. Conditions can change quickly, so having strategies to deal with these elements is vital. Monitor the Forecast:
- Stay Informed:
- Before heading out, keep a close eye on weather forecasts. Apps and websites for weather, satellite images, and aurora predictions can help you stay updated. Knowing what to expect allows for better preparation.
- Prepare for Changes:
- Weather can be unpredictable, especially in urban areas. A sudden downpour can ruin your plans, but being prepared with weather-resistant gear can save the day. Invest in a good rain cover for your camera and always carry along an umbrella!
Adapt to Conditions:
- Shooting in the Wind:
- Strong winds can destabilize your camera. Try to find a sheltered spot or use a weight bag on your tripod to keep things steady. I once set up my camera at a lakeside, only to have relentless winds make focusing impossible. After relocating to a nearby tree line, I was able to capture stunning reflections of the aurora across the water instead.
- Incorporate Elements into Your Scene:
- If conditions aren’t ideal—like cloudy skies or light pollution—don’t retreat! Instead, look for creative ways to use these elements. Layers of clouds can create a dramatic backdrop, so explore what’s possible within those limitations.
- Practice Patience:
- Sometimes, the best images come from waiting for the right moment. If conditions aren’t perfect, take the time to experiment with other compositions or explore different areas of your location. Often, unexpected opportunities arise while you’re maintaining a patient, watchful eye.
Personal Experience: I remember a night when I planned to shoot auroras in an urban area only to be met with sudden clouds rolling in. Instead of heading home defeated, I set up near a bustling street corner, capturing the auroras peeking through the gaps. While the conditions weren’t ideal, the interplay of city lights and clouded skies produced unique images that I cherished. Overcoming challenges in Urban Aurora Photography often leads to some of your best work. With the right mindset, preparation, and flexibility, you can turn potential obstacles into opportunities. In our next section, we’ll explore the vital ethics of urban photography, covering privacy and property rights considerations. Let’s dive into a topic that’s essential for every responsible photographer!

Ethical Considerations in Urban Photography
Respecting Privacy and Property Rights
As a photographer, especially in an urban environment, it’s crucial to navigate the ethical landscape of your craft. While capturing the beauty of urban auroras and cityscapes can be exhilarating, respecting the rights and privacy of others should always be at the forefront of your mind. Understanding Privacy:
- Public vs. Private Spaces:
- When photographing people or property, knowing whether you are in a public or private space is essential. In public areas, you generally have the right to photograph, but there are exceptions. Always remember that just because something is in public view doesn’t mean it’s fair game for photography without consideration.
- Candid Shots:
- If you find yourself wanting to take candid photographs of people, it’s respectful to ask for permission whenever possible. This not only shows consideration for their privacy but can also lead to some delightful interactions. I once asked a group of musicians if I could capture them as they performed under the auroras; they were thrilled and even posed for me!
- Avoiding Disturbances:
- Try not to intrude on private moments. There’s a line between capturing lively street scenes and interfering in people’s personal space. Being mindful of context helps maintain a respectful distance, allowing you to document urban life without becoming a nuisance.
Property Rights:
- Think About Backgrounds:
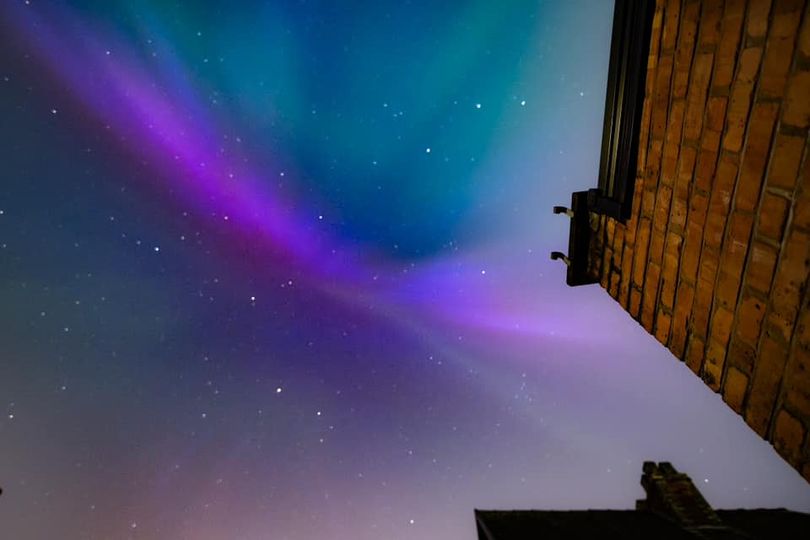
- When composing your shots, be aware of your backdrop. Capturing a beautiful aurora over a specific building might require permission from the property owner, especially if the image is for commercial use. Unfortunately, I learned this the hard way when I included a distinct building in my shot, only to find out later that they had strict regulations about using their property in photographs.
- Seek Permissions Proactively:
- For instance, if you want to shoot from a rooftop or within a commercial or private establishment, always seek out the necessary permissions in advance. This ensures you’re respectful of the property and its owners.
- Understanding Intellectual Property:
- Familiarize yourself with copyright laws related to urban art, graffiti, or distinctive city features. Licensing can vary significantly based on the art’s creator, and using their work in your photos can lead to disputes if done improperly.
Licensing and Sharing Urban Aurora Images
Once you’ve captured stunning urban aurora photographs while respecting ethical boundaries, the next step is understanding how to license and share your images effectively. Licensing Your Work:
- Types of Licenses:
- If you plan to sell or share your images, knowing the right licensing type is vital. There are varying licenses, from exclusive to non-exclusive arrangements:
- Royalty-Free: Allows for multiple uses without recurring fees.
- Rights Managed: More controlled, where you dictate how the image can be used.
- Creative Commons: Encourages sharing under specified terms but can be restrictive depending on the license.
- If you plan to sell or share your images, knowing the right licensing type is vital. There are varying licenses, from exclusive to non-exclusive arrangements:
- Metadata and Copyright Notices:
- Always include metadata with your images detailing copyright information. This not only protects your work but also provides credit for your creativity.
- Including your name and the year of capture within the file can discourage unauthorized use.
Sharing Responsibly:
- Social Media Etiquette:
- As you share your urban aurora photographs online, always tag and give credit to locations, people, or other photographers when relevant. This not only acknowledges others’ contributions but can also foster a community of respect and support.
- Watermarking Your Images:
- Consider watermarking your images when sharing online to protect your work from unauthorized use. The watermark serves as a reminder of your ownership while promoting your photography.
- Engage with Permission:
- If you plan to use someone else’s image in a collaboration or for inspiration, always seek permission beforehand. This practice promotes honesty and transparency within the photography community.
Final Thoughts: In navigating the ethical concerns surrounding urban photography, you’re not just adhering to laws—you’re embodying the spirit of respect for community and environment. Balancing the beauty of urban landscapes with awareness of privacy and property rights creates a healthier photography culture and enhances your reputation as an artist. In the upcoming section, we’ll explore how to showcase your urban aurora portfolio effectively, from building an online presence to participating in exhibitions and contests. Let’s gear up to celebrate your stunning work!
Showcasing Your Urban Aurora Portfolio
Building an Online Presence
After investing time and energy into capturing those stunning urban auroras, it’s time to share your work with the world. Building an online presence is essential for showcasing your portfolio effectively and gaining visibility in the competitive photography landscape. Create a Photography Website:
- Personal Domain:
- Having a dedicated website with your own domain name establishes legitimacy. It doesn’t have to be fancy; even a simple layout highlighting your best work makes a lasting impression. I started my website with a free template and gradually built it out over time, focusing on my favorite pieces.
- Portfolio Display:
- Organize your portfolio into categories (e.g., Urban Aurora, Night Scapes, City Life) to make navigation easier for visitors. This helps viewers hone in on your specific style and expertise.
- Use high-resolution images to ensure your work represents the best quality without pixelation!
- Blogging:
- Writing blog posts about your photography journey can engage potential viewers. Share techniques, tips, or stories behind specific shots. This not only showcases your knowledge but also builds a community of photography enthusiasts.
- An example from my experience: I wrote a post about the challenges of shooting urban auroras, discussing the weather variables and ways to overcome them. This resonated with many aspiring photographers!
Social Media Engagement:
- Instagram and Pinterest:
- Platforms like Instagram and Pinterest are excellent for visual storytelling. Use hashtags related to urban photography and auroras to reach a broader audience. Consistency is key; try posting regularly to maintain engagement with your followers.
- Feel free to share behind-the-scenes moments, such as scouting locations or editing processes—they humanize your brand and connect you with your audience.
- Join Photography Communities:
- Engage with fellow photographers by joining Facebook groups, forums, or Reddit communities focused on photography. Share your work, critique others, and seek advice. It’s an invaluable way to learn and grow in your craft.
- Email Newsletters:
- Consider setting up an email newsletter for your followers. This allows you to update them on new projects, exhibitions, or tips, keeping your audience engaged and invested in your work.
Participating in Exhibitions and Contests
In addition to your online presence, participating in exhibitions and contests can provide significant exposure and credibility. Finding the Right Venues:
- Local Galleries and Coffee Shops:
- Reach out to local galleries or coffee shops that often feature local artists. Many are open to showcasing work, and it can lead to valuable networking opportunities.
- I exhibited my urban aurora photos in a small gallery downtown, and the interactions with visitors opened doors to collaborations and new friendships.
- Community Events and Festivals:
- Look for local art fairs, festivals, or photography events that allow artists to display their work. Setting up a booth can draw attention to your portfolio, and you’ll also meet fellow creatives who can inspire your work.
- Art Shows and Competitions:
- Regularly check for art shows and competitions that resonate with urban or nature photography. Winning or getting recognized in contests can boost your credibility, leading to potential clients and invitations for further exhibitions.
- Be sure to read the guidelines thoroughly and tailor your submissions to fit the competition criteria.
Networking Opportunities:
- Attend Workshops:
- Engaging in workshops and seminars can expand your skills and network. Many professional photographers share their experiences in contests and exhibitions, which can help you refine your artistic vision and presentation.
- Collaborations with Other Artists:
- Team up with other artists or photographers for joint exhibitions. This collaboration can provide a larger platform and draw in diverse audiences.
- I once collaborated with a local painter whose works aligned with mine. Together, we created an interactive exhibit that combined our mediums, allowing for rich conversations and increased visibility for both of us.
In showcasing your urban aurora portfolio, remember that storytelling is at the heart of photography. Whether on your website, social media, or in exhibitions, share the experiences and emotions behind your images, and let your work speak for itself. Each piece is not just a photo; it’s a glimpse into the fascinating interplay of light, color, and life in urban environments. In our final thoughts, let’s reflect on your journey in urban aurora photography, highlighting everything you’ve learned along the way and how you can continue to evolve as a photographer. Let’s wrap this up with a celebration of your unique perspective!