
Crafting with paper can be one of the most rewarding and accessible hobbies. Whether you’re looking to create stunning home decorations or thoughtful handmade gifts, there’s something about working with paper that sparks creativity and joy. If you’ve ever wandered through a craft store, you’ve likely been overwhelmed by all the possibilities, but don’t stress! Let’s break it down into fun and manageable projects that anyone can tackle, regardless of skill level.
Why Paper Crafts?
Paper crafts are an excellent way to express your creativity and engage in a productive pastime. Here’s why many people, including myself, love working with paper:
- Affordability: Paper is inexpensive and widely available. You don’t have to invest in expensive materials.
- Versatility: Paper can be transformed in countless ways. From folding to cutting to gluing, the only limit is your imagination!
- Relaxation: Engaging in paper crafts can be incredibly therapeutic. When I sit down with a stack of paper, I can easily lose track of time while focusing on the task at hand.
- Gift-making: Handmade gifts always carry a special meaning. Showing someone you care by creating something unique is a delightful feeling.
Getting Started with Your Paper Craft Journey
Before diving into specific projects, it’s essential to gather the necessary materials. Here’s a simple list to help you get started:
- Variety of Paper: Printer paper, colored cardstock, origami paper, and magazines.
- Scissors or Craft Knife: Sharp enough for precise cuts.
- Adhesives: Glue, glue sticks, or double-sided tape, depending on the project.
- Ruler and Pencil: For accurate measurements and guidelines.
- Decorative Tools: Markers, stickers, and washi tape to personalize your creations.
Having a well-stocked craft area will not only inspire you but also ensure that you have everything you need on hand for spontaneous craft sessions!
Easy Projects to Get You Inspired
Now, let’s jump into some easy and fun projects that demonstrate the beauty of what you can do with paper. Here are some ideas you might consider:
- Origami Projects: The art of folding paper is a wonderful place to begin. Origami is not only captivating but also improves your focus and dexterity. Start with simple designs like the paper crane or butterfly, which can be made in under 10 minutes.
- Paper Cuts and Collages: Transform pieces of paper, magazines, or even old greeting cards into art through cutting and layering. Creating paper snowflakes is a winter classic, while magazine collages allow you to express your personality and interests.
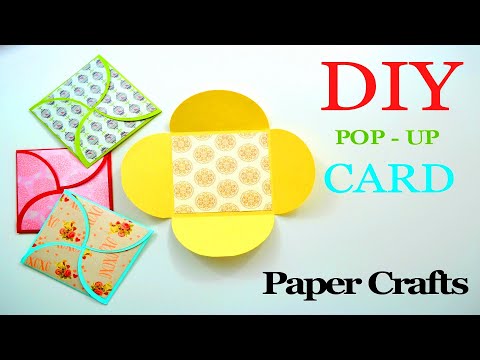
- Handmade Greeting Cards: Instead of buying cards, creating your own adds that personal touch. Consider designing pop-up cards or trying your hand at quilling to impress your loved ones.
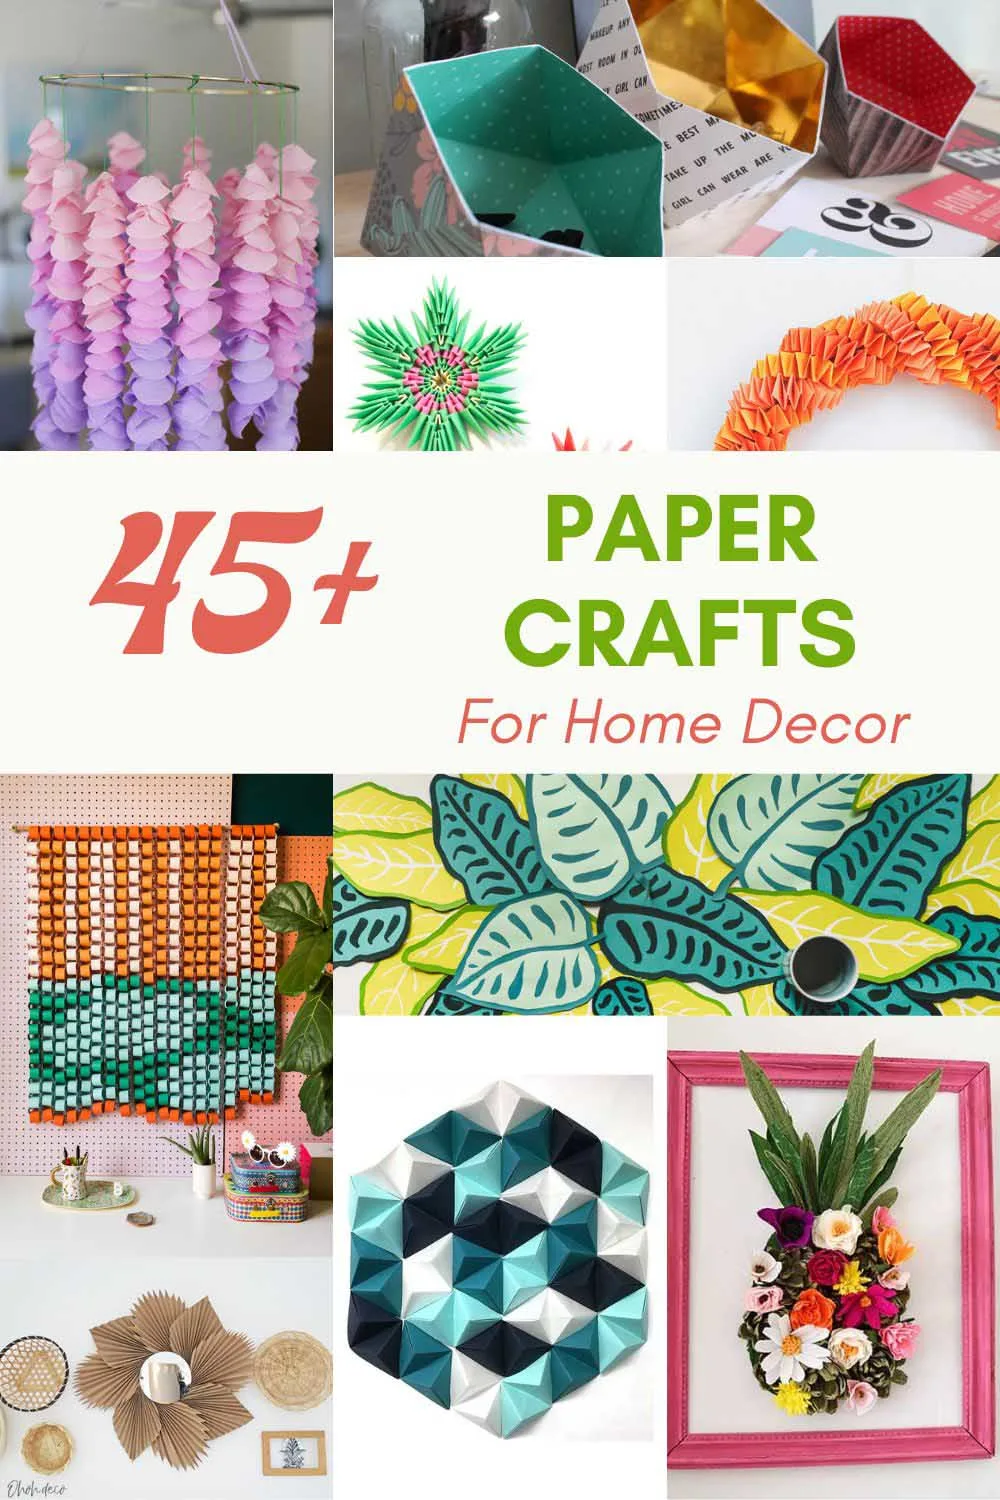
- Home Decorations: Elevate your living space with beautiful paper flowers or charming paper lanterns. With just a few sheets of paper, you can fill your home with vibrant colors and cheerful designs.
- Upcycled Paper Crafts: Don’t throw away those old newspapers or toilet paper rolls! With a bit of imagination, they can be transformed into useful and creative projects, such as a colorful newspaper basket.
Join the Paper Crafting Community
If you ever find yourself stuck or need inspiration, the craft community is a fantastic resource. Social media platforms like Pinterest and Instagram are filled with ideas, tutorials, and support from fellow crafters. Joining local workshops or online classes is another way to refine your skills and connect with others who share your passion. In conclusion, diving into paper crafts opens up a wonderful world of creativity and expression. Whether you’re crafting for personal enjoyment, making gifts, or enhancing your home, the projects covered will surely inspire you. So gather your materials and let the crafting begin! ✂️🎨

Having embarked on your exciting journey into paper crafts, you’re probably eager to start creating! The next step is to gather all the materials you’ll need for various DIY paper projects. Trust me, having a well-organized craft kit can make all the difference in not only your enjoyment but also the ease with which you create your masterpieces.
Essential Tools and Supplies
Before diving into any specific projects, it’s helpful to have a basic toolkit. Here’s a comprehensive list that I always keep on hand for crafting:
- Cutting Tools:
- Scissors: A good pair of scissors is indispensable. Whether you’re making intricate cuts or tearing paper, precise scissors can make your work much smoother.
- Craft Knife & Cutting Mat: For detailed designs, a craft knife allows you to make cleaner and more intricate cuts. Always use a cutting mat to protect your surfaces.
- Adhesives:
- Glue Sticks: Quick-drying and mess-free, glue sticks are incredible for securing paper together.
- Liquid Glue: Great for heavier materials and more extensive projects, just remember to use it sparingly!
- Double-Sided Tape: Perfect for layering and giving your projects a clean finish.
- Measuring and Marking Tools:
- Ruler: For straight edges and precise measurements.
- Pencil: A light pencil mark can help you plan your cuts before committing to them.
Your toolkit doesn’t have to be overwhelming! Start with these basics, and as you grow in your crafting journey, you can expand your collection based on the projects you want to tackle.
Types of Paper to Consider
The type of paper you choose can dramatically impact the final look of your craft. Here are some variations you might like to explore:
- Standard Printer Paper:
- Great for practice and templates. I often use this for initial designs before committing to more expensive papers.
- Colored Cardstock:
- Sturdy and vibrant, perfect for making cards and decorations. It rarely curls and holds its shape well.
- Origami Paper:
- Usually comes in various colors and patterns specifically designed for folding. Beginners often appreciate this weight as it’s easy to manipulate.
- Patterned Papers:
- Scrapbooking paper or decorative prints provide visual interest and can be used for collages or highlighting elements in your crafts.
- Recycled Paper:
- Consider using old newspapers, magazines, or wrapping paper to add character to your projects. Not only does it save costs, but it also encourages sustainability.
Additional Crafting Accessories
Aside from the essential tools and paper types, including some accessories in your toolkit can enhance your crafting experience. Here are a few I often find useful:
- Stamps and Ink Pads: Perfect for adding unique designs and personal touches to your projects.
- Washi Tape: This decorative tape adds flair and can be an easy way to embellish any craft.
- Markers and Pens: Use them for drawing or detailing your projects. It’s fun to add your doodles for an extra personal touch!
- Embellishments: Stickers, rhinestones, or ribbons can transform a basic project into something special.
Organizing Your Craft Space
Keeping your materials organized not only saves time but also fuels your creativity. Here are a few tips that have worked for me over the years:
- Storage Bins: Use clear containers to keep your paper types sorted. Label them for easy access.
- Caddy for Tools: Have a portable caddy or basket to house your cutting and gluing tools so you can craft wherever you please.
- Wall Organization: Pegboards can help keep your tools in view and easily accessible.
By gathering these materials and organizing your space effectively, you’ll set yourself up for success. With your toolkit ready, you can jump into creating beautiful paper crafts. The possibilities are endless, and each project will help you hone your skills while expressing your creativity. Enjoy the journey! 🌟✂️

With your crafting materials all organized and ready to go, let’s dive into the enchanting world of origami! This ancient Japanese art of paper folding is not only a delightful way to create beautiful art pieces, but it also enhances focus and fine motor skills. I’m excited to share two timeless and simple origami projects that are perfect for beginners: the Origami Paper Crane and the Origami Butterfly.
Origami Paper Crane
The Origami Crane is one of the most recognized figures in origami, symbolizing peace and hope. Plus, it’s said that folding a thousand cranes will grant you a wish—talk about motivation to master this art! Materials Needed:
- A square piece of paper (origami paper works best, but you can use any thin paper, including printer paper cut into a square).
Steps to Fold the Origami Crane:
- Start with the Colored Side Up: Place your square paper in front of you, ensuring the colored side is facing upwards.
- Fold in Half Diagonally: Fold the paper in half diagonally, corner to corner, creating a triangle, then unfold it. This will create a crease for later steps.
- Fold in Half Again: Now fold it in half diagonally in the other direction, and unfold it again.
- Bring the Corners to the Center: With your paper laying flat, bring the two top corners down to the center crease, forming a kite shape.
- Flip and Fold: Turn the paper over. Fold up the bottom section about a third of the way up—this will be the belly of your crane.
- Create the Neck and Tail: Now take the right flap, and fold the top point of it downwards, folding it away from the center. Repeat on the left side. Flip the paper again, and pull the neck and tail sections out carefully.
- Form the Wings: Fold out the two flaps to create the crane’s wings, adjusting them as needed to give a beautiful wing shape.
And there you have it—the origami crane! While it may take a few attempts to get the folds just right, don’t get discouraged. Each one is a step toward perfecting your technique. 🐦✌️
Origami Butterfly
Next up is the charming Origami Butterfly. This design adds a playful touch to any crafting project and can also be used as a delightful decoration or gift embellishment. Materials Needed:
- Another square piece of paper, preferably in vibrant colors or patterns to mimic a butterfly’s wings.
Steps to Fold the Origami Butterfly:
- Begin with the Color Side Up: As with the crane, place the paper colored side up.
- Fold in Half Vertically: Fold the paper in half, aligning the edges, then unfold to reveal a crease down the center.
- Create the Wings: Fold the top corners down to meet at the bottom crease. This will help shape the wings.
- Fold Up the Bottom Point: Now take the bottom point of the triangle you just created and fold it up to meet the top. This forms the butterfly’s body.
- Make the Butterfly Shape: Fold the two side flaps towards the center crease, one on each side, making sure they meet at the top. They should resemble wings.
- Pinch the Wings: To give your butterfly’s wings more dimension, pinch the top of the folded paper so that the wings stand out.
- Final Touch: Adjust the corners and wings to your liking, making them wider or narrower based on the look you desire.
Now you have a lovely origami butterfly fluttering on your table! 🦋✨ Like the crane, the butterfly may take a few tries to get right, but remember—practice makes perfect! If you’re feeling ambitious, try creating a whole garden of butterflies to hang up or use in home décor. Both of these simple origami projects offer an excellent starting point for exploring more complicated designs in the future. Not only are they fun to make, but they also serve as wonderful decoration ideas or gifts. Keep practicing, and soon you’ll be impressing friends and family with your origami skills!

After enjoying the delicate art of origami, it’s time to explore another exciting area of paper crafts: paper cuts and collages! These projects allow for endless creative expression, don’t require special skills, and can be completed in a short amount of time. We’re diving into two enjoyable and straightforward projects: creating stunning paper snowflakes and crafting a vibrant magazine collage. Let’s get started!
Paper Snowflakes
Creating paper snowflakes is a classic winter activity that brings a bit of magic to your home, regardless of the season. Each snowflake is unique, and there’s something quite satisfying about unfolding your creation to reveal intricate designs. Materials Needed:
- Plain white paper (printer paper or any paper you have on hand)
- Scissors
- Pencil (optional for sketching designs)
- String or tape for hanging
Steps to Create Paper Snowflakes:
- Cut Squares: Start by cutting a square piece of paper. The size can vary, but a 6-inch square works well for most designs.
- Fold the Square: Fold the square in half diagonally to form a triangle. Make sure to align the corners neatly.
- Fold Again: Fold the triangle in half once more to form a smaller triangle. For a more complex snowflake, you can fold it one more time.
- Cut Shapes: This is where your creativity kicks in! Use scissors to cut shapes along the edges of the triangle. You can create curves, v-shapes, or even small hearts. The key is to avoid cutting through the folds completely; otherwise, you’ll end up with separate pieces.
- Unfold and Reveal: Carefully unfold your paper to unveil the snowflake. Each cut will reveal a unique pattern, and no two snowflakes will ever look the same!
- Add the Finishing Touches: If you like, you can lightly spritz your snowflakes with glitter or hang them up using string for added decoration.
One year, during a particularly snowy winter, I decided to create a whole window display filled with paper snowflakes. It turned out to be such a fun project, and every neighbor who walked by seemed to appreciate the wintry charm it added to our home! ❄️✨
Magazine Collage
Now, let’s transition from winter wonderlands to vibrant artistic expression! Magazine collages are a fantastic way to transform old magazines into eye-catching pieces of art. Not only do you get to recycle, but you also get to explore your artistic side in a fun and abstract manner. Materials Needed:
- Old magazines or newspapers
- Scissors
- Glue (glue stick works best for this)
- Thick paper or canvas as a background
- Markers or other decorative elements (optional)
Steps to Create a Magazine Collage:
- Gather Materials: Find old magazines, newspapers, and any other paper materials you want to include in your collage. This could even include wrapping paper or colored tissue.
- Look for Inspiration: Take some time to flip through the magazines, cutting out images, words, and colors that resonate with you. You may want to theme your collage based on colors, emotions, or specific subjects.
- Plan Your Design: While collages can be free-form, having some direction can help. Arrange your cut-out pieces on a thick paper or canvas without gluing them down first. This way, you can experiment with layouts and arrangements.
- Glue Your Pieces: Once you’re happy with your design, start gluing! Start from the back and work your way forward, ensuring all edges are secured.
- Add Personal Touches: Use markers to add quotes, doodles, or other decorative elements. This is a great way to make the collage more personal and unique.
- Display Your Creation: Once everything is dry, frame your collage or hang it up as is. It will become a fantastic conversation piece!
I remember the first collage I made was after a difficult week. I used images related to my goals and dreams, and it was so fulfilling to see my vision visually represented. It turned out to be not just a beautiful piece of art but also an inspiring reminder of what I wanted to achieve. 🌈🖌️ By diving into paper cuts and collages, you’re expanding your creative toolkit and discovering new ways to express yourself! These projects are not just about the final products but also about the joy and mindfulness found within the crafting process. Keep creating and enjoy the journey!
Now that you’ve explored the exciting world of paper cuts and collages, let’s jump into a rewarding endeavor—creating handmade greeting cards! Handmade cards add a personal touch and are perfect for any occasion, be it birthdays, holidays, or just to say “I’m thinking of you.” I’m thrilled to share two fantastic techniques: Pop-Up Cards and Quilling Card Designs. Both methods are relatively simple yet offer standout creations that are sure to impress!
Pop-Up Card
Pop-Up Cards are enchanting and create a delightful surprise when opened. They might seem complex, but once you understand the wrapping and folds, you’ll be delighted by how simple they can actually be! Materials Needed:
- Cardstock or thick paper for the card base
- Colored paper for the pop-up elements
- Scissors
- A ruler
- Pencil
- Glue
Steps to Create a Pop-Up Card:
- Prepare Your Card Base: Start with a piece of cardstock. You’ll want to cut it to your desired size. A standard greeting card size is usually 5×7 inches, which is pretty manageable.
- Create the Fold: Fold your card in half, ensuring the edges align evenly. This will form the base of your pop-up card.
- Craft the Pop-Up Mechanism: Take another piece of colored paper, and cut out two strips that are about 1 inch wide and 4 inches long. Fold each strip in half to form a “V” shape. These will be your pop-up tabs.
- Attach the Tabs: Open the card back up carefully and place the folded strips (the tab V shapes) parallel to each other where you want the pop-up element to appear. Use glue to attach them. Make sure to only glue the bottom part and allow the top part to stand up.
- Decorate the Pop-Up Element: Now comes the fun part! Cut out shapes (like flowers, hearts, or quirky creatures) from the colored paper and glue them to the tops of the tabs you just created. You can create a beautiful bouquet that pops up when the card is opened!
- Final Touches: Now, fill the front of your card with a message, extra decorations, or drawings to complete the card.
I remember crafting a pop-up card for my niece’s birthday. She was thrilled to see the bright flowers spring up as she opened it! 🌼💖 It left a lasting impression and gave me immense joy to see her smile.
Quilling Card Design
Quilling is a delightful art form that involves rolling, shaping, and gluing strips of paper to create beautiful designs. Quilling can add intricate and personalized touches to your cards that are simply enchanting. Materials Needed:
- Quilling paper strips (you can buy them or cut 1/8 inch strips from colored paper)
- Quilling tool (optional, but helpful)
- Scissors
- Glue
- Cardstock for your card base
Steps to Create a Quilling Card Design:
- Select Your Card Base: Start with a piece of cardstock for the card base. As with pop-up cards, a standard size works great.
- Prepare Your Quilling Strips: Pick your colors of quilling strips. You can have fun with various hues, creating a color palette that speaks to the occasion (soft pastels for spring, bold colors for a celebration, etc.).
- Begin Quilling: Using your quilling tool or your fingers, take a paper strip and start rolling it tightly to form a coil. Once you’re done rolling, hold it in place and let it loosen a bit, then glue the end to keep it from unrolling.
- Shape Your Coils: From the basic coils, you can create different shapes by pinching or curving the rolled strips. Here are a couple of basic shapes to try:
- Teardrop: Roll a strip into a tight coil, then pinch one side.
- Heart: Similar process, but after making the teardrop, align two to create a heart shape.
- Design Your Card: Start gluing your quilled shapes to the cardstock base, arranging them as you see fit. You can create flowers, swirls, or even spell out a message.
- Finishing Touches: Once you are satisfied with the layout, let it dry. Consider adding a unique message inside, along with decorative touches like washi tape around the edges.
The first time I tried quilling, I created a card for a friend’s wedding anniversary adorned with colorful rings and hearts. It was such a labor of love, and the recipients were really touched by the personal effort! 💖🌹 Handmade greeting cards are a charming way to bring joy to life’s special moments. Whether it’s the surprise of a pop-up card or the intricate beauty of a quilling design, these personal touches turn ordinary greetings into treasured keepsakes. So grab your materials and let your creativity flow! 🥳✍️

As you immerse yourself in the world of handmade greeting cards, it’s time to explore the charming realm of paper decorations for your home! Paper crafts can not only be delightful to make but also serve as stunning décor that adds warmth and personality to your living space. Today, we’ll be crafting beautiful Paper Flowers and vibrant Paper Lanterns—two projects that transform your environment and bring a touch of creativity into your home.
Paper Flowers
Creating paper flowers can brighten any room and provide a touch of elegance without the hassle of maintaining real blooms. Best of all, they’re incredibly easy to make! Materials Needed:
- Colored cardstock or crepe paper
- Scissors
- Floral wire or skewers
- Tape or glue
- Optional: Decorative leaves made from green paper
Steps to Create Paper Flowers:
- Choose Your Paper: Decide on the colors you want for your flowers. Pastel colors create a soft and soothing look, while bright colors give a vibrant pop.
- Cut Petals: Draw petal shapes onto your paper and cut them out. A simple flower can be made with 5-6 oval petals. You can vary the size of the petals to create depth.
- Shape the Petals: Lightly curl the edges of each petal using a pencil or your fingers to give them a more realistic look.
- Assemble the Flower: Start by taking one petal and gluing it to the base. Add the other petals in a circle around the first petal, overlapping them slightly. If you’re feeling extra creative, you can add a contrasting color in the center.
- Create the Stem: Use floral wire or a skewer as the stem. Secure the base of your flower to the wire with tape or glue.
- Add Leaves: If you desire, cut out leaf shapes from green paper and attach them to the stem to complete the flower.
- Display Your Creations: Place your beautiful blooms in a vase, group them in a bouquet, or even garland them together for a stunning display!
I once crafted a bouquet of paper flowers for a friend’s birthday party, and they became a hit! Not only did they look great on the table, but they served as a lovely keepsake for her when the festivities were over. 🌸💐 The best part? They never wilted!
Paper Lanterns
Next, let’s create some enchanting Paper Lanterns that are perfect for adding a little ambiance to your space, especially during festive occasions or cozy nights. Materials Needed:
- Colored or patterned cardstock
- Scissors
- Tape or glue
- String or ribbon for hanging
- LED tealight candles (if you plan to light them up)
Steps to Create Paper Lanterns:
- Cut Your Paper: Begin with a piece of cardstock measuring about 10×12 inches. You can use two pieces if you want a double-layered effect.
- Make Slits: On the long sides of your cardstock, make small cuts about 1 inch apart, stopping about an inch from the edges. These will form the lantern’s design.
- Create the Lantern Shape: Once you’ve made the cuts, curl the paper into a cylinder shape and join the two ends together, securing them with tape or glue.
- Flatten the Ends: Pinch the two ends of the lantern together, creating a top flared section. You can secure this with tape, and make sure it’s sturdy enough for hanging.
- Add a Handle: To create a handle for your lantern, slice a small strip from leftover paper, about 1 inch wide and attach it across the top.
- Light It Up: For safety, use an LED tealight inside the lantern. If you made a double-layered lantern, you can even create a contrasting design on the outer layer to enhance the look.
One memorable evening, I hung a dozen paper lanterns in my backyard for a summer gathering. As night fell, lighting them up turned our space into a whimsical paradise! The soft glow made for lovely ambiance and sparked laughter and joy among friends. 🏮✨ Decorating with paper crafts is not only a cost-effective solution but also an opportunity for self-expression. Whether it’s through the playful charm of paper flowers or the inviting glow of paper lanterns, you can fill your home with creativity and love. With each creation, you’re not just making decorations; you’re crafting memories and unique experiences that brighten everyday life. So let your imagination flourish and enjoy the transformation in your home!
As we continue our crafting journey, let’s dive into an exciting and eco-friendly area: upcycled paper crafts! Not only do these projects help reduce waste, but they also unleash your creativity and resourcefulness. Today, I’ll share how to create a charming Newspaper Basket and explore the wonderful world of Toilet Paper Roll Crafts—two projects that turn everyday household items into functional and beautiful crafts!
Newspaper Basket
Newspaper baskets are a fantastic way to repurpose old newspapers while creating something practical and stylish for your home. Whether you use them to store small items, organize clutter, or even as gifts, these baskets offer both beauty and utility. Materials Needed:
- Old newspapers
- Scissors
- Glue or Mod Podge
- A bowl or round object to shape the basket
- Optional: Paint or decorative items (like ribbons) for embellishment
Steps to Create a Newspaper Basket:
- Prepare Your Strips: Start by tearing or cutting your newspaper into long strips, about 1-2 inches wide. The lengths can vary, but aim for around 12 inches for more versatility.
- Weave the Base: Take four strips and lay them out in a cross shape. Start weaving more strips over and under to form a base. Keep your tension consistent to maintain structure. You can create any shape you desire but a round base tends to look nicer!
- Build Up the Sides: Once you have the desired base size, continue attaching strips vertically, by weaving them around the edge of the base. Adjust and fold the strips upward to begin forming the basket’s sides.
- Secure Your Structure: As you weave, use glue to secure the overlapping sections, ensuring everything holds together. This is essential for stability—especially on the edges where the strips meet!
- Finish the Top Edge: To create a professional finish, you can fold down the top edge of the basket, gluing it in place as you go. This helps to hide cuts and provides a clean, neat look.
- Embellish and Display: Now it’s time for fun! You can paint your basket, add a decorative ribbon around it, or leave it natural for a rustic look. Fill it with items like yarn, fruit, or even use it as a lovely gift basket!
When I first attempted to make a newspaper basket, I was amazed at how quickly it took shape! I gifted one to a friend for her birthday, and she used it to store her craft supplies. It was a beautiful way to show that upcycling can be both functional and aesthetically pleasing. 🌼🧺
Toilet Paper Roll Crafts
Now let’s explore the versatile world of Toilet Paper Roll Crafts. Those empty rolls are a goldmine for crafting projects, and they’re perfect for creating fun, imaginative designs that bring your creativity to life! Materials Needed:
- Empty toilet paper rolls
- Scissors
- Paint, markers, or decorative paper
- Glue
- Other embellishments (like googly eyes, waste paper, or yarn)
Popular Projects to Try:
- Seedling Pots: Cut the rolls in half and poke a few drainage holes. Fill them with soil, and plant seeds for a great gardening project. You can decorate them before planting for an added touch!
- Cardboard Monsters: Transform those rolls into playful monsters! Cut out eyes, teeth, and other features from paper or felt, gluing them onto the roll. Paint it in wacky colors, add pipe cleaners for arms, and you’ll have a fun desk buddy.
- Toy Cars: Cut out circular pieces from thick cardboard, glue them to the sides of the roll as wheels, and paint it to create a simple car. You can even add small figures or characters for added fun.
- Wall Art: Flatten the rolls and cut them into smaller rings, gluing them together in different patterns on a larger canvas or board to create unique wall art. You can paint the rings or leave them natural for a striking design!
The first time I crafted with toilet paper rolls, I created seedling pots for my kitchen windowsill. Watching them grow was so satisfying, and it inspired me to try other projects. My kids joined in, making colorful monsters and racing their cardboard cars around the house! 🚗🌱 Upcycled paper crafts are not just good for the environment; they’re also a fantastic outlet for your creative energy. The Newspaper Basket and Toilet Paper Roll Crafts prove that with a little imagination, you can easily transform everyday items into beautiful and functional pieces. So gather your supplies, have fun experimenting, and enjoy the beauty of creating something new from something old! ✨♻️