
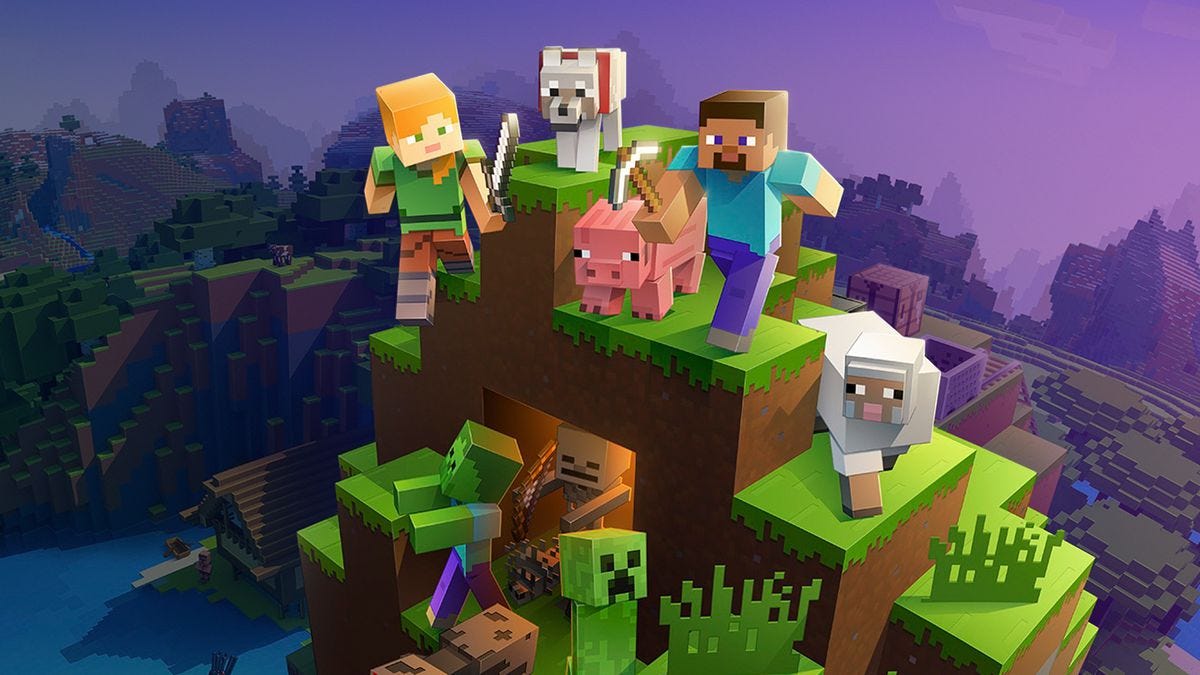
Overview of Minecraft Crafting
Introduction to Minecraft Crafting
When you dive into the pixelated world of Minecraft, one of the first things you’ll notice is the sheer amount of freedom and creativity at your fingertips. 🛠️ One major aspect that unlocks this potential is crafting. Whether you’re a beginner or a seasoned player, understanding the mechanics of crafting will elevate your gameplay from basic survival to a scientific exploration of materials and resources. Crafting in Minecraft is both intuitive and rich with complexity. It allows you to take raw materials from your environment—like wood, stone, or minerals—and transform them into tools, weapons, and various items that enhance your gaming experience. This process of creation is fundamental to Minecraft, allowing players to adapt to challenges, express creativity, and construct entire worlds from scratch. As you embark on your crafting journey, you’ll find a variety of tools and techniques at your disposal. You can start simple by creating a wooden pickaxe or leap into the advanced realm of potions and enchanted items. The flexibility in crafting is what keeps players engaged, constantly experimenting with different combinations and strategies. From my personal experience, one of the most satisfying moments in Minecraft was the first time I crafted a diamond sword. The feeling of accomplishment as I finally held that shiny blade, ready to explore and face the dangers lurking in the overworld, was unparalleled. 🎉
Importance of Crafting in Minecraft
Crafting is not just a mechanic in Minecraft; it’s a vital component that ties together so many aspects of the game. Here’s why crafting matters so much:
- Resource Management: Crafting teaches players to gather and manage resources effectively. You quickly learn which materials are needed for different items, and as you gather these resources, it helps to build an understanding of your surroundings.
- Survival Mechanics: In survival mode, crafting is essential for creating the tools and gear necessary to fend off threats like zombies and skeletons. Making a wooden sword or crafting armor from iron not only enhances your survival chances but also brings excitement to the gameplay.
- Problem Solving: The crafting recipes require players to think critically. For example, figuring out how to make a brewing stand requires specific materials that you must collect, teaching problem-solving skills that can be applied in real-life scenarios.
- Creativity and Customization: Beyond survival, crafting in Minecraft allows for immense creative expression. Whether you’re building a whimsical castle or an intricate redstone contraption, the crafting system empowers you to design and create unique structures and items tailored to your vision.
- Community Engagement: Crafting often becomes a social activity, with players sharing strategies, discovering recipes, and exchanging crafted items. You may find a friend who has mastered the art of enchanting while you conquer the brewing system or vice versa. Collaboration can lead to powerful guilds that can take on bigger challenges together.
To put this into perspective, let’s take a look at how crafting influences different gameplay styles:
| Gameplay Style | Crafting Role |
|---|---|
| Survival | Essential for tools, weapons, and shelter to fend off enemies. |
| Exploration | Crafting tools like boats and maps to navigate across dimensions. |
| Creative Building | Provides materials to create structures and landscapes of your choice. |
| Technological | Offers components for automation using redstone mechanics. |
Another personal anecdote to illustrate the importance of crafting: I recall a time when I got lost in a dark cave while mining for resources. Instead of panicking, I pulled up my crafting menu and quickly fashioned some torches using sticks and coal I had collected. Lighting the way not only saved me from lurking mobs but also led me to an unexpected vein of diamonds! 🌟 In essence, crafting is the backbone of your Minecraft experience and supports various playstyles, from diligent resource gatherers to ambitious architects. Understanding how crafting works will not only enrich your gameplay but also enable you to connect with the community, share ideas, and collaborate on epic builds. As you venture deeper into Minecraft, you’ll see how every crafted item opens up new gameplay opportunities and challenges. The beauty of crafting lies in its blend of functionality and creativity, allowing you to express yourself while addressing the needs of your virtual adventures. Get ready to gear up and start your crafting journey—there’s a whole world waiting for you! 🚀

Basic Crafting Tools and Techniques
Crafting Table and Inventory
As you continue your journey in Minecraft, mastering the basic tools and techniques of crafting is fundamental. One of the first concepts you need to get familiar with is the crafting table and the inventory. These are your primary tools for bringing your ideas to fruition. 🛠️ Your Inventory: When you first start playing, you have access to a 2×2 crafting grid simply by opening your inventory. This small grid is perfect for crafting basic items, such as:
- Sticks (using two wooden planks)
- Wooden tools (like pickaxes or swords)
- Torches (using a stick and coal)
However, the limitations of the 2×2 grid might quickly become apparent as you start crafting more complex items. Crafting Table: The crafting table is your gateway to unlocking the full potential of crafting. To create one, you need to gather four wooden planks (from any type of wood) and place them in your 2×2 crafting grid. Once you have your crafting table, simply right-click to access its expanded 3×3 crafting grid. This larger grid allows for crafting a wide range of items. Some examples include:
- Weapons
- Armor
- More advanced tools
- Various blocks (like chests and furnaces)
Here’s a quick step-by-step to create your crafting table:
- Gather Wood: Punch some trees to collect logs.
- Craft Planks: Open your inventory (E) and convert logs into wooden planks.
- Open Crafting Interface: Place your wooden planks in the 2×2 grid to create the crafting table.
- Place the Table: Find a suitable spot in your world and place your crafting table.
Once you have the crafting table set up, you open a whole new world of possibilities! From personal experience, I remember the first time I laid down my crafting table in my cozy little shack; it felt like I had built my first workshop! 🎉
Understanding Crafting Recipes
Now that you have your crafting table, the next crucial step is to understand crafting recipes. Recipes tell you the specific materials you need and how to arrange them in the crafting grid to create an item. Here’s a breakdown of how you can navigate this aspect effortlessly: Basic Recipe Format:
- Arrangement: Materials have to be placed in the grid according to the recipe’s specific layout. It’s a little like following a cooking recipe; the order and type of ingredients matter.
- Materials: You need to collect the materials required for the item you wish to craft.
For example, to create a wooden pickaxe, you’ll need:
- 3 Wooden Planks (across the top row)
- 2 Sticks (one in the middle, one in the middle column)
Here’s how the crafting recipe looks:
| Plank | Plank | Plank |
| Stick | ||
| Stick |
The crafting table shines when it comes to more complex items, so ensure you explore various items and their recipes. To help you get started, here’s a list of some essential early-game crafting recipes you should try:
- Crafting Tools:
- Stone Sword: 2 Cobblestones (vertical) and a Stick (middle)
- Wooden Axe: 3 Wooden Planks (top row), 2 Sticks (middle column)
- Building Blocks:
- Chest: 8 Wooden Planks (surrounding an empty center)
- Furnace: 8 Cobblestones (surrounding an empty center)
- Armor:
- Helmet: 5 Iron Ingots (in a U formation)
- Boots: 4 Iron Ingots (forming an upside-down U)
As you progress in Minecraft, learning and memorizing these essential crafting recipes will save you time and enhance your resource management skills. Experimenting is Key: Don’t be afraid to experiment! Sometimes, you’ll find new and interesting ways to create items that aren’t widely known. It’s during these moments where you can stumble upon neat tricks or create something unique that adds to your gameplay. For example, I once accidentally crafted a block of dirt and transformed it into a makeshift throne in my house. While it may not be the fanciest item in the game, it was a fun addition that served as a talking point among my friends! 😂 Ultimately, understanding the crafting table and recipes will set a solid foundation for your Minecraft adventures. As you become more confident, you can delve into more intricate items and explore advanced techniques like brewing and enchanting. Always remember to keep experimenting and refining your skills. The more you craft, the more you’ll discover! The world of Minecraft is vast, and unlocking its secrets often begins with the basic tools and techniques. So gather your resources and get crafting! Your next great adventure awaits! 🚀

Advanced Crafting Strategies
Crafting Rare and Valuable Items
As you progress deeper into the intricate world of Minecraft, the ability to craft rare and valuable items becomes essential. These items not only improve your gameplay but also elevate your standing in the vibrant Minecraft community. Entering the realm of advanced crafting can feel daunting, but with the right knowledge and a solid strategy, it’s incredibly rewarding! ✨ Understanding Valuable Resources: To craft rare items, you’ll need valuable resources that are often harder to find. Some of these materials and their associated items include:
- Diamonds: Perhaps the most sought-after resource in the game. Craft diamond swords, armor, and tools to ensure you’re well-equipped for any adventure.
- Netherite: An upgrade from diamonds, it gives your items even more durability and power. You’ll need to first obtain ancient debris in the Nether and smelt it to create netherite ingots.
- Emeralds: These can be used for trading with villagers, unlocking powerful enchantments, or crafting rare blocks.
Here’s a quick overview of some rare and valuable items and how you can craft them:
| Item | Crafting Recipe |
|---|---|
| Diamond Sword | 2 Diamonds (vertical) + 1 Stick (middle) |
| Netherite Sword | 1 Netherite Ingot + 2 Diamonds (vertical) |
| Enchanting Table | 4 Obsidian + 2 Diamonds + 1 Book |
| Block of Emerald | 9 Emeralds (in a 3×3 formation) |
The thrill you experience from finding those first diamonds makes the effort worthwhile! There’s nothing quite like hearing that “ding” sound when mining a block, indicating riches below. I still remember the palpable excitement when, after a long mining session, I emerged with a pocketful of diamonds ready to craft my first diamond armor! 🎉 Crafting Tips for Rare Finds:
- Mine Deep: Diamonds and other rare ores typically generate deeper in the world. Head down to levels 11-15 for the best chance of finding diamonds.
- Use Fortune Enchantment: Fortune increases the amount of raw materials you can obtain from ore blocks. If you’re lucky enough to have a pick with this enchantment, it can significantly enhance your resource collection.
- Explore the Nether: Resources like netherite require you to venture into the Nether. Be prepared for its dangers, but also its rewards!
Transitioning to crafting rare items truly feels like a rite of passage in your Minecraft journey. Once you’ve successfully crafted your first batch of rare gear, you’ll feel a sense of accomplishment that propels your gameplay forward.
Utilizing Enchanting and Brewing
Now that you’ve equipped yourself with valuable items, the next step is to make the most out of them through enchanting and brewing. These systems allow for powerful enhancements and give you an upper hand against mobs or during PvP encounters. Understanding Enchanting: Enchanting lets you enhance your items and tools with special abilities. Here’s how to get started:
- Craft an Enchanting Table: As mentioned previously, you’ll need 4 obsidian blocks, 2 diamonds, and 1 book to make it.
- Level Up: You will need experience levels to enchant items, which you can gain from defeating mobs, mining, or completing challenges.
- Place Bookshelves: To increase your enchanting capabilities, surround your enchanting table with bookshelves. Each bookshelf adds an additional enchantment level up to a maximum of 15 bookshelves.
When enchanting, you’re presented with three random options, so it’s useful to have multiple items to enchant. For instance, always keep some spare swords or pickaxes ready just in case you want to reroll enchantments. Here are some sought-after enchantments to consider:
- Sharpness: Increases melee damage, perfect for weapons.
- Efficiency: Speeds up mining, great for your tools.
- Protection: Reduces damage taken from attacks, essential for armor.
I once enchanted a sword with Sharpness II and went on a mob-slaying spree. Watching zombies and creepers meet their end with a few swift strikes was incredibly satisfying! ⚔️ Diving into Brewing: Brewing adds another layer to your gameplay, allowing you to craft potions that can provide boosts or unique effects. Here’s what you need to set up your brewing station:
- Brewing Stand: Craft it using 1 Blaze Rod and 3 Cobblestones. Blaze Rods can be obtained from Blazes in the Nether, so be ready for a challenge!
- Glass Bottles: Use glass panes or blocks to create glass bottles to hold your potions.
- Water and Ingredients: Fill your bottles with water, and use ingredients such as Nether Wart (found in the Nether) and various other components for the desired effects.
Below are some popular potions you might want to experiment with:
| Potion | Effect |
|---|---|
| Potion of Healing | Restores health |
| Potion of Strength | Increases melee damage |
| Potion of Fire Resistance | Grants immunity to fire |
| Potion of Night Vision | See in the dark |
Brewing takes a bit of practice, but once you master it, you can tailor potions to suit your unique playstyle. I can recall one intense battle against a Enderman: right before the fight, I drank a Strength potion. The boost made all the difference, and I was able to defeat it with ease—an experience I won’t soon forget! 🎖️ Exploring the advanced crafting strategies of rare items, enchanting, and brewing can transform your Minecraft experience into an epic adventure filled with thrilling encounters and intense battles. So gather your materials, level up your items, and prepare for anything the world throws at you! Your crafting journey has only just begun, and the possibilities are endless. 🌍🚀

Creative Building with Crafted Materials
Designing Structures and Landscapes
With your inventory filled with rare items and your enchanting table ready for action, the fun of creative building emerges in Minecraft. Designing beautiful structures and captivating landscapes is where individual expression meets the utilization of carefully crafted materials. The blocks and items you create can be transformed into stunning architectural feats that reflect your vision! 🎨 Choosing Your Materials: Different materials offer varying aesthetics and characteristics in your builds. Here are some popular choices and their attributes:
- Wooden Planks: Versatile and easy to obtain, they can create cozy homes or rustic cabins.
- Stone Bricks: Excellent for fortresses or castles, providing strength and a medieval vibe.
- Glass: Perfect for windows, it allows natural light to flood in while keeping the exterior intact.
- Concrete and Terracotta: Available in a wide range of colors, these materials let you add beautiful hues to your landscapes and buildings.
When designing structures, consider the theme you want to achieve. The initial step I took in crafting my dream home was creating a simple wooden cabin near a lake, adorned with flowers and decorative pathways that lead to a cozy dock. 🌷 Landscape Building: Landscaping is an essential aspect of creating an immersive environment. Here’s how to enhance your worlds:
- Use Natural Terrain: Blend your structures into the natural landscape. This can create a more harmonious look instead of imposing artificial buildings.
- Balance Color Schemes: Choose a color palette that works well together. For example, a beach house might use sand, water, and light wood to create a soothing atmosphere.
- Add Terrain Features: Elevate your landscape with hills, trees, and lakes. You can use blocks like dirt and grass to mold landforms. This diversity adds depth to your builds.
Here are some ideas to consider while designing landscapes:
- Gardens: Create vibrant flower beds or vegetable gardens.
- Water Features: Streams, ponds, or even fountains can elevate the aesthetics.
- Paths and Trails: Connect different areas of your build with gravel or cobblestone paths.
I remember going all out on my fantasy castle, which sprawled across an entire mountain. I used combinations of stone bricks, glass, and wool, incorporating a waterfall cascading down the side. My friends were amazed at the intricate details, from the towers topped with flags to the lush gardens surrounding the base. 🏰 In Minecraft, creativity knows no bounds! As you build, don’t forget to experiment with patterns and shapes to make your structures more interesting. Repeating designs or asymmetrical layouts can yield stunning results, so let your imagination run wild!
Incorporating Redstone Technology
Ready to take your creative building to the next level? It’s time to delve into the world of Redstone technology! Redstone allows you to create impressive contraptions and automated systems, adding functionality and flair to your builds. Whether you want secret doors, traps, or complex machinery, mastering Redstone will greatly enhance your Minecraft experience. ⚙️ Understanding Redstone Basics: Before you start crafting, familiarize yourself with some essential components:
- Redstone Dust: The basic building block that conducts power. Use it to connect components.
- Redstone Torch: Acts as a power source, providing a constant signal.
- Levers, Buttons, and Pressure Plates: These can be used to activate Redstone circuits and create interactive elements.
- Pistons: Used to push blocks or create doors!
Example Builds and Applications: Here are a couple of classic Redstone builds to get your creative juices flowing:
- Hidden Doors: Create seamless entrances that blend into your surroundings. Use pistons to push blocks aside, revealing a secret path. Imagine impressing friends with a door that opens at the flick of a lever!
- Materials Needed:
- 2 Sticky Pistons
- Redstone Dust
- Block of your choice (for the door)
- Materials Needed:
- Automated Farms: Craft a system that automatically harvests crops and collects items. Use water streams and hoppers to carry the products to a central chest.
- Materials Needed:
- Water Bucket
- Hoppers
- Redstone Clock (for timing to activate pistons)
- Materials Needed:
- Trap Systems: For a bit of fun (or mischief), use pressure plates or tripwires to create traps for unsuspecting players or mobs.
- Materials Needed:
- TNT or an arrow trap setup
- Redstone Dust and Trigger Mechanism
- Materials Needed:
When first starting with Redstone, I found it helpful to watch tutorials online to grasp the basics. However, once I got the hang of it, I began to build my own secret bases with hidden entrances activated by levers disguised as torches. The thrill of surprise when my friends visited was priceless! 🎭 Tips for Mastering Redstone:
- Start Small: Begin with simpler projects and gradually implement more complex systems.
- Experiment: Don’t be afraid to test out ideas; trial and error is part of the fun!
- Use Creative Mode for Practice: If you’re unsure, try using Creative Mode to practice Redstone builds without the constraints of survival mode.
Incorporating Redstone technology into your builds opens a whole new world of possibilities. It empowers you to create not just visually appealing structures, but also functional environments that enhance gameplay. In summary, designing structures, landscaping, and incorporating Redstone technology are integral to your creative building endeavor in Minecraft. So gather your materials, unleash your imagination, and create something that truly reflects your individuality! Your Minecraft journey is an ever-evolving masterpiece just waiting to be crafted. 🚀🌍✨
Showcasing Your Crafted Creations
Sharing Builds in Multiplayer
Now that you’ve mastered the art of crafting and building breathtaking structures, it’s time to share your achievements with the world. Multiplayer mode in Minecraft offers a fantastic platform for you to showcase your creativity while connecting with fellow players. Whether you’ve constructed a cozy cottage or an elaborate castle, there’s nothing quite like seeing your builds gain appreciation in real-time! 🌍 Why Share in Multiplayer? Sharing your creations in multiplayer not only allows you to showcase your hard work but also fosters community engagement and provides feedback that can help improve your skills. Here are some benefits of sharing your builds in multiplayer environments:
- Collaborative Projects: Partner with friends or players to create larger builds. Together, you can combine ideas and techniques to produce something spectacular.
- Networking: Connect with fellow builders who share your passions, leading to friendships and potentially future collaborations.
- Feedback and Inspiration: Receive constructive criticism that can help you improve and inspire others with your creative ideas.
How to Show Off Your Builds in Multiplayer:
- Invite Friends to Your Server: Create a private world and invite friends to tour your creations. Set up a fun build reveal party where everyone can explore and provide their thoughts. I once hosted a tour of my underwater lair, complete with hidden chambers and a grand aquarium, and the positive reactions from my friends were invigorating! 🐠
- Participate in Building Contests: Many Minecraft communities host periodic contests where you can enter your builds for a chance to win awards or recognition. It’s a great way to challenge yourself and learn from other builders.
- Show Off with Screenshots and Videos: Capture your builds using screenshots or video tours, and share them within your multiplayer server chat. You’ll be surprised at how much excitement this can generate!
Tips for Engaging with the Multiplayer Community:
- Be Active in Chat: Connect with others by engaging in conversations about your builds. Share your thought process, inspirations, and even the challenges you faced while constructing.
- Attend Events: Participate in server events and gatherings where you can showcase your skills and mingle with other players.
- Build for Others: Create communal areas, parks, or plazas where fellow players can gather and enjoy your creations. This adds value to the community and encourages more players to visit.
The thrill of watching others explore your creations can’t be understated. It will not only boost your confidence but also motivate you to continue crafting and sharing!
Showcasing Builds on Social Media
With multiplayer out of the way, let’s talk about taking your showcasing efforts to the digital streets: social media! Platforms like Twitter, Instagram, Reddit, and others are filled with gamers eager to share their Minecraft experiences. With a few clicks, you can reach a vast audience, showcase your builds, and gain insights from a diverse community. 📸 Why Use Social Media? Social media serves as an excellent avenue for promoting your work and connecting with the broader Minecraft community for various reasons:
- Wider Reach: Showcase your creations to a global audience, many of whom may not be part of your immediate multiplayer circle.
- Feedback and Recognition: Receive instant feedback and recognition from players worldwide. Some of my most rewarding comments on a build I shared on Reddit came from players across the globe!
- Networking Opportunities: Connect with other builders, enthusiasts, and content creators who may collaborate or inspire future projects.
How to Showcase Your Builds Effectively:
- Create a Dedicated Hashtag: When uploading your photos or videos, create a unique hashtag for your builds (e.g., #MyMinecraftCastle). This keeps your work organized and allows others to find it easily.
- Post High-Quality Images: Make sure your screenshots are crystal clear. Use photo-editing tools to enhance the visuals and remove HUD elements to focus on your creations. I usually take pictures during sunsets or sunrises for that extra dramatic effect! 🌅
- Share Your Building Process: Document your design process through time-lapse videos or step-by-step photo series. Fans appreciate seeing how your creation came to life, and it can inspire them to try their hand at building.
- Engage With Your Followers: Respond to comments on your posts, and ask for feedback or ideas on future builds. Creating an interactive community around your work can lead to increased engagement.
- Join Minecraft Community Forums: Platforms like Reddit have specific subreddits (such as r/Minecraft) devoted to showcasing builds. Share your work there, and you’ll often find a receptive community ready to provide feedback!
Setting Up Your Social Media Profile:
- Use Relevant Bio Tags: Include keywords relating to Minecraft and building in your profile bio to attract like-minded individuals.
- Post Regularly: Consistency is key! Regular posts can help keep your followers engaged and excited about what you’ll share next.
In one memorable instance, I shared my elven village on Instagram with the hashtag #Elfheim. The post garnered more likes and shares than I could’ve imagined, inspiring fellow players to start their own fantasy-themed builds. It was a gratifying experience that encouraged me to keep creating and sharing! In conclusion, showcasing your crafted creations is a rewarding and vital part of the Minecraft experience. Whether sharing in multiplayer or on social media, the feedback, friendships, and inspiration that come from showcasing your builds can enhance your skills and passion for the game. So grab your screenshots, polish your creations, and let the world see what you’ve crafted! Your masterpieces are just waiting to be shared! 🚀✨