
Introduction to Crafting
Importance of Crafting in Today’s World
Crafting has become a beacon of creativity and self-expression in today’s fast-paced digital society. With technology dominating most aspects of our lives, there’s a growing need to unplug and reconnect with our hands. Crafting offers a fantastic escape from daily stresses and allows you to engage with the physical world. In a world where everything is mass-produced, handmade crafts symbolize individuality and personal touch. Each crafted item carries a story, reflecting the creator’s personality and experiences. This makes crafting not just an enjoyable pastime but also a way to preserve valuable traditions. Whether it’s knitting a scarf that wraps a loved one in warmth or creating a handmade gift that leaves an unforgettable impression, crafting fosters deep connections and memories. Crafting is not just a hobby; it has become a lifestyle. More people are sharing their creations on social media, building communities centered around DIY projects, and inspiring each other with their artwork. The sense of belonging and sharing in the crafting community adds to its importance today.
Benefits of Engaging in DIY Projects
Engaging in DIY projects comes with a plethora of benefits that go beyond the simple joy of creating. Here are a few highlights that capture the essence of why you should jump into crafting:
- Stress Relief: Crafting allows you to focus your mind, providing a therapeutic outlet. During tough times, I often find solace in creating something beautiful with my hands—whether it’s painting or sewing. There’s something calming about watching your ideas take shape.
- Boosts Creativity: Engaging in crafting boosts your creative thinking. It encourages out-of-the-box ideas and helps develop innovative solutions to problems. For instance, I once transformed an old shoebox into a stylish storage solution, using scraps of fabric and art supplies. It ignited a burst of creativity I hadn’t felt in ages!
- Skill Development: Each project enhances your skills and increases your knowledge of various techniques. From learning how to use fabric scissors to mastering beading techniques, every step is an opportunity for growth.
- Sustainability: More people are becoming environmentally conscious, and crafting is a wonderful way to promote sustainability. You can repurpose old materials, reduce waste, and create beautiful items without contributing to the consumerist cycle. Think about those tin cans you were about to throw away—they can become charming plant pots!
- Sense of Accomplishment: There’s nothing quite like the satisfaction of completing a project. The moment you finish a DIY project, the feeling of accomplishment surges from within, boosting your self-esteem and motivating you to tackle the next challenge.
Crafting is not just about the final product but enjoying the journey of making it. Embrace this fulfilling experience and watch as your world transforms one creative project at a time. After all, crafting is a journey—one colorful stitch, a perfect bead, or a clever design at a time. So why not dive in? The rewards are limitless!
Essential Crafting Tools and Materials
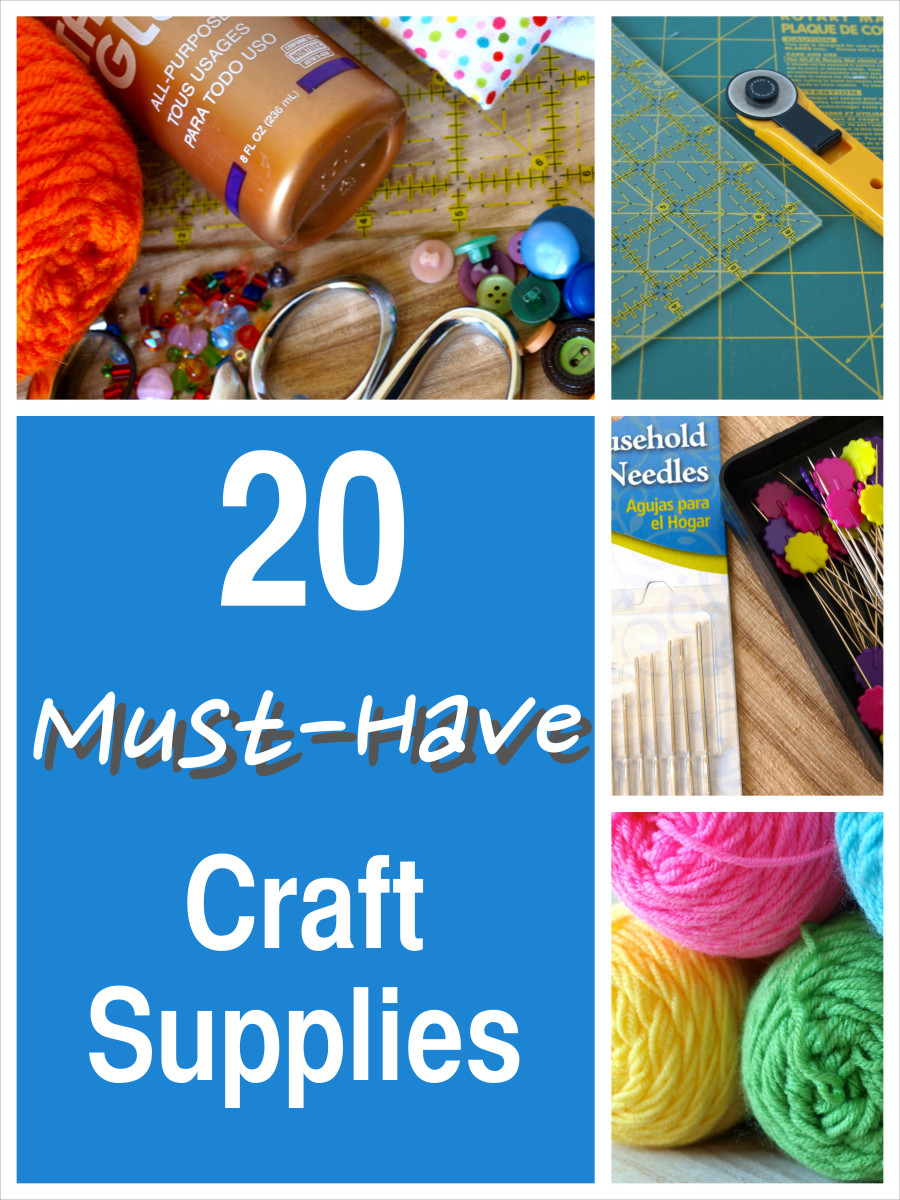
Must-Have Tools for Every Crafter
As you embark on your crafting journey, it’s essential to have the right tools at your disposal. Having the right tools not only makes the process smoother but also enhances the quality of your projects. Here are some must-have tools that every crafter should consider adding to their toolkit:
- Scissors: A good pair of scissors is a crafter’s best friend. Whether you’re cutting paper for a scrapbook or fabric for a sewing project, investing in quality scissors is a must. I learned the hard way when I used dull scissors on a fabric project—it was a struggle!
- Glue and Adhesives: Different projects call for different types of glue. Craft glue for paper, fabric glue for materials, and hot glue for quick fixes can cover you in various situations. Having a variety of adhesives helps ensure your creations stick together!
- Cutting Mat: Protect your surfaces while cutting with a self-healing cutting mat. They are fantastic for precision and keep your workspace neat, which I can’t emphasize enough after countless evenings of cleaning up sticky residue!
- Ruler and Measuring Tape: Precision is crucial, especially in sewing and paper crafting. A clear ruler and measuring tape will help you get measurements just right, so you avoid those “oops” moments when your pieces don’t fit together.
- Craft Knife: A precision craft knife is perfect for intricate cutting projects. It allows for more detail than standard scissors, especially for paper crafting. Just be careful—those blades are sharp!
- Pencil and Eraser: Sometimes, you need to sketch out designs before committing to a cut. A pencil lets you plan with ease, while a good eraser saves your work from potential mistakes.
With these tools in your arsenal, you’re well on your way to take on a variety of crafting projects!
Different Types of Crafting Materials
Now that we’ve covered tools, let’s talk about the materials you’ll encounter in the crafting world. The options are endless, and that’s what makes crafting so exciting! Here’s a list of common materials to consider:
- Paper: The heart of many crafts! From cardstock to scrapbook paper, you can create everything from cards to detailed paper art. I often find myself collecting beautiful papers just because they inspire new ideas.
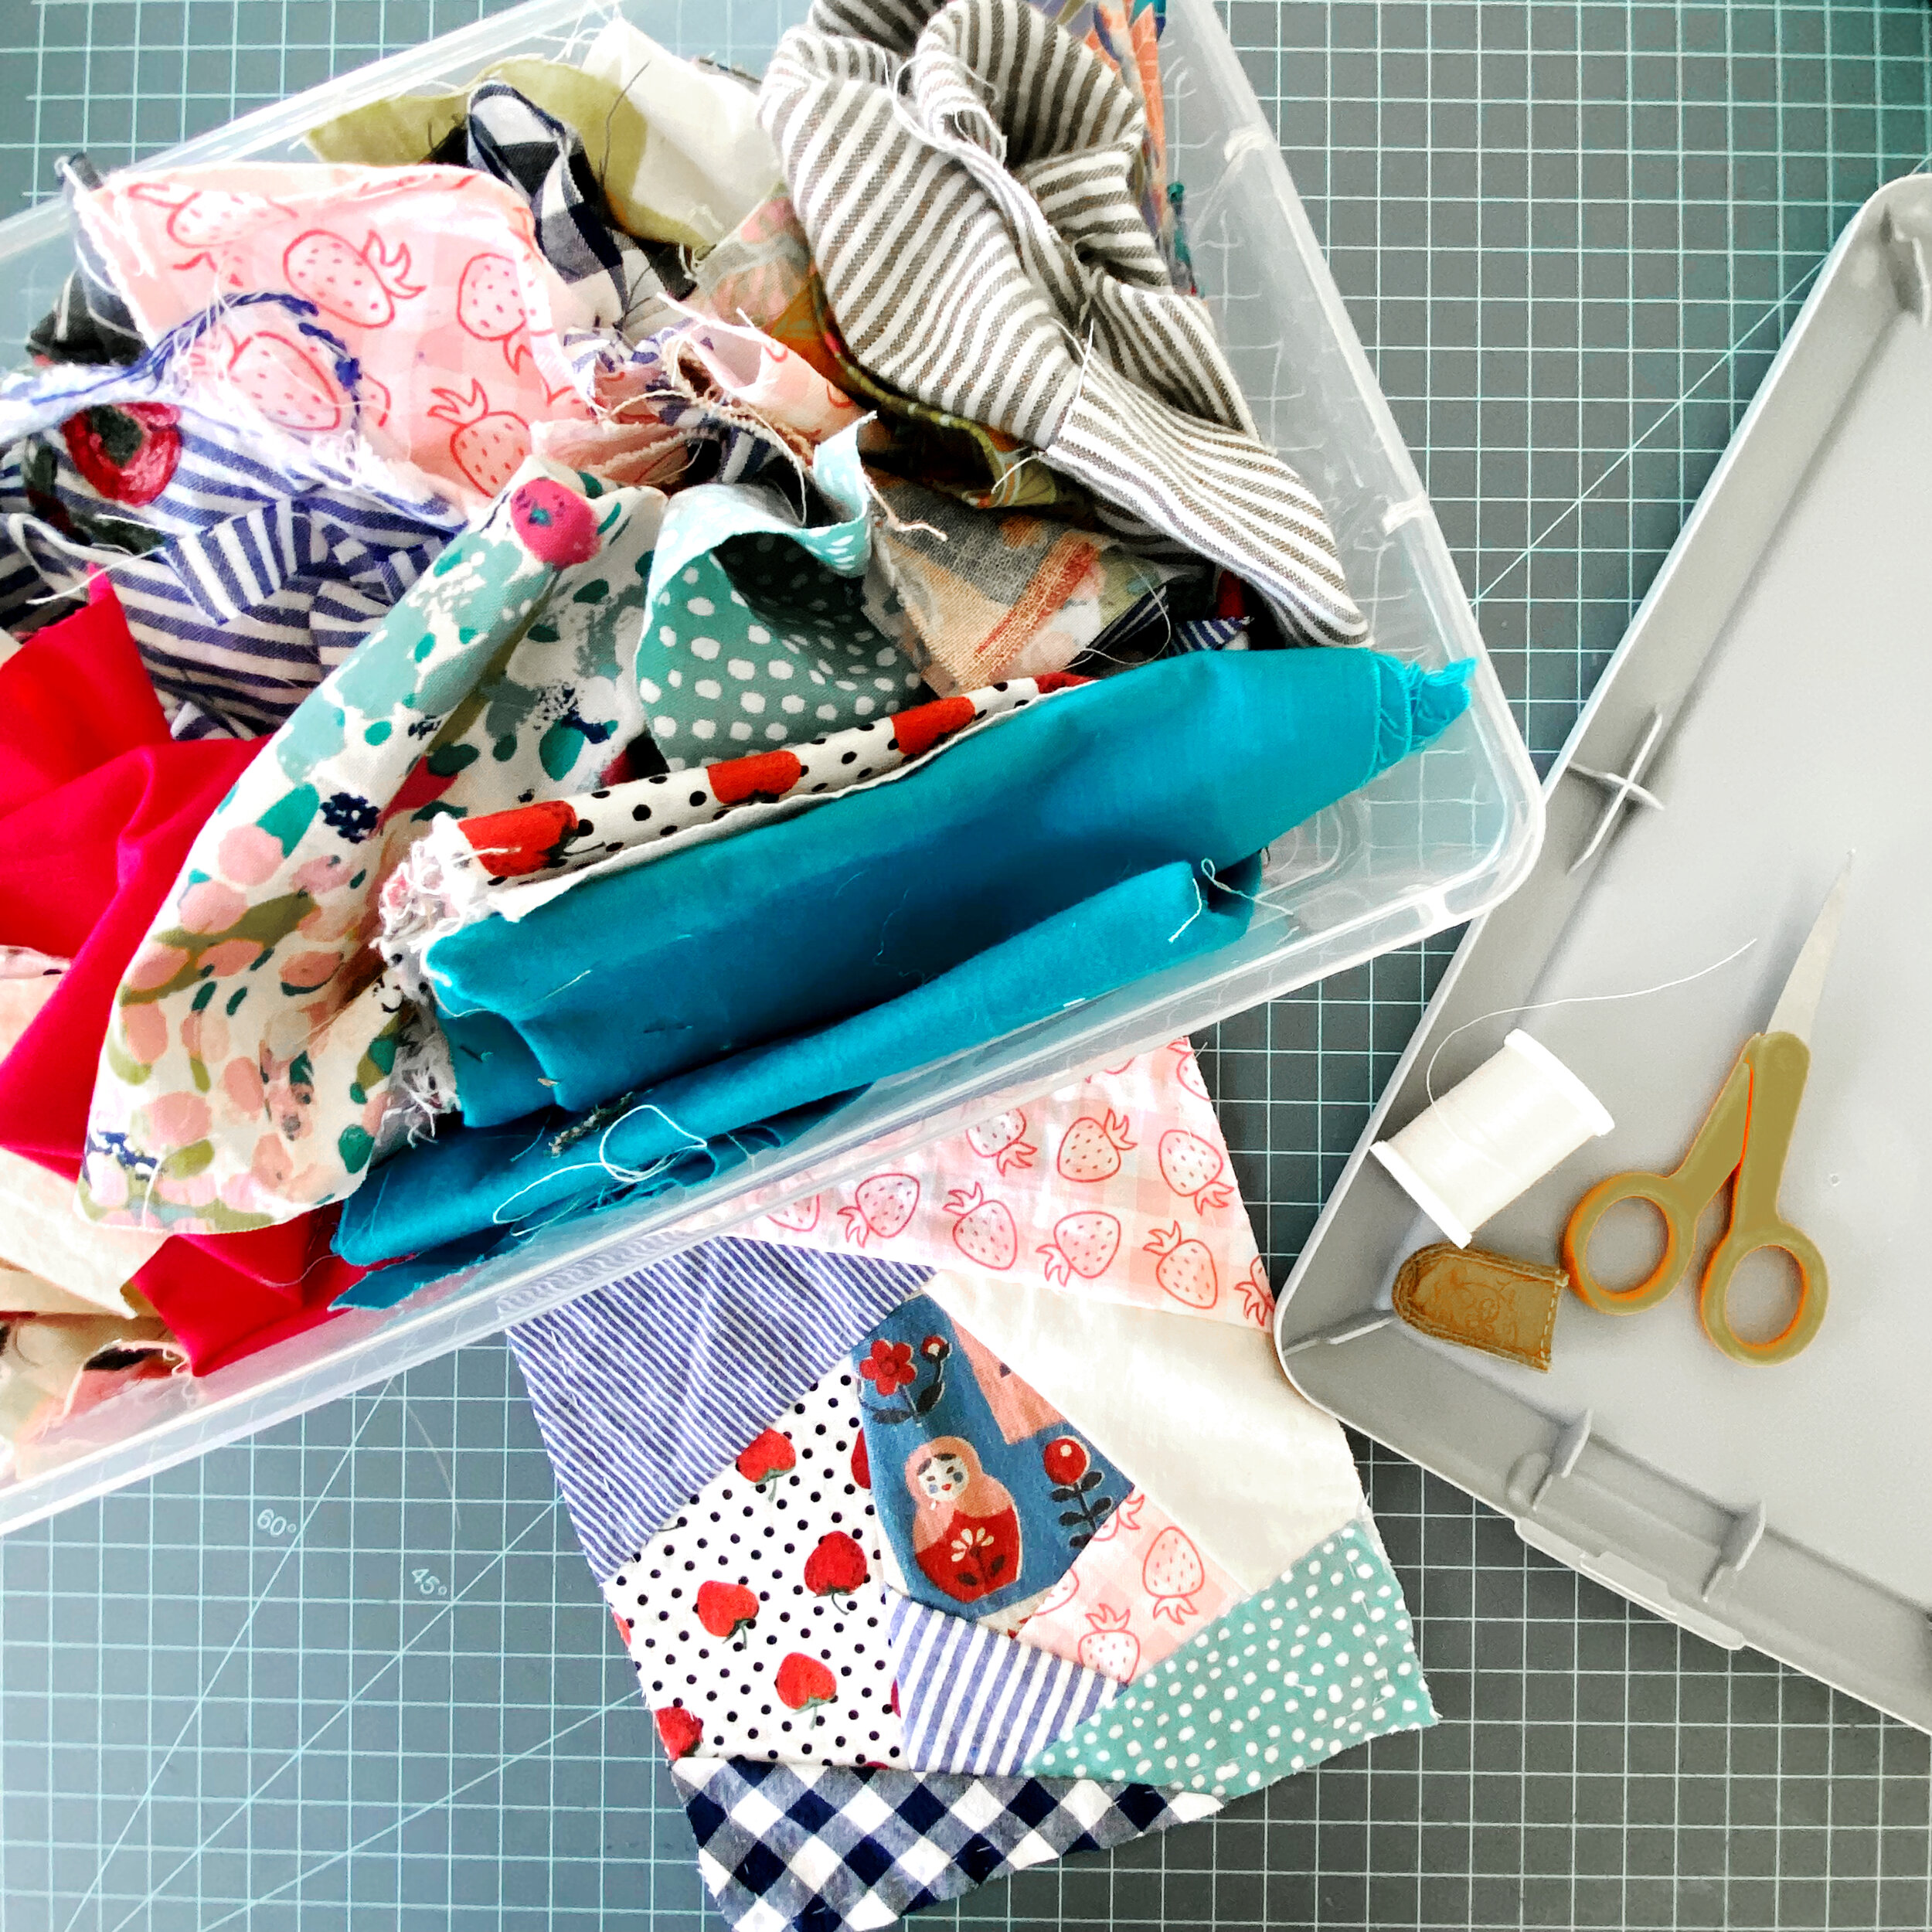
- Fabric: Whether you prefer cotton, linen, or synthetic blends, fabric is a versatile medium for both sewing and other craft projects. Think pillows, bags, or even quilt squares. One of my recent projects involved upcycling some old t-shirts into a cozy quilt, which turned out beautifully!
- Beads and Jewelry Making Supplies: If you’re interested in jewelry making, there’s a treasure trove of materials—from glass beads to wires and clasps. Having an assortment allows for creativity when designing earrings or bracelets.
- Wood and Natural Materials: For those who enjoy woodworking or nature-inspired crafts, materials like balsa wood, driftwood, or even stones can add an earthy touch.
- Recyclables: Don’t overlook what you already have at home! Empty jars, cardboard boxes, and even fabric scraps can be transformed into amazing projects. I once made unique lanterns from repurposed glass jars, and they brought a lovely ambiance to my living room.
Every crafter has their preferences, and exploring materials is part of the fun! As you gather your supplies, keep in mind that the combination of tools and materials will set the stage for endless creativity. Remember, crafting is about experimenting, enjoying the process, and making something uniquely yours! Happy crafting! 🎨✨

Paper Crafting Projects
Handmade Greeting Cards
One of the joys of paper crafting is creating handmade greeting cards. There’s something special about receiving a card crafted with love, rather than a store-bought generic one. I remember the first time I made a batch of cards for my family during the holidays; the smiles on their faces were priceless! Creating DIY greeting cards allows you to tailor messages and designs for any occasion, whether birthdays, anniversaries, or just to say “thank you.” Here’s how to get started:
- Gather Your Supplies: You’ll need cardstock (for the card base), decorative paper, scissors, glue, and embellishments like ribbons, stickers, or washi tape.
- Design Your Layout: Before you cut anything, plan your card layout. Sketching out designs can help you visualize what you want.
- Cut & Assemble: Cut the cardstock to your desired size (common sizes are 5×7 or A2). Start layering decorative papers on the front. Mix and match colors to see what feels right!
Here are a few tips to elevate your handmade cards:
- Add Personal Touches: Handwrite messages or draw little illustrations inside the card. It adds sincerity that printed cards can’t replicate.
- Experiment with Techniques: Don’t be afraid to try techniques like embossing or stamping for more texture. It might seem intimidating at first, but practice makes perfect!
- Create a Card Set: Once you’ve got the hang of it, consider making a set of cards for different occasions. You’ll be prepared for any surprise event!
Handmade greeting cards not only serve as thoughtful gifts but also encourage you to unleash your creativity!
Quilled Paper Art
If you’re looking for a project that adds an artistic flair to your paper crafting, quilled paper art is a brilliant choice. This technique involves rolling and shaping strips of paper into beautiful designs. I was captivated by quilling after receiving a handmade card that featured a delicate quilled flower. The intricate details sparked my curiosity, and I just had to try it for myself! Here’s how to dive into the world of quilling:
- Gather Materials: You’ll need quilling paper strips, a quilling tool (often a slotted tool), scissors, and glue. A quilling board can also help in forming shapes evenly.
- Start with Simple Shapes: Begin with basic shapes like circles, teardrops, and s-scrolls. These fundamental shapes form the basis for most quilled designs!
- Practice Rolling: Use the quilling tool to roll the paper strips tightly, then let them loosen a bit before securing with glue. The varying tightness creates different shapes and effects.
Here are some simple project ideas to get you started with quilling:
- Greeting Cards: Combine quilled designs with handmade cards for a unique touch. A quilled flower on a card can take your message to the next level.
- Wall Art: Create a beautiful piece of wall art by combining quilled shapes into a stunning design, like a nature scene or abstract patterns.
- Decorative Keepsakes: Think about creating framed pieces of quilled art. You can even add small phrases or quotes to make it even more meaningful.
Quilling is not only fun; it’s also a therapeutic way to create art. The rhythmic movements of rolling paper can be incredibly soothing! So, gather your paper and tools, and let your imagination take flight with these paper crafting projects. Enjoy every roll and fold! 🎉✂️

Fabric Crafting Ideas
DIY Tote Bag
If you’re looking to dive into the world of fabric crafting, a DIY tote bag is the perfect project for both beginners and experienced crafters alike. Not only are they practical, but they also offer endless opportunities for personalization. I still remember the first tote bag I made, decorated with fun fabric featuring my favorite movie characters. It became my go-to bag for trips to the library! Here’s how you can create your own fabulous tote bag:
- Materials Needed:
- 1 yard of fabric (canvas or cotton works great)
- Scissors
- Sewing machine (or needle and thread for hand-sewing)
- Measuring tape
- Iron and ironing board
- Instructions:
- Cut Your Fabric: Start by cutting two pieces of fabric, each measuring approximately 15” x 16” (this creates a nice-sized bag). For the straps, cut two long strips measuring 4” x 20”.
- Sew the Bag: Place your fabric pieces right sides together and sew around the sides and bottom, leaving the top open. Make sure to leave a hem allowance at the top for a finished edge.
- Create Hem: Turn the bag inside out, iron the top edge, and fold it down about an inch. Sew this hem to create a sturdy opening.
- Attach the Straps: Fold your strap pieces in half lengthwise, sew along the long edge, turn them inside out, and then attach them to the bag. You can position them about 4 inches in from the sides for comfort.
- Personalization Ideas:
- Fabric Paint: Add your own designs with fabric paint or markers to make it uniquely yours. You could even use stencils for more intricate designs!
- Iron-On Patches: If you have a favorite brand or character, iron-on patches can add a delightful touch.
Making a DIY tote bag is not just fun—it’s also an opportunity to reduce plastic waste while showcasing your creativity!
Upcycled Clothing Projects
Now, let’s talk about another exciting way to unleash your creativity: upcycling old clothing. This sustainable practice allows you to refresh items you might otherwise toss, transforming them into something new and fabulous. I once took an old pair of jeans and turned them into a trendy denim bag. It felt great wearing something that had a story behind it! Here are a few upcycling project ideas to get you started:
- Denim Tote or Bag:
- Instructions: Use an old pair of jeans and follow similar steps as with the DIY tote bag. Use the legs for the body and the pockets for fun detailing!
- Personal Touch: Add embroidery or embellishments to enhance your design.
- T-shirt Pillows:
- Instructions: Cut a t-shirt into two squares (enough to cover your pillow form). Sew along the edges, leaving an opening to stuff in a pillow insert or soft filling.
- Tip: T-shirts with special prints or logos make great personal pillows that spark memories!
- Skirt to Apron:
- Instructions: Cut off the waistline of a skirt and create straps using the leftover fabric. This transforms it into a cute and functional apron!
- Customizing: Add pockets from other old clothes for added functionality.
Upcycling clothing not only breathes new life into your wardrobe but also promotes a more sustainable approach to fashion. Embrace the challenge and watch how your creativity can reshape the old into something wonderfully new! Happy crafting with fabric! 🌟👗✨
Jewelry Making Tutorials
Wire-Wrapped Crystal Necklaces
If you’re ready to dive into the enchanting world of jewelry making, creating wire-wrapped crystal necklaces is a fantastic place to start. I remember the first time I gifted a wire-wrapped crystal necklace to a friend; the joy on her face was priceless! Each piece you make can feel so personal, and it’s a beautiful way to showcase your style. Let’s get started on creating your own stunning wire-wrapped crystal necklace:
- Materials Needed:
- A crystal or gemstone of your choice (think amethyst, quartz, or lapis lazuli)
- 20 or 22 gauge wire (copper or silver wire is great)
- Wire cutters
- Round-nose pliers
- Chain or cord for the necklace
- Instructions:
- Cut the Wire: Start by cutting about 30 inches of wire. This will give you enough length to wrap around the crystal.
- Wrap the Crystal: Begin at the top of the crystal. Create a loop with the wire using your round-nose pliers, leaving some wire for wrapping.
- Secure the Crystal: Loop the wire around the crystal, working your way down. Use crisscross patterns to ensure that the crystal is securely held in place. Don’t hesitate to get creative with your patterns!
- Finish with a Bail: Once you’re satisfied with the wrapping, create another loop at the top to attach to your chain or cord.
- Attach to Chain: Finally, thread your wrapped crystal onto your chain or cord, and voilà, you have a one-of-a-kind necklace!
This project is not only straightforward but also allows for plenty of creative expression. You can experiment with different types of wire, crystals, or patterns to tailor the necklace to your taste!
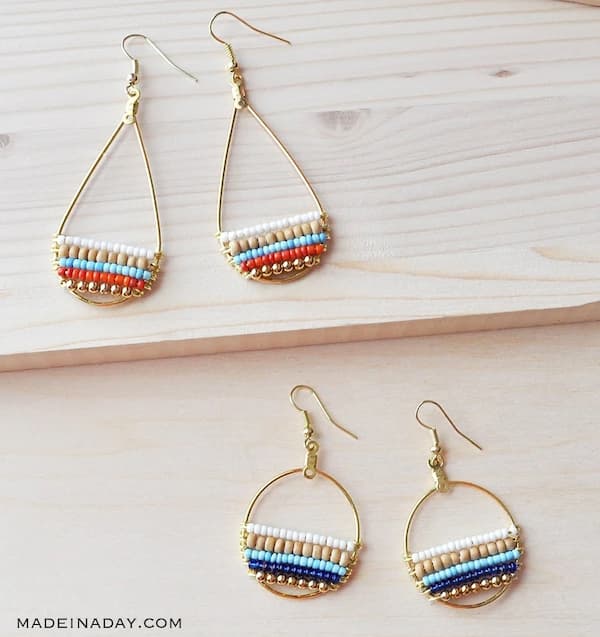
Beaded Bracelets
Now that you have an elegant necklace, let’s explore another delightful jewelry-making project: beaded bracelets. These charming accessories can add a splash of color to any outfit, and they’re quite simple to create. I can’t tell you how many compliments I’ve received on my homemade beaded bracelets—they’re a hit! Here’s how to make your own beaded bracelet:
- Materials Needed:
- Assorted beads (glass, wooden, or acrylic)
- Stretch cord or elastic thread
- Scissors
- Tape or a bead board (optional, to arrange the design)
- Instructions:
- Plan Your Design: Before stringing beads, lay out your design. Use a bead board or tape the end of the cord to your workspace to keep them in place.
- Cut the Cord: Cut a piece of stretch cord about 10 inches longer than your wrist size, allowing for easy tying later.
- String the Beads: Start adding beads to the cord, ensuring your pattern is just how you want it. Take your time—this is your chance to be creative!
- Tie the Knot: Once you’re happy with the length of your bracelet, tie the ends of the cord together in a secure knot. I recommend double knotting to ensure it stays put!
- Trim the Ends: Trim excess cord carefully, and you’re all set!
Beaded bracelets are a lot of fun because you can mix and match different beads and even create themed bracelets for various occasions. You might create a beachy vibe with blues and whites or a more elegant look with earth tones. Jewelry making offers endless ways to express your personality, and wire-wrapped crystal necklaces and beaded bracelets are just the beginning. Each piece you create tells a story, and the joy of wearing something you crafted yourself is unmatched! So gather your supplies and start your jewelry-making adventure today! 💖✨
Home Decor Crafts
Macrame Wall Hanging
If you’re looking to add a touch of warmth and texture to your home, creating a macrame wall hanging is a beautifully creative project that can elevate any room. I fondly remember the first time I completed a macrame piece; it transformed my dull wall into a statement of bohemian charm! Each knot adds character, and the satisfaction of seeing your creation on display is unmatched. Here’s how you can make your very own macrame wall hanging:
- Materials Needed:
- Macrame cord (usually 3-5 mm thickness)
- Wooden dowel or branch for the base
- Scissors
- Tape measure
- Optional: beads, decorative accents
- Instructions:
- Cut the Cord: Cut several pieces of macrame cord to your desired length, typically around 4-5 times longer than how long you want the finished piece to be. For a simple design, you could start with about 10 cords.
- Attach to the Dowel: Fold each cord in half and use a lark’s head knot to attach it to your dowel. Ensure the cords are evenly spaced.
- Start Knotting: Begin with basic knots like square knots or half knots. If you’re new to macrame, many online tutorials can guide you through different knots and patterns.
- Create your Design: Experiment with different knots to design your wall hanging. Feel free to integrate beads to add a unique flair!
- Finish: Once you’re happy with the size and design, trim the ends of your cords to create even or custom edges.
Macrame is not only relaxing but also incredibly rewarding; each piece you create is one-of-a-kind! It’s a wonderful way to express your personal style and make a space feel cozy.
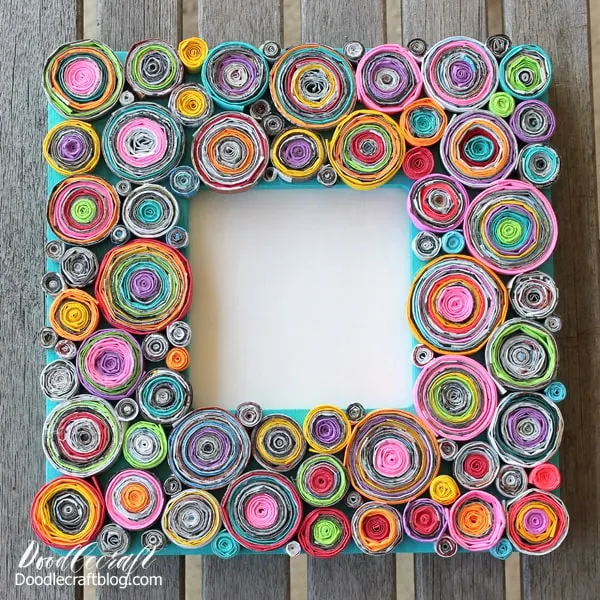
Customized Picture Frames
Next up in the world of home decor crafts: customized picture frames! Nothing says “home sweet home” quite like displaying cherished memories in frames that reflect your style. I still remember adjusting the frames on my gallery wall to create a cohesive look, and each time I pass by, I feel a wave of nostalgia. Creating your own customized picture frames allows for endless creativity. Here’s how to get started:
- Materials Needed:
- Plain wooden or plastic frames (available at craft stores or thrift shops)
- Acrylic paint or wood stain
- Paint brushes
- Decorative elements (like washi tape, stickers, or even fabric)
- Picture or artwork to display
- Instructions:
- Choose Your Frame: Start with a simple frame that matches your existing decor. Thrift store finds can often be transformed into something extraordinary!
- Prepare the Frame: If you’re painting, start by cleaning the frame and, if necessary, sanding it lightly to ensure better paint adhesion.
- Paint or Stain: Apply your chosen color or stain to the frame using a paintbrush. For a rustic look, use multiple layers, or consider a half-dipped technique for a modern twist.
- Add Decorations: Once dry, embellish your frame! Try wrapping fabric or lace around the frame, adding washi tape, or even gluing on small decorative items that resonate with you.
- Insert Your Picture: Finally, place your favorite picture or a lovely piece of art into the frame, and display it prominently in your home.
Customized picture frames not only serve as decor but also become a wonderful conversation starter. When guests see your personalized pieces featuring your cherished memories, it’s a lovely way to share your story! With these home decor crafts—macrame wall hangings and customized picture frames—you can truly showcase your creativity and style. So gather your supplies, unleash your inner artist, and make your space feel uniquely you! 🌿🖼️✨
Sewing Projects for Beginners
Simple Pillow Covers
If you’re keen to embark on your sewing journey, making simple pillow covers is a fantastic first project! Not only is it incredibly easy, but it also gives you the satisfaction of sprucing up your living space without spending a fortune. I remember the first time I created a set of colorful pillow covers for my couch; it completely transformed the look and feel of the room! To help you get started on your pillow cover adventure, here’s a straightforward guide:
- Materials Needed:
- Fabric of your choice (cotton works great and comes in endless patterns)
- Sewing machine (or a needle and thread for hand sewing)
- Scissors
- Measuring tape
- Straight pins
- Iron and ironing board
- Instructions:
- Measure Your Pillow: Start by measuring the dimensions of your pillow. For example, if your pillow is 18” x 18”, add 1 inch for seam allowance on all sides.
- Cut Your Fabric: Cut two squares of fabric to your desired size. So, for our 18” pillow, you would cut two pieces that are 19” x 19”.
- Pin the Fabric: Place the two squares right sides together, pin them at the edges to secure in place.
- Sew: Sew around the edges, leaving a gap of about 6 inches on one side to allow for turning it inside out and inserting the pillow.
- Turn Inside Out: Once sewn, turn your cover inside out through the gap, and use a pencil or something similar to push the corners out for a nice shape.
- Insert the Pillow: Place your pillow inside, then tuck in the raw edges of the gap and pin it closed.
- Final Stitch: Carefully sew the opening closed by hand or machine, and your pillow cover is ready to shine on your couch!
Not only will this project build your confidence in sewing, but you’ll also have a lovely home accessory to show for your efforts!
Reusable Cloth Napkins
Now that you’ve conquered pillow covers, let’s move on to another beginner-friendly project: reusable cloth napkins. Not only are they eco-friendly, but they also add a charming touch to your dining table. I started making my own cloth napkins as a simple way to reduce waste, and I’ve loved how they look at family dinners! Here’s how to whip up these stylish alternatives to paper napkins:
- Materials Needed:
- Fabric fabric (cotton, linen, or even a fun print for a personal touch)
- Sewing machine (or needle and thread for hand sewing)
- Scissors
- Measuring tape
- Iron and ironing board
- Instructions:
- Decide on Size: A standard cloth napkin size is usually 18” x 18” or 20” x 20”. Decide what size works best for your table setting.
- Cut Your Fabric: Cut your fabric into squares based on your chosen size. If you’re feeling adventurous, you could even use different fabrics for variety!
- Iron the Fabric: Before sewing, press your fabric with an iron to get rid of wrinkles and ensure a clean finish.
- Sew the Edges: Fold over the edges by about 1/4 inch and press with the iron. Then, fold them over again and pin into place. This will create a nicely finished edge.
- Final Sewing: Sew around the edges of the napkin, ensuring to hold everything in place. The neat stitching adds a professional look!
- Final Touch: Iron the napkins once more for that crisp finish, and you’re ready to set the table!
These reusable cloth napkins are not only practical but also a fun, eco-conscious way to enhance any meal. Both of these sewing projects—simple pillow covers and reusable cloth napkins—are excellent starting points for beginners seeking to gain confidence in sewing while creating items that are both beautiful and functional. So, grab your materials, channel your creativity, and enjoy the process of making! ✂️🧵✨

Upcycling and Recycling Crafts
Tin Can Planters
One of the most delightful ways to embrace upcycling is by transforming everyday items into something beautiful and functional. Tin can planters are a perfect example! Not only do they provide an eco-friendly way to showcase your greenery, but they also add a whimsical touch to any indoor or outdoor space. I remember creating my first tin can planter: I painted it in bright colors and put a little succulent inside. It became the perfect centerpiece for my coffee table! Here’s how you can create your very own tin can planters:
- Materials Needed:
- Empty tin cans (soup cans, coffee cans, etc.)
- Hammer and nail (for making drainage holes)
- Wire or string (for hanging options)
- Paint or decorative paper (to personalize)
- Small plants or flowers
- Potting soil
- Instructions:
- Prepare the Cans: Remove any labels from your cans and wash them thoroughly. Using the hammer and nail, carefully punch a few holes in the bottom of the can for drainage.
- Decorate the Exterior: Now comes the fun part! Use paint to add color, or cover your can with decorative paper. You could also use washi tape for a quick and easy design.
- Fill with Soil: Add a layer of potting soil to the bottom and then carefully place your plant inside, filling the rest of the can with more soil.
- Water and Care: Give your new planter a little water and place it in a sunny spot. If you want to hang your planter, attach some wire or string to the top!
These tin can planters are not just charming; they’re also a sustainable way to use materials you might otherwise throw away. You can even customize each can to match your home’s decor or garden theme!
Repurposed Glass Jar Lanterns
Another exciting upcycling project involves transforming glass jars into beautiful lanterns. This project is a delightful way to repurpose jars that would typically end up in recycling. I first made these lanterns for a summer barbecue, and they instantly became the highlight of the evening, casting cozy light and creating a warm ambiance. Here’s how to create your own enchanting glass jar lanterns:
- Materials Needed:
- Clean glass jars (mason jars, pickle jars, etc.)
- Tea light candles (real or battery-operated)
- Twine, wire, or ribbon (for hanging)
- Optional: paint, glitter, or decorative paper
- Optional: small pebbles or sand (for stability)
- Instructions:
- Clean the Jars: Ensure your glass jars are clean and free of any labels. If you want to paint or decorate them, choose the appropriate surface.
- Decorate: Get creative! Paint the outside for a opaque look, or use Mod Podge to apply decorative paper or glitter. If you want a rustic vibe, simply wrapping twine around the neck gives a charming touch.
- Insert the Light Source: Place either a tea light candle (if using real candles, ensure your jar is heat-resistant) or a battery-operated tea light inside.
- Add Stability: If you’re using real candles, consider adding a layer of small pebbles or sand to stabilize the jar and remind you to keep it on a flat surface.
- Creating Hanging Lanterns: For a hanging lantern, you can either tie twine or wire around the jar’s neck or poke holes and attach wire to create a handle.
These lanterns not only beautify your space but can also serve as thoughtful gifts for friends and family. Upcycling crafts like tin can planters and repurposed glass jar lanterns allow you to reduce waste while tapping into your creative side. Not only do these projects enhance your surroundings, but they also imbue a sense of sustainability into your crafting journey. So, gather your recyclables and get crafting—you might just surprise yourself with what you can create! 🌱🕯️✨
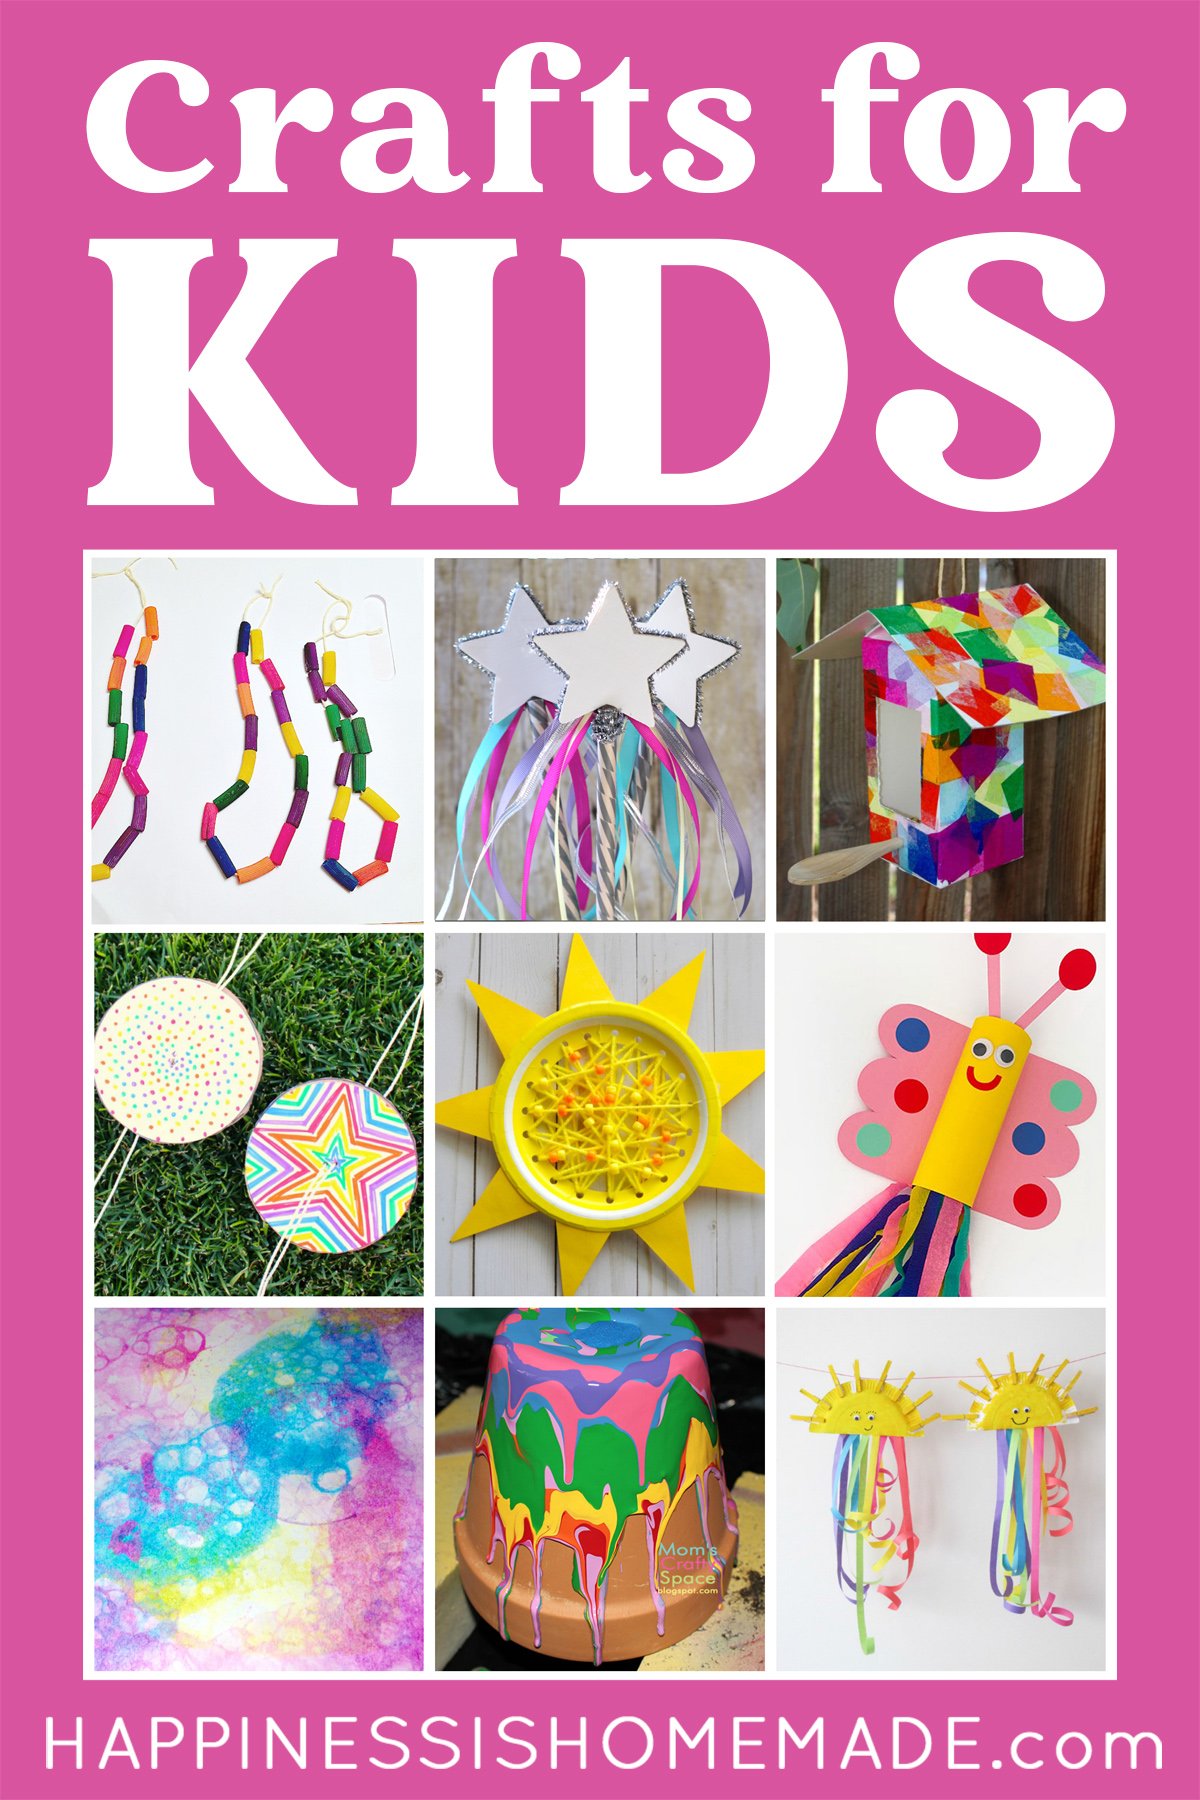
Crafting for Kids
Easy Summer Camp Crafts
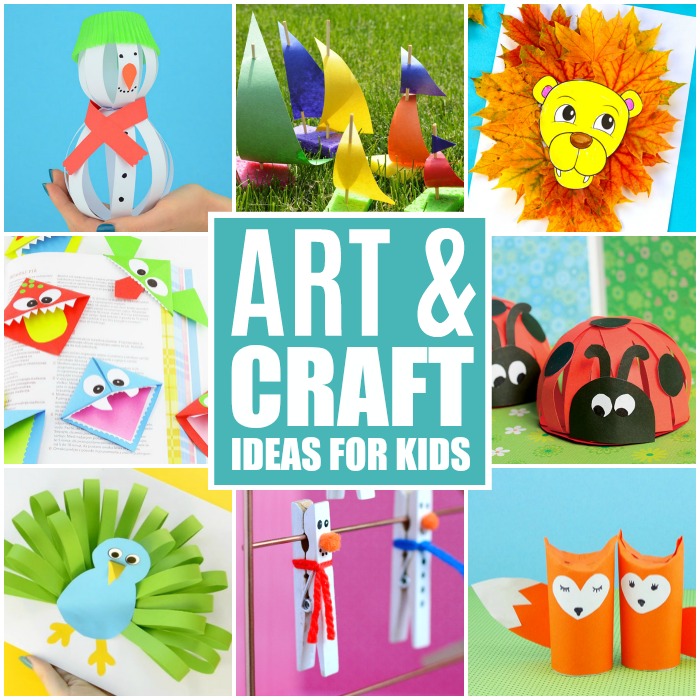
Crafting is not just a wonderful outlet for adults; it’s an exciting and engaging way for kids to unleash their creativity during summer camps! I remember attending summer camp as a child and how much I looked forward to craft time. From creating friendship bracelets to painting rocks, those moments allowed us to express ourselves and bond with new friends. Here are some easy and fun summer camp craft ideas that kids will absolutely love:
- Friendship Bracelets:
- Materials Needed: Colorful embroidery thread or yarn.
- Instructions: Cut several strands of thread to your desired length, knot them at one end, and braid or knot them in various patterns. This teaches basic knotting skills and promotes sharing, as kids can make them for friends!
- Nature Art:
- Materials Needed: Leaves, flowers, twigs, and a piece of paper or canvas.
- Instructions: Encourage kids to collect various natural items and create beautiful designs by gluing them onto the paper. This activity allows for creativity and connection with nature while learning about the environment.
- Paper Plate Animals:
- Materials Needed: Paper plates, markers, glue, and other craft supplies (like googly eyes).
- Instructions: Kids can turn paper plates into their favorite animals by decorating them with markers and craft supplies. It’s an easy, mess-free craft that results in fun, imaginative creatures ready to play!
These crafts not only offer a fun way to pass the time but also teach valuable skills. It’s amazing to see how kids can develop fine motor skills and have loads of fun in the process!
Educational DIY Projects
Crafting can also serve an educational purpose, providing kids with hands-on projects that reinforce learning while keeping them entertained. I once helped my younger sibling with a DIY solar system project that transformed our living room into a miniature universe—it was both educational and a lot of fun! Here are some engaging educational DIY projects that can inspire your child’s creativity while reinforcing important concepts:
- Mini Solar System Model:
- Materials Needed: Styrofoam balls (various sizes), paint, a cardboard base, and string.
- Instructions: Paint the balls to represent different planets, and use the cardboard base to lay them out in order from the sun. This project reinforces scientific concepts while allowing kids to learn about space creatively.
- DIY Weather Chart:
- Materials Needed: Poster board, markers, and pictures representing different weather conditions.
- Instructions: Have kids create a chart that tracks daily weather patterns. They can draw or cut out images of the sun, clouds, rain, and snow, and update it each day. This helps them learn about weather patterns and develop observational skills.
- Homemade Bookmarks:
- Materials Needed: Cardstock, colored pencils, and a hole punch.
- Instructions: Kids can decorate cardstock with their favorite designs or quotes. Adding a hole and threading a piece of ribbon through makes it functional and personal. This encourages reading while allowing kids to express their personalities.
Combining creativity with education makes crafting an ideal activity for kids. These DIY projects not only spark their imagination but also enhance their learning experience in a memorable way. So gather your materials and get ready for some crafting fun that combines summer excitement and education! 🌈✂️📚

Conclusion: The Joys of Crafting
Crafting brings an incredible sense of joy and fulfillment to our lives. It’s more than just creating pretty things; it’s an amazing outlet for self-expression and creativity. From making DIY cards to whipping up dazzling jewelry, every project tells a unique story and reflects a bit of who you are. 🌟
Connecting with Others
One of the most beautiful aspects of crafting is how it connects us with others. Remember the laughter and camaraderie during crafting sessions with friends or family? Whether it’s a summer camp crafting session or a cozy night in with loved ones, crafting brings people together.
- Host Crafting Parties: You could host a themed craft night where everyone brings their favorite supplies and creates something together.
- Share Your Creations: Whenever I complete a project, I love sharing it on social media or with family. It inspires others to dive into their crafting journeys!
These connections through crafting create lasting memories and friendships that you cherish.
Boosting Mental Well-being
Crafting is also fantastic for mental health! Engaging in hands-on projects allows you to focus and unwind, providing a wonderful escape from daily stressors. I’ve often found that after a long day, spending time crafting calms my mind and lifts my spirits.
- Mindfulness Through Crafting: The repetitive motions of sewing or painting can often lead to a state of flow—a meditative quality that allows us to breathe deeply and simply enjoy the moment.
- Personal Growth: Each completed project boosts your confidence and showcases your capabilities, reminding you of what you can achieve with your hands!
Embracing Sustainability
In today’s eco-conscious world, crafting also provides an opportunity to be more sustainable. Upcycling and recycling materials to give them new life is something we can all embrace. It feels wonderful to reduce waste while creating something beautiful!
- Repurpose and Reimagine: From turning old clothing into stylish bags to crafting vibrant planters from tin cans, the possibilities are endless. Each upcycled item is not only functional but also tells a story of transformation.
So whether you’re diving into upcycling projects, whipping up fun crafts with kids, or simply indulging your creative side, crafting is a rich, joy-filled journey. Don’t be afraid to get your hands a little messy and try new things. The world of crafting is boundless, and it’s waiting for you with open arms. So gather your supplies, unleash your creativity, and most importantly, enjoy the process! Happy crafting, my friends! 🎉✂️❤️
