
Introduction
Importance of a Custom Cycling Jersey
When you think about cycling, your mind might wander to the open road, the wind whipping past your ears, and the exhilarating sense of freedom. But have you ever thought about how pivotal your gear is to that experience? A custom cycling jersey is not just apparel; it’s an extension of who you are as a cyclist. Each ride you take can feel distinctly different based on what you wear. By sporting a jersey that reflects your personality, you not only enhance your comfort but also your confidence. Imagine soaring through breathtaking landscapes in a jersey that feels like a second skin. The right jersey significantly impacts your cycling experience, helping manage moisture and temperature while providing essential support. And let’s not overlook the power of self-expression – designing your custom cycling jersey allows you to showcase your style, whether it’s vibrant colors or unique graphics that tell your cycling story.
Benefits of Crafting Your Own Cycling Jersey
Creating your own cycling jersey offers a plethora of benefits that go beyond merely selecting colors and styles. Here are a few compelling reasons to dive into this artistic endeavor:
- Personal Fit: Off-the-rack jerseys sometimes miss the mark in sizing and comfort. By crafting your own, you can ensure the perfect fit, accommodating your unique body shape and riding style.
- Unique Identity: You join the ranks of fellow cyclists who embrace individuality. Your jersey can reflect your personality, team spirit, or even pay homage to your favorite cycling destinations.
- Functional Design: Customize features like pockets, zippers, and fitting styles for superior functionality during those long rides. A strategically placed zipper for ventilation, or extra pockets for snacks, can make all the difference.
- Connection: Crafting your jersey can be a fulfilling project that allows you to share your love for cycling with friends and family. It might even turn into a fun group activity for cycling clubs.
- Sustainable Choices: If eco-friendliness is important to you, creating your own jersey allows the choice of materials that align with your values. Opt for sustainable fabrics or explore companies that prioritize eco-conscious production methods.
Reflecting on my own experiences, crafting my cycling jersey was like embarking on a mini-journey. I spent hours sifting through designs, selecting fabric, and envisioning what I wanted it to be. When I received the finished product, it felt like I had distilled a part of my cycling adventure into fabric! So, it’s not just about the ride; it’s about creating a piece of you that tells your story each time you hit the road. Next, let’s dive deeper into finding design inspiration that resonates with your style and personality!

Design Inspiration
Finding Design Ideas
After deciding to create your custom cycling jersey, the next exciting step is finding design ideas that truly resonate with you. Inspiration is all around us; it just requires a keen eye and some creativity! Start by exploring these sources:
- Nature: Look at the colors and patterns around you—think vibrant sunsets, lush forests, or even the sandy beaches. Nature has a remarkable way of inspiring beautiful palettes and designs.
- Art and Culture: Visit art galleries or browse online art platforms. The colors and shapes in contemporary art can help you discover unique combinations that speak to your aesthetic.
- Cycling Events: Attend cycling events or races. Observe what others are wearing; you might find a style or motif that piques your interest. Plus, the various team jerseys often showcase creative designs worth noting!
- Social Media: Platforms like Pinterest and Instagram are treasure troves of design inspiration. Search for keywords like “custom cycling jerseys” or follow popular cycling influencers who frequently share their designs.
When I was working on my own cycling jersey, one of my favorite sources of inspiration was a local mural. The bright colors and swirling patterns caught my attention and influenced my choice of a bold, eye-catching design.
Personalizing Your Jersey Design
Now that you’ve gathered some design ideas, how can you make them your own? Personalization is what sets your jersey apart and adds that unique touch. Here are ways to tailor your design:
- Colors and Patterns: Choose colors that reflect your personality or evoke emotions while cycling. Soft pastels may convey a serene ride, while bright colors exude energy and enthusiasm. Incorporate patterns, like stripes or polka dots, to make your jersey pop!
- Unique Graphics: Think about adding meaningful images or symbols. Whether it’s a favorite animal, a mountain range, or an emblem representing your cycling club, graphics will tell your story.
- Text and Quotes: Consider including a personal motto or your name. This adds a layer of intimacy and makes the jersey uniquely yours. For example, my jersey showcases the phrase “Ride with Passion” – a reminder of why I love cycling!
- Team Collaboration: If you’re designing as a group, brainstorm together! Bring everyone’s ideas to the table, and create a cohesive design that embodies your team’s spirit.
Remember, your custom cycling jersey is a canvas. Embrace the chance to express your creativity, and let your design tell the story of who you are as a cyclist. Up next, we’ll explore how to select the right materials for your dream jersey.

Selecting Materials
Choosing the Right Fabric
Now that you’ve been inspired to design your custom cycling jersey, the next crucial step is selecting the right materials. This choice will significantly affect your comfort, performance, and durability on those long rides. When it comes to cycling jerseys, you want fabrics that offer breathability, moisture-wicking properties, and flexibility. Here are some commonly used fabrics to consider:
- Polyester: This is the most popular choice for cycling jerseys owing to its lightweight and moisture-wicking abilities. It quickly draws sweat away from your skin, keeping you dry and comfortable.
- Nylon: Known for its durability and stretch, nylon fabric is perfect for a snug yet flexible fit. It also offers excellent abrasion resistance, making it suitable for those who tackle rough terrains.
- Merino Wool: For those chillier rides, merino wool can be an excellent option. It regulates temperature and is breathable, allowing you to stay warm without overheating.
- Blends: Some jerseys combine fabrics, like polyester and spandex, to give you the best of both worlds—moisture control and stretchiness.
In my experience, when I first designed my cycling jersey, I opted for a polyester-spandex blend. It fit snugly without being restrictive and offered fantastic moisture management during hot summer rides.
Selecting the Best Color Options
Once you’ve settled on the fabric, it’s time to have fun with color! The color choices you make can influence both aesthetics and performance. When selecting color options for your jersey, consider the following:
- Visibility: Bright colors help you stand out on the road, increasing visibility to motorists, especially during twilight hours. Fluorescent colors like lime green or bright orange can be lifesavers.
- Personal Preference: Don’t shy away from colors that represent your personality! Whether it’s vibrant reds, calming blues, or even playful patterns, your jersey should resonate with who you are.
- Color Combinations: Experiment with contrasting and complementary colors to create a visually appealing design. Use the color wheel as a guide to discover combinations that pop.
- Fading and Paneling: Remember that darker colors show less dirt but can fade in sunlight. If you opt for a mix, think about how you want the color to be distributed—solid blocks, panels, or even gradients can create a unique look.
In my cycle group, we decided on a bright blue with lime green accents for our jerseys. Not only did we stand out during our weekend rides, but those colors also represented the beautiful skies we enjoyed while biking together. Selecting the right fabric and colors goes hand-in-hand in bringing your custom cycling jersey vision to life. With this foundation, you’re now ready to take the next step: taking precise measurements for the perfect fit!

Taking Measurements
Understanding Sizing Charts
With your fabric and colors chosen, you’re in the final stages leading up to crafting your dream cycling jersey! But before you dive into the design process, it’s crucial to take accurate measurements to ensure a perfect fit. This is where understanding sizing charts comes into play. Sizing charts are not just a bunch of numbers; they’re your roadmap to finding the right size. Here are a few key points to consider:
- Brand Variations: Different brands may have varying sizing standards. It’s essential to check the specific sizing chart for the brand you’re considering. While one company may categorize a medium as a 38-inch chest, another might define it as 40 inches.
- Body Types: Consider your body shape when looking at sizing charts. Some brands offer options like slim fit, regular fit, or relaxed fit. Knowing your body type helps you select a jersey that enhances your comfort while on the bike.
- Measurement Units: Sizing charts may use different measurement units, such as inches or centimeters. Ensure you’re familiar with how each chart denotes them to avoid confusion.
When I was designing my own jersey, I quickly discovered that I needed to measure myself carefully since I was transitioning between brands with different sizing systems. It was a learning experience, but it helped me understand what fit meant for my cycling journey!
Measuring for a Perfect Fit
Now that you’re equipped with knowledge about sizing charts, it’s time to measure yourself for that perfect fit. Here’s a step-by-step guide on how to take measurements accurately:
- Gather Supplies: You’ll need a soft measuring tape, a notepad, and a pen. It’s also a good idea to wear a snug-fitting shirt for more accurate body measurements.
- Measure Key Areas:Focus on these essential measurements:
- Chest: Wrap the measuring tape around the fullest part of your chest, making sure it’s level and not too tight.
- Waist: Measure around the narrowest part of your waist, again keeping the tape level.
- Hips: Stand with your feet together and measure around the widest part of your hips.
- Torso Length: Measure from the center of your collarbone down to your waist to get the torso length.
- Refer to the Sizing Chart: Once you’ve taken your measurements, map them onto the relevant sizing chart. If you fall between sizes, it often helps to opt for the larger size for a more comfortable fit, especially when riding.
- Use a Fitting Guide: Some brands may provide fitting guides that offer additional tips on how a jersey should fit. Take these into consideration when selecting your size.
Taking accurate measurements is essential in ensuring that your cycling jersey will not only look great but also feel fantastic during long rides. It’s like creating a custom-made suit tailored just for you! Up next, we’ll explore the exciting process of designing your jersey, using software tools to bring your ideas to life!

Designing Your Jersey
Using Design Software
Now that you’ve measured for the perfect fit, it’s time to bring your creative vision to life by designing your cycling jersey! With the right design software, this process can be both fun and straightforward. Choosing a user-friendly design tool can help you visualize your ideas before committing to the final product. Here are some great options to consider:
- Canva: This web-based platform offers a user-friendly interface and a wealth of design templates. You can customize colors, add text, and even upload your own graphics with ease.
- Adobe Illustrator: While it has a steeper learning curve, it provides unmatched precision and creative flexibility for those serious about their designs. If you’re comfortable with advanced design tools, Illustrator can really let your creativity shine.
- Inkscape: This is a free vector graphics software that can do a lot of what Illustrator can. It’s great if you want to avoid subscriptions but still want extensive features.
- Custom Jersey Design Websites: Some companies provide online tools specifically for jersey design. These platforms often allow you to see how your designs will look on an actual jersey, taking the guesswork out of the process.
When I designed my cycling jersey, I leaned on Canva for its simplicity. It allowed me to experiment with various layouts without feeling overwhelmed. Plus, I loved that I could easily rearrange elements with just a few clicks!
Adding Logos and Graphics
The next exciting stage is adding logos and graphics to your jersey design. This is where your personality and creativity truly shine. Here are a few tips on how to approach this:
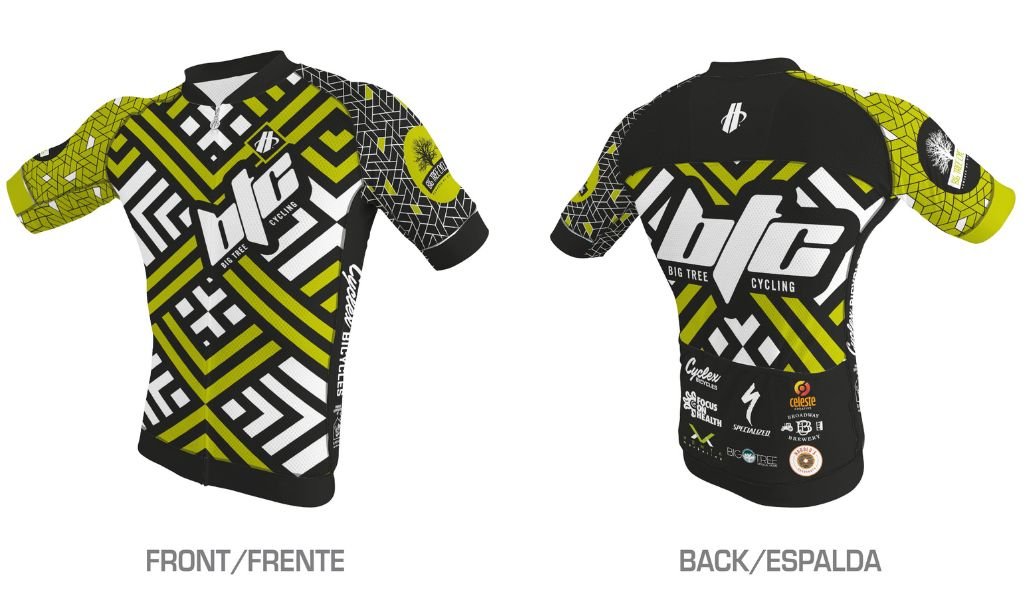
- Logo Placement:If you’re representing a team, brand, or event, consider where your logo will look best. Common placements include:
- Left chest area
- Back of the jersey
- Sleeve designs
- Graphics and Patterns:Think about how you want to integrate graphics. You can use:
- Striking images: These could be anything from mountain ranges to abstract art that resonates with your cycling experiences.
- Patterns: Incorporate stripes, polka dots, or other designs to add flair. Patterns can also enhance visibility; think of bright, attention-grabbing colors!
- Text Elements: Adding text can personalize your jersey. You might include a name, a slogan, or even a significant date. Make sure it aligns with your overall design—keep fonts clear and legible!
- Balancing Elements: Ensure that while your jersey has personality, it doesn’t feel overly cluttered. Sometimes, less is more. A well-placed logo with complementary graphics can create a cohesive look.
For my jersey, I decided to incorporate the logo of my cycling club on the front, coupled with a design that mimicked the outline of my favorite local mountain. The result was a unique piece that captured both my identity and my love for cycling! With your designs shaping up beautifully, you’re almost ready to take the next step: exploring the various printing options to bring your custom jersey to life!
Printing Options
Sublimation Printing
With your design fully conceptualized, it’s time to explore the various printing options that will bring your custom cycling jersey to life. One of the standout methods is sublimation printing, and it’s hugely popular among cyclists for several reasons! Sublimation printing involves dyeing the fabric itself rather than applying ink on top, resulting in vibrant colors that won’t fade over time. Here are a few key benefits:
- Vibrant Colors: This method allows for full-color designs that remain bright and vivid, even after several washes. So, if you’ve chosen a stunning gradient or intricate graphics, sublimation creates the best representation.
- Durability: Because the dye becomes part of the fabric, it’s resistant to fading and peeling. This means your jersey will look fantastic ride after ride, regardless of the weather conditions.
- Breathability: Unlike some thicker inks, the results of sublimation maintain the breathable quality of the material, ensuring that your jersey remains comfortable during intense rides.
However, there are a couple of considerations. Sublimation works best on synthetic fabrics (like polyester), so if you opted for more natural materials, you may want to explore other printing methods. When I had my jersey made using sublimation, I was blown away by the rich colors that popped against the fabric! It felt exciting to wear something that was not only personal but looked visually stunning.
Screen Printing vs. Heat Transfer
Two other common printing methods you’ll encounter are screen printing and heat transfer. Let’s break down these options to see how they stack up against each other: Screen Printing:
- Overview: This traditional method involves pushing ink through a mesh screen onto the fabric, layer by layer.
- Pros:
- Cost-Effective for Bulk: If you’re making several jerseys, screen printing typically comes with lower costs per unit.
- Longevity: The ink layers create a durable finish, though sometimes it may feel heavier on the fabric.
- Cons:
- Limited Colors: Complex designs may require multiple screens, making it less suitable for intricate graphics or detailed images.
- Longer Setup Time: The initial setup can be time-consuming, which might be inconvenient if you’re looking for quick turnaround times.
Heat Transfer:
- Overview: This method involves applying a printed design onto the fabric using heat and pressure, transferring the image onto the jersey.
- Pros:
- Vibrant Designs: This method can produce detailed images and graphics, similar to sublimation.
- Ease of Customization: It’s simple to create small batches or even single-item prints.
- Cons:
- Durability Concerns: Over time, heat transfers can crack or fade, especially with frequent washing.
- Weight: Depending on the materials used, the transferred design may feel bulkier, affecting overall comfort.
In my experience, if you’re looking for durability and vibrancy, sublimation is hard to beat, but both screen printing and heat transfer have their own merits based on your unique needs. Now that you have a grasp on the different printing methods available, we can delve into sewing techniques, ensuring that your custom cycling jersey is not only stunning but also well-constructed for the road ahead!

Sewing Techniques
Machine vs. Hand Sewing
With your printed design ready, the next step is bringing your cycling jersey together through sewing. Here, you’ll encounter two major sewing techniques: machine sewing and hand sewing. Each has its unique advantages and considerations. Machine Sewing:
- Efficiency: If you’re sewing multiple jerseys or aiming for a quick turnaround, a sewing machine is your best friend. It dramatically speeds up the process, letting you finish projects in record time.
- Consistency: Machine sewing produces even stitching, which can enhance both the appearance and durability of the seams. This is especially important for activewear, where strength is crucial.
- Variety of Stitches: Most machines offer a range of stitch types, from straight to zigzag, which can be particularly beneficial for different fabric types.
In my experience, using a sewing machine for my jersey project allowed me to achieve a professional finish with minimal effort. After a few hours, I had the entire jersey pieced together beautifully! Hand Sewing:
- Control: Hand sewing gives you ultimate control over intricate areas like curve seams or collar attachments. For those small details, hand sewing can be invaluable.
- Personal Touch: There’s something special about the craftsmanship that comes from hand sewing. It adds a unique charm and can make each piece feel truly one-of-a-kind.
- Portability: If you’re on the go, hand sewing requires minimal tools and space for quick fixes. You can easily tuck a needle and thread into a bag for any adjustments on the road.
While hand sewing can be rewarding, be prepared for it to be time-consuming, especially for larger projects. I often like to mix both techniques—using a machine for the bulk of the work and hand sewing for final touches to create a personalized finish.
Finishing Seams and Hems
Once your jersey is assembled, the next step is attending to the finishing seams and hems. These small details help enhance the overall durability and appearance of your garment. Here are a few tips for finishing your jersey effectively:
- Serger or Overlock Machine: If you have access to a serger, this tool can provide a professional-grade finish to your seams by trimming excess fabric while preventing fraying. It’s particularly useful for stretchy fabrics commonly found in cycling jerseys.
- Flatlock Seams: Consider using flatlock stitching, especially for activewear. This type of seam lies flat against the skin, reducing chafing during long rides. It’s a favored choice among cyclists for comfort.
- Hemming Techniques:Depending on your jersey’s design, you can choose different hemming methods:
- Rolled Hem: Creates a narrow, neat finish ideal for lightweight fabrics.
- Double Fold Hem: Offers added strength, which is beneficial for jerseys that’ll see a lot of wear and tear.
- Reinforce Areas: Pay special attention to stress points, like armpits or shoulders. Reinforcing these areas with double stitching or adding fabric patches can improve durability.
During my jersey construction, I found that taking the time to finish seams properly made a noticeable difference in how the garment felt while riding. Paying attention to these details not only improves the durability of the jersey but also creates a polished look. With your jersey sewn beautifully, you’re now almost set to take it out for a spin! But don’t forget to also consider maintenance to keep your creation looking fresh and vibrant. Let’s explore the tips for maintaining your custom cycling jersey next!

Tips for Maintenance
Washing and Drying Guidelines
Congratulations on completing your custom cycling jersey! Now that you have this amazing piece of gear, maintaining it properly is key to ensuring it stays fresh and vibrant for all your rides. First and foremost, let’s talk about washing and drying guidelines to keep your jersey looking its best.
- Read Care Labels: Always start by checking the care label on your jersey. Each fabric may have unique washing instructions, and following them can help extend the life of your jersey.
- Gentle Cycle: If you’re using a washing machine, opt for a gentle cycle with cold water. This minimizes agitation, protecting the seams and graphics from excessive wear.
- Use Mild Detergent: Choose a mild detergent that’s free from bleach and fabric softeners. Fabric softeners can coat technical fabrics, affecting their moisture-wicking abilities and breathability.
- Turn Inside Out: To preserve the print and minimize friction against other clothes, turn your jersey inside out before washing. This helps protect the graphics from fading or peeling.
- Air Dry: Avoid the dryer! Instead, hang your jersey to air dry. Direct sunlight can fade colors over time, so find a shaded spot or an indoor area with good airflow. If you’re in a pinch, you can use a towel rack or clip it on a hanger.
When I first started cycling, I didn’t realize how crucial proper washing was. After a couple of months of throwing my jersey in the dryer, the vibrant colors started to fade, and it was a painful lesson learned! Now, I treat my custom jersey with the care it deserves, and it pays off.
Storing Your Custom Cycling Jersey
After you’ve washed and dried your jersey, thinking about how to store it properly is the next step. Proper storage not only helps maintain the jersey’s shape but also protects it from potential damage. Here are some tips to keep in mind:
- Avoid Hanging: While it may seem tempting to hang your jersey, that can stretch the fabric over time. Instead, opt for folding it neatly to maintain its shape.
- Use Breathable Storage: Store your jersey in a breathable cotton or mesh bag. This helps prevent moisture buildup and reduces the risk of mildew, especially if you’re in a humid environment.
- Keep Away from Direct Sunlight: Store your jersey in a cool, dry place away from direct sunlight. Prolonged exposure can lead to color fading and degradation of the material.
- Assess Before Storage: If you’re storing your jersey for an extended period, make sure it’s clean and dry. Any sweat or grime left on the fabric can attract pests or lead to odors.
- Periodic Checks: If you aren’t wearing your cycling jersey regularly, take a moment every few months to check on it. This ensures no unwanted pests or damage has occurred over time.
I like to keep my jerseys in a designated drawer, separated by season or type of ride. During the off-season, a simple check-up and proper folding make it easy for me to pull them out fresh and ready to go when the cycling weather returns! By following these washing and storing guidelines, you can ensure your custom cycling jersey remains a beloved part of your cycling wardrobe for years to come. Up next, let’s delve into some exciting ways to showcase your awesome creation. Whether through social media or participating in cycling events, your design deserves to be celebrated!

Showcasing Your Creation
Social Media Sharing
Now that you’ve put in the hard work to create your custom cycling jersey, it’s time to show it off! One of the best ways to share your achievement is through social media. The cycling community is vibrant and creative, and sharing your design can inspire others and help you connect with fellow cyclists. Here are some tips on how to make the most of your social media presence:
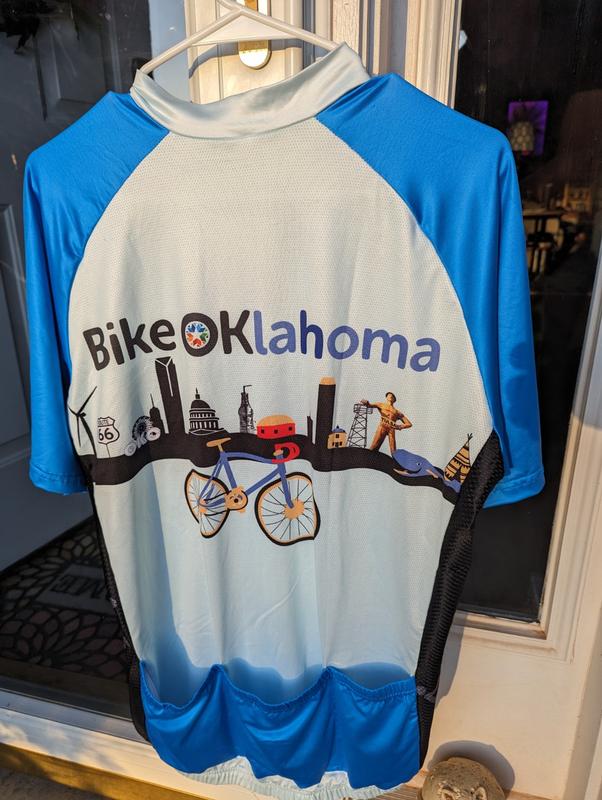
- Take Great Photos: Start with a photoshoot to capture your jersey in its best light! Whether you’re posing on your bike, in a park, or with friends, high-quality images will attract more attention. Don’t forget to photograph the details, such as graphics and stitching.
- Use Engaging Captions: Accompany your photos with engaging captions that tell the story behind your design. Share what inspired you, any challenges you overcame, or the excitement you felt once it was complete. Authenticity resonates with people.
- Hashtags: Utilize relevant hashtags to increase visibility. Popular ones include #CustomCyclingJersey, #CyclingLife, and #BikeStyle. This will help fellow cyclists discover your post and engage with your content.
- Join Cycling Groups: Share your jersey in cycling-related Facebook groups, Instagram communities, or forums. Engaging with niche communities can lead to meaningful conversations and feedback about your design.
- Create a Jersey Reveal Post: Consider making a dedicated post or story series that takes your audience through the design process. This not only showcases the final product but also highlights the effort and creativity that went into it.
When I shared my custom jersey on Instagram, I received amazing feedback and even started conversations with other designers and cyclists. One follower reached out for tips on how to create their own jersey, which was a lovely way to connect through our shared passion!
Participating in Cycling Events
Another fantastic way to showcase your custom cycling jersey is by participating in cycling events. Whether it’s a local charity ride, a competitive race, or a leisurely group ride, your jersey can be a conversation starter and a point of pride during these gatherings. Here’s how to make the most of the experience:
- Join Group Rides: Participating in local group rides not only allows you to flaunt your jersey but also helps foster camaraderie among cyclists. Your peers might appreciate your creativity and even ask about your design process!
- Attend Cycling Festivals: Many cities host cycling festivals that include events like races, vendors, and workshops. These are great places to show off your jersey and meet like-minded individuals who share your passion for cycling and design.
- Organize a Fun Team Outing: Teaming up with other cyclists to organize a themed ride, where everyone wears custom jerseys, can create a fun atmosphere. It also makes for great photos and memories!
- Document Your Experiences: Capture moments during the event with your jersey front and center. Whether you’re taking group selfies or sharing your ride statistics, your custom-designed piece will become a part of your cycling story.
During my last charity ride, I wore my jersey and even received compliments from fellow cyclists! It sparked conversations about our shared experiences and allowed me to bond with others over our love for cycling. Plus, I captured some fantastic photos that I later shared on social media, further amplifying my jersey’s visibility. By sharing your custom cycling jersey on social media and participating in cycling events, you’re not just showcasing a unique design—you’re also weaving it into the vibrant fabric of the cycling community. So get out there and ride proudly! Now, let’s wrap up everything with a thoughtful conclusion.
Conclusion
As we wrap up this deep dive into the world of custom cycling jerseys, it’s clear that creating one is more than just a fun project; it’s an opportunity to express your unique cycling personality and enhance your riding experience.
Embracing Individuality
From the initial design inspiration to selecting materials and sewing techniques, each step allows you to weave your individuality into every thread. Cycling jerseys hold the potential to tell a story—about your favorite rides, the friends you’ve met along the way, or the adventures yet to come. Remember, your jersey is an extension of yourself, allowing you to ride in style and comfort! Reflecting on my own journey with my jersey, I remember the joy of seeing it come to life. I felt a sense of pride wearing something that was completely mine, designed from start to finish. It turned every ride into an opportunity to showcase a piece of art that signifies my passion for cycling.
Community Connections
Moreover, sharing your custom creation on social media and participating in cycling events can deepen your sense of belonging within the cycling community. Engaging with others who appreciate similar designs or experiences creates bonds that are incredibly rewarding. You never know who you might inspire along the way! By sharing your design process and engaging with fellow cyclists, you contribute to a larger narrative that celebrates creativity and individuality within the sport. Who knows? Your post or participation in an event might motivate someone else to embark on their journey of creating a custom cycling jersey!
Maintaining Your Masterpiece
It’s important to remember that your journey doesn’t end once the jersey is created. Proper maintenance, from washing to storing techniques, will help keep your creation looking fresh and vibrant for many rides to come. By treating your jersey with the care it deserves, you ensure longevity while maintaining its quality. Each time you wear it, you’ll be reminded of the effort and creativity that went into making it uniquely yours.
A Call to Action
So, whether you are a seasoned cyclist or just embarking on your cycling journey, I encourage you to take the plunge and design your own jersey. Utilize the tips and techniques shared throughout this blog, mix and create designs that reflect who you are, and ride with pride! In the end, cycling is about enjoyment, adventure, and the stories we create along the way. Your custom cycling jersey is more than just clothing—it’s a celebration of your passion and a testament to your journey as a cyclist. So get out there, showcase your creation, and embrace the road ahead! 🚴♂️✨

